Ebook Việt Hoá] Plant parenting: Easy ways to make more houseplants vegetables and flowers - LESLIE F. HALLECK
[Ebook Việt Hoá] Plant parenting – LESLIE F. HALLECK (Nhân giống cây) – PREPARING YOUR SEEDS (Chuẩn bị Hạt giống)
- Nguồn: [Ebook Việt Hoá] Plant parenting: Easy ways to make more houseplants, vegetables, and flowers – LESLIE F. HALLECK (Nhân giống cây: Những cách dễ nhất để nhân giống cây cảnh trong nhà, rau và hoa)
- Biên tập: Dũng Cá Xinh (Tháng 08/20201)
- Dịch: Huyền Nguyễn
English
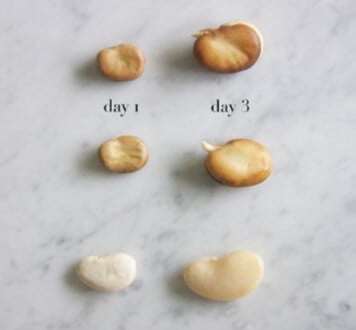
For most annual and edible seeds, normal germination occurs at optimal soil temperature and moisture levels without any special techniques. But you can speed up the germination process (or improve germination rates from older seed stock) if you pre-sprout them, a process called chitting or greensprouting. Chitting involves soaking the seeds, usually for 24 hours (some species require more time), before you sow them into pots or into the garden.
Seeds of stone fruits, such as peaches and apricots, nut trees, or citrus seeds, will root more successfully
if you pre-sprout them. Chitting may also allow you to start seeds in cooler-than-optimal soil. In general, chitting is easiest with medium to large size seeds that you can handle easily, but you can do it with smaller seeds, too, if you’re careful.
Some seeds are more difficult to germinate than others because they have a very hard, protective seed coat. Seeds with hard seed coats can typically be stored successfully for much longer than seeds with soft seed coats—but they also take longer to germinate. These are the types of seeds that can travel long distances over long periods of time in nature before they germinate, or even make their way through animal digestive tracts (where the seed coat is broken down) before they are deposited to germinate. Some seeds with hard seed coats must be exposed to fire to break their dormancy and germinate. These are all evolved, survival tactics for each species of plant.
If you’re not sure if your seeds have a hard seed coat, give them a squeeze or a tap on a hard surface. A seed has a hard seed coat if no amount of squeezing or tapping produces any give. You may have discovered your seeds have a hard seed coat because they never germinated, or they took an extensive amount of time to germinate.
While most annual vegetable seeds do not require pre-soaking or any special preparation for germination, seeds of some natives, perennials, and fruits with hard coats will require a bit of extra work on your part, whether it be a longer chitting/soaking period, scarification, stratification, or inoculation with rhizobium bacteria. Information on the seed packet usually includes the type of seed coat and any special germination needs.
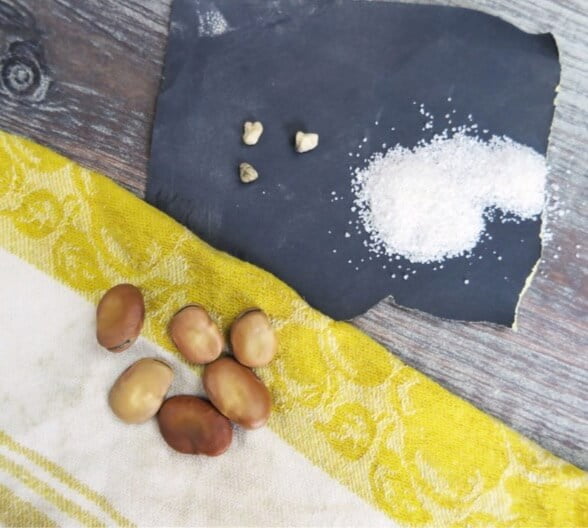
Seed scarification involves scraping away part of the hard coating to expose the seed to water
and gases that trigger germination. In the natural environment, temperature, soil microbes, and even fire can break down seed coats. Animals eat seeds, which are then exposed to stomach acid which breaks down the seed coat.
If you have had trouble getting certain types of seeds to germinate and they have a very hard outer coat, try scarifying them with one of these easy methods.
- HOT WATER Boil water and pour it into a bowl. Let it cool for about 30 seconds, then add the seeds. Allow the water to cool to room temperature and the seeds to swell, then remove them. The amount of time needed for seeds to swell will depend on the plant variety. It may take a few hours or a couple of days. Soaking for 12 to 24 hours is recommended, but don’t let seeds soak for more than 48 hours.
- FILE Use a small file or sandpaper to rub away or nick a small section of the seed coat. (Do not rub off the entire coat.) Make your mark on the opposite side of the seed-eye, where the shoot will emerge, so you don’t damage the eye.
- SAND Roll or rub your seeds with sand or fine gravel for a few seconds. You can do this between sheets of paper or another flat surface. Don’t crush the seeds, you only want to scrape away a bit of the seed’s surface coating.
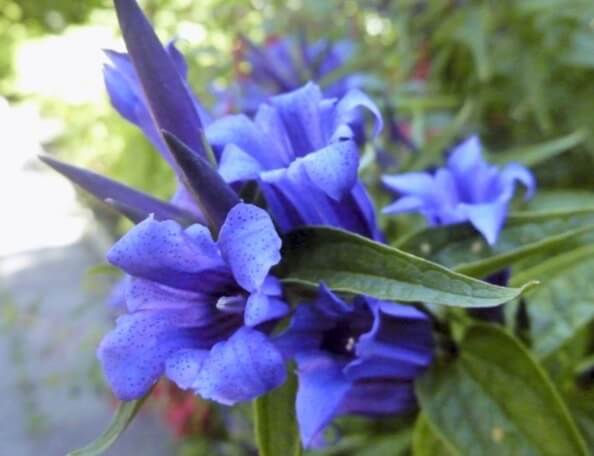
Some seeds do not have a hard seed coat and will instead go into a dormancy period that can make germination a long affair. You will have to wake these seeds from their slumber using a process called stratification. Many natives, wildflowers, herbaceous perennials, and grasses fall into this category.
Stratification involves creating the most favor- able environmental conditions for the seeds—conditions in which they would germinate in nature. Seeds and plants that go into dormancy typically come to life after the return of spring temperatures and rainfall. You must mimic the cycle of dormant winter season followed by natural germination season. For starting seeds and growing indoors, create an artifi- cial winter by chilling the seeds.
Some seeds experience a double dormancy, so they will not germinate or put on green growth above ground until they have experienced two winter seasons. Species in the lily family require a double dormancy. To speed up production, trick these species by using a repetitive stratification process.
There are two common methods for seed stratification: moist and dry.
- MOIST STRATIFICATION Mix your seeds with damp sand and seal them in a container. Store the container in your refrigerator (not the freezer) for 1 to 2 months. Then remove the seeds and allow them to dry at room temperature. Using a seedling heat mat, sow and germinate the seeds per the instruc- tions on the seed packet.
- DRY STRATIFICATION This involves storing dry seeds at freezing temperatures for 1 month or more, depending on the species. Never put moistened seeds in the freezer, as this can kill them.
Seeds of many native wildflowers and prairie grasses will benefit from dry stratification for 1 to 3 months before you try to germinate them. Other native and woodland-type wildflowers perform best with moist stratification for about 1 month. Research the plant you want to germinate to determine whether it needs any chitting, scarification, or dry or moist stratification to germinate successfully.
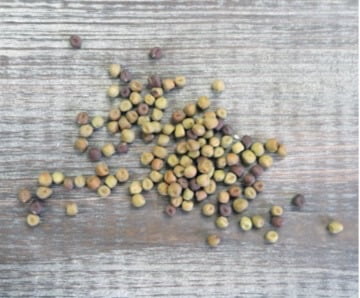
Legume plants, such as beans and peas, have developed beneficial symbiotic relationships with sev- eral species of soil-borne bacteria (Rhizobium spp.).
These rhizobium bacteria help form special nodules in the roots of legume plants that enable the plants to fix their own nitrogen from the atmosphere and soil, so that the plant can absorb it. Nitrogen fixation is the conversion of atmospheric nitrogen (N2) into ammonia (NH3), which is the form of nitrogen plants can absorb and use. Essentially, the bacteria help the plants make their own fertilizer. Seeds of legume plants can benefit from inoculation with rhizobia before planting. In fact, if you buy rhizobia from a garden center or online, it will probably be labeled as garden inoculant and will be in a powder form. You can mix it with water and pour it into the soil where you will be planting legumes outdoors or soak your legume seeds in the inoculant before planting. Follow label instructions.
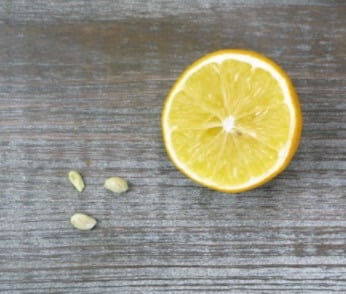
These lemon seeds are clones of the mother plant. You can plant these seeds and grow plants identical to the mother plant.
How to Chit Seeds
- 1 Moisten some dish towels, paper towels, or newspaper to the dampness of a wrung-out sponge, then set the damp material in a tray or on a plate.
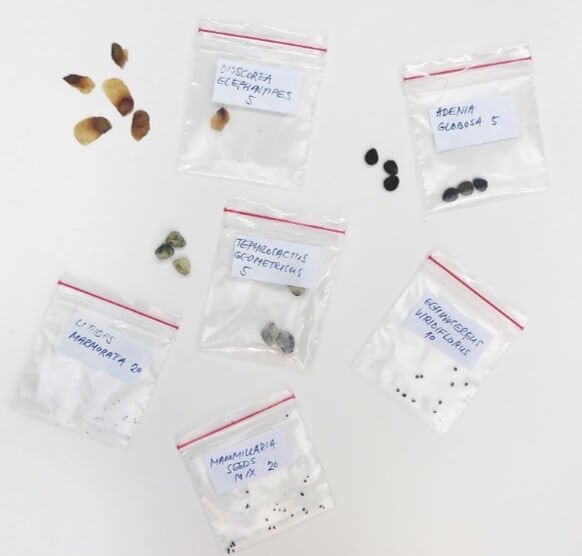
- 2 Forseedsthatsproutquickly,suchasbeans (1 to 3 days), simply spread your seed onto the moist surface. For seeds that take longer and need more constant moisture to sprout—and for larger, harder seeds that take longer to sprout, such as many succulents and cacti (several weeks)—insert the moistened dish towel or paper towel into a small plastic baggy, place the seeds inside the moistened towel, and seal the baggy.
- 3 Placeinawarmspotinyourhome.
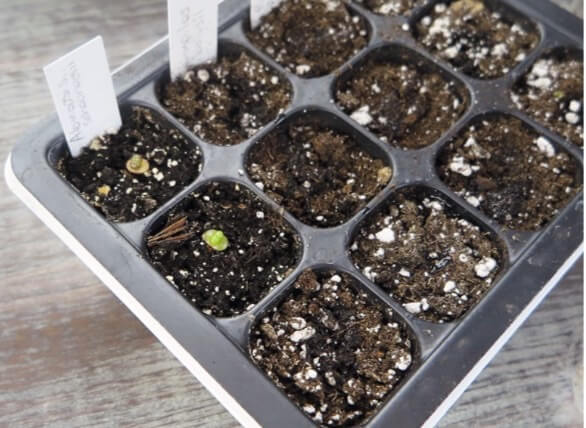
- 4 Seeds will absorb the moisture and swell, and some will germinate and begin to sprout. Immediately plant these sprouted seeds into a water rooter, growing media, or seed plugs.
- 5 Ifyourseedshavebeenmolding,thendilute a 1:25 ratio of hydrogen peroxide to water and wipe the seeds with the solution before you place them into the moist towel.
Clone Seeds
Many varieties of citrus and mangoes produce what we call apomictic seeds, or clone seeds. These clone seeds develop without the need for male genes or pollination and allow you to grow new identical specimens of your mother plant from seed instead of a cutting. So, if you save seeds from your lemon tree, you can germinate them and consistently grow the exact same type of lemon.
Tiếng Việt
Đối với hầu hết các loại hạt ăn được và hạt hàng năm, quá trình nảy mầm thường diễn ra ở nhiệt độ và độ ẩm đất tối ưu mà không cần bất kỳ kỹ thuật đặc biệt nào. Nhưng bạn có thể đẩy nhanh quá trình nảy mầm (hoặc cải thiện tỷ lệ nảy mầm từ lượng hạt cũ), quá trình hạt nảy mầm trước được gọi là chitting hoặc greensprouting. Quá trình này bao gồm việc ngâm hạt, thường trong 24 giờ (một số loài cần nhiều thời gian hơn), trước khi bạn gieo vào chậu hoặc gieo ra vườn.
Hạt giống của các loại quả, chẳng hạn như Đào và Mơ, cây có hạt hoặc hạt giống Cam Quýt, sẽ ra rễ thành công hơn nếu khuyến khích chúng nảy mầm trước. Hạt được khuyến khích này mầm trước có thể cho phép bạn gieo hạt trong đất tối ưu hơn. Nói chung, quá trình này dễ dàng nhất với những hạt có kích thước từ trung bình đến lớn mà bạn có thể dễ dàng xử lý, nhưng bạn cũng có thể làm điều này với những hạt nhỏ hơn nếu bạn cẩn thận.
Một số hạt khó nảy mầm hơn những hạt khác vì chúng có lớp vỏ hạt rất cứng để bảo vệ. Hạt có lớp vỏ cứng thường có thể được bảo quản lâu hơn nhiều so với hạt có lớp vỏ mềm, nhưng chúng cũng mất nhiều thời gian hơn để nảy mầm. Đây là những loại hạt có thể mất một khoảng thời gian dài trong tự nhiên trước khi chúng nảy mầm, hoặc thậm chí đi qua đường tiêu hóa của động vật (nơi vỏ hạt bị phá vỡ) trước khi chúng nảy mầm. Một số hạt có lớp vỏ cứng phải tiếp xúc với lửa để phá vỡ trạng thái ngủ và nảy mầm. Đây là các chiến thuật sinh tồn, tiến hóa của từng loài thực vật.
Nếu bạn không chắc hạt của mình có vỏ hạt cứng hay không, hãy bóp hoặc gõ nhẹ lên bề mặt cứng, hạt có vỏ hạt cứng sẽ không thể bóp bẹp. Bạn có thể đã phát hiện ra hạt của mình có lớp vỏ hạt cứng vì chúng không bao giờ nảy mầm hoặc mất nhiều thời gian để nảy mầm.
Mặc dù hầu hết các loại hạt giống rau hàng năm không cần ngâm trước để có thể nảy mầm, hạt giống của một số cây bản địa, cây lâu năm và trái cây có lớp vỏ cứng sẽ đòi hỏi bạn phải thực hiện thêm một số bước, chẳng hạn như là thời gian ủ, ngâm lâu hơn, tạo vảy, phân tầng hoặc cấy vi khuẩn rhizobium. Thông tin trên gói hạt giống thường bao gồm loại vỏ hạt và các bước cần thực hiện để hạt giống nảy mầm.
Quá trình làm khô hạt bao gồm việc cạo bỏ một phần của lớp phủ cứng để hạt tiếp xúc với nước và khí kích thích nảy mầm. Trong môi trường tự nhiên, nhiệt độ, vi sinh vật trong đất, thậm chí lửa có thể phá vỡ lớp vỏ hạt. Động vật ăn hạt, sau đó hạt tiếp xúc với axit dạ dày làm phá vỡ lớp vỏ hạt.
Nếu bạn gặp khó khăn khi ươm mầm một số loại hạt giống và chúng có lớp vỏ hạt rất cứng, hãy thử một trong những phương pháp đơn giản sau.
- NƯỚC NÓNG: Đun sôi nước và đổ vào bát. Để nguội khoảng 30 giây rồi cho hạt vào. Để nước nguội đến nhiệt độ phòng và hạt nở ra, sau đó vớt hạt ra. Khoảng thời gian cần thiết để hạt nở ra sẽ phụ thuộc vào giống cây trồng. Có thể mất vài giờ hoặc vài ngày. Nên ngâm hạt từ 12 đến 24 giờ, nhưng không để hạt ngâm quá 48 giờ.
- GIŨA: Dùng giũa nhỏ hoặc giấy nhám để chà hoặc mài một phần nhỏ của vỏ hạt. (Không chà xát toàn bộ lớp lông.) Đánh dấu ở phía đối diện của mắt hạt, nơi chồi sẽ mọc lên, để không làm hỏng mắt.
- CÁT: Lăn hoặc chà hạt bằng cát hoặc sỏi mịn trong vài giây. Bạn có thể làm điều này giữa các tờ giấy hoặc một bề mặt phẳng khác. Đừng làm nát hạt, bạn chỉ nên cạo đi một chút lớp phủ bề mặt của hạt.
Một số hạt không có vỏ hạt cứng và thay vào đó sẽ ngủ đông khiến cho việc nảy mầm kéo dài. Bạn sẽ phải đánh thức những hạt này khỏi thời kì ngủ đông bằng cách sử dụng một quá trình gọi là phân tầng. Nhiều loài bản địa, hoa dại, cây thân thảo lâu năm và cỏ thuộc loại này.
Sự phân tầng liên quan đến việc tạo ra những điều kiện môi trường có lợi nhất cho hạt giống, những điều kiện mà hạt giống sẽ nảy mầm trong tự nhiên. Hạt giống và thực vật đi vào trạng thái ngủ đông thường trỗi dậy sau mùa xuân và khi có lượng mưa trở lại. Bạn phải mô phỏng chu kỳ của mùa đông sau đó là mùa nảy mầm tự nhiên. Để bắt đầu gieo hạt và trồng cây trong nhà, hãy vờ tạo ra một mùa đông bằng cách làm lạnh hạt giống.
Một số hạt giống trải qua thời kỳ ngủ đông kép, vì vậy chúng sẽ không nảy mầm hoặc không phát triển xanh tốt cho đến khi chúng trải qua hai mùa đông. Các loài trong họ hoa Loa Kèn thuộc loại này. Để tăng tốc độ nảy mầm, hãy kích kích những loài này nảy mầm bằng cách sử dụng quy trình phân tầng lặp đi lặp lại.
Có hai phương pháp phổ biến để phân tầng hạt: ẩm và khô.
- CHỐNG ẨM Trộn hạt với cát ẩm và đậy kín trong thùng. Bảo quản hộp trong tủ lạnh (không phải ngăn đá) trong 1 đến 2 tháng. Sau đó lấy hạt ra và để khô ở nhiệt độ phòng. Sử dụng thảm nhiệt ươm hạt giống, gieo hạt theo hướng dẫn trên gói hạt giống.
- BẢO QUẢN KHÔ Điều này liên quan đến việc bảo quản hạt khô ở nhiệt độ đông lạnh từ 1 tháng trở lên, tùy thuộc vào loài. Không bao giờ cho hạt đã ẩm vào tủ đông, vì điều này có thể làm chết hạt giống.
Hạt giống của nhiều loài hoa dại bản địa và cỏ thảo nguyên sẽ được hưởng lợi từ việc phân tầng khô từ 1 đến 3 tháng trước khi bạn ươm mầm. Các loại hoa dại bản địa và hoa rừng khác hoạt động tốt nhất với sự phân tầng ẩm trong khoảng 1 tháng. Nghiên cứu cây mà bạn muốn ươm mầm để xác định xem nó có cần phân tầng, làm khô hay ẩm để nảy mầm thành công hay không.
Các cây họ Đậu, chẳng hạn như Đậu và Đậu Hà Lan, đã phát triển các mối quan hệ cộng sinh có lợi với các loài vi khuẩn truyền qua đất (Rhizobium spp.).
Những vi khuẩn rhizobium này giúp hình thành các nốt sần đặc biệt trong rễ của cây họ Đậu, giúp cây tự cố định nitơ từ khí quyển và đất để cây có thể hấp thụ được. Cố định nitơ là sự chuyển đổi nitơ trong khí quyển (N2) thành amoniac (NH3), đây là dạng nitơ cây trồng có thể hấp thụ và sử dụng. Về cơ bản, vi khuẩn giúp cây tự tạo phân bón. Hạt giống của cây họ Đậu có thể được hưởng lợi từ việc cấy vi khuẩn rhizobia trước khi trồng. Trên thực tế, nếu bạn mua rhizobia từ trung tâm làm vườn hoặc trực tuyến, có thể nó sẽ được dán nhãn là chế phẩm làm vườn và sẽ ở dạng bột. Bạn có thể trộn với nước và đổ vào đất nơi bạn sẽ trồng cây họ Đậu ngoài trời hoặc ngâm hạt giống cây họ Đậu trong chế phẩm trước khi trồng. Làm theo hướng dẫn trên nhãn.
Những hạt Chanh vô tính, bạn có thể gieo những hạt giống này và trồng cây giống hệt cây mẹ.
Cách để kích thích hạt nảy mầm sớm
- 1. Làm ẩm một số khăn lau bát đĩa, khăn giấy hoặc giấy báo đến độ ẩm của miếng bọt biển đã vắt, sau đó đặt vật liệu ẩm vào khay hoặc trên đĩa.
- 2. Đối với hạt nảy mầm nhanh chóng, chẳng hạn như Đậu (1 đến 3 ngày), bạn chỉ cần rải hạt lên bề mặt ẩm. Đối với những hạt giống mất nhiều thời gian hơn và cần độ ẩm liên tục để nảy mầm và đối với những hạt lớn hơn, cứng hơn, mất nhiều thời gian hơn để nảy mầm, chẳng hạn như nhiều loài Xương Rồng (cacti) và cây mọng nước (vài tuần), đặt đĩa khăn ẩm hoặc khăn giấy vào một túi nhựa nhỏ, Đặt hạt vào trong khăn ẩm và buộc kín miệng túi.
- 3. Đặt ở một nơi ấm áp trong nhà bạn.
- 4. Hạt sẽ hút ẩm và phồng lên, một số sẽ bắt đầu nảy mầm. Ngay lập tức gieo những hạt đã nảy mầm này vào máy xới đất, giá thể trồng hoặc khay gieo hạt.
- 5. Nếu hạt đã bị mốc, hãy pha loãng hydrogen peroxide theo tỷ lệ 1:25 với nước và lau hạt bằng dung dịch trước khi đặt chúng vào khăn ẩm.


Hạt giống nhân bản
Nhiều giống cây có múi và Xoài (mango) tạo ra thứ mà chúng ta gọi là hạt apomictic, hay hạt nhân bản. Những hạt giống vô tính này phát triển mà không cần gen đực hoặc quá trình thụ phấn và cho phép bạn trồng các cây giống hệt cây mẹ từ hạt thay vì giâm cành. Vì vậy, nếu bạn thu thập hạt giống từ cây Chanh (lemon), bạn có thể ươm mầm và liên tục trồng đúng loại Chanh.
![[Ebook Việt Hoá] Plant parenting – LESLIE F. HALLECK (Nhân giống cây) – PREPARING YOUR SEEDS (Chuẩn bị Hạt giống) [Ebook Việt Hoá] Plant parenting – LESLIE F. HALLECK (Nhân giống cây) – PREPARING YOUR SEEDS (Chuẩn bị Hạt giống)](https://vn1.vdrive.vn/codai.net/2021/02/ebook-huong-dan-nhan-giong-cay-canh-rau-va-hoa-04.jpg)


