Ebook Việt Hoá] Plant parenting: Easy ways to make more houseplants vegetables and flowers - LESLIE F. HALLECK
[Ebook Việt Hoá] Plant parenting – LESLIE F. HALLECK (Nhân giống cây) – GROWING TRANSPLANTS VS. DIRECT SEEDING (Gieo cấy so sánh với trồng hạt trực tiếp)

Th2
- Nguồn: [Ebook Việt Hoá] Plant parenting: Easy ways to make more houseplants, vegetables, and flowers – LESLIE F. HALLECK (Nhân giống cây: Những cách dễ nhất để nhân giống cây cảnh trong nhà, rau và hoa)
- Biên tập: Dũng Cá Xinh (Tháng 08/20201)
- Dịch: Huyền Nguyễn
English
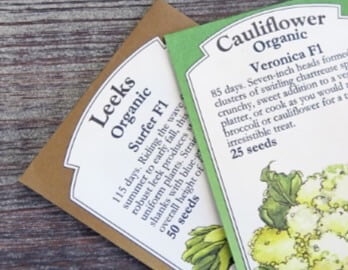
On the seed packet you will find information on when you can expect flowers or fruit from a mature plant, also known as days-to-harvest. If your tomato seed packet states 85 days, that means it typically takes 85 days to start harvesting fruit . . . but 85 days from when, exactly?
The number of days-to-harvest can vary significantly, depending on whether you direct seed a crop into the garden or first grow a transplant. Tropical crops, such as eggplant, peppers, and tomatoes, are typically started early indoors as transplants, allowing for bigger plants in the outdoor garden once temperatures are appropriate. For these plants, days-to-harvest is counted from the date they are transplanted into their final container or outdoor garden location. So, for the 85-day tomato variety, harvest time comes in 85 days plus the 8 to 10 weeks it took to grow a garden-ready transplant from seed—or 135 to 149 days (19 to 21 weeks) total to produce harvestable fruit.
When starting seedlings indoors for your out- door garden, you must prepare the seeds early enough to plant outside at the optimal time. Crops such as
broccoli, kale, and cabbage can be ready to plant out- doors in as few as 5 to 6 weeks from the date you germinate them. Leeks and celery, on the other hand, can take a full 12 weeks. Research how long it takes to grow a planting-ready transplant, and then count backward from the outdoor planting date for your area. That’s when you must get your seeds started indoors. Make sure to transplant plants shortly after germination as they can become stunted if you allow them to live too long in a small container.
If you direct seed your crop into the garden or the container in which it will grow indoors, the days-to-harvest number on the seed packet is calculated from the date of germination. Plant these crops when indoor or outdoor temperatures are ideal. It’s best to direct seed root crops (carrots, turnips, beets, radishes) and some large-seeded vegetable crops (beans, broad beans, squash, corn) straight into the garden or final growing container, as they won’t always transplant well.
Other crops fall somewhere in the middle. You can direct seed lettuce and many other salad greens, for example, into their final container or garden spot, but you can also grow them as transplants first, then bump them up into larger containers or set them in an outside garden.
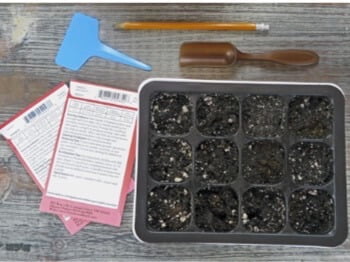
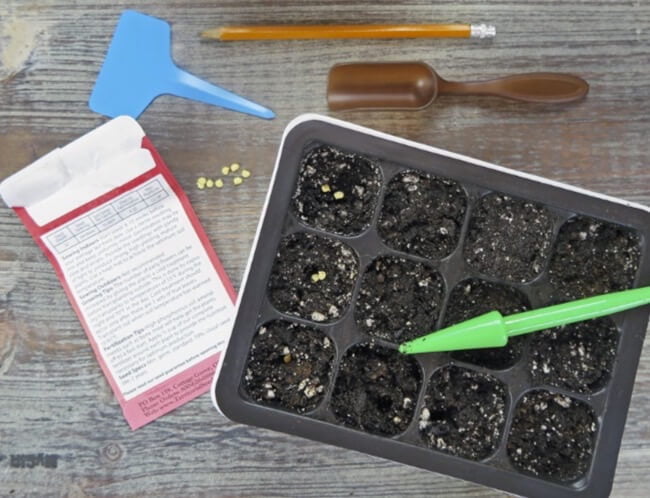
Before planting seeds, be sure to thoroughly moisten the growing media, pellets, or plugs. Plant your seeds at the depth recommended on the packet. Typically, you can plant larger seeds deeper and smaller ones more shallowly. You should sow some seeds, such as lettuce, on top of the soil and lightly press them down. Mist the lettuce seeds to moisten them, but don’t cover them with soil or they won’t grow.
Always make sure that large containers you’re direct seeding into have drainage holes. And for these larger containers, take care that you don’t overwater them in the early stages of seed germination and growth. With more soil volume, the larger pots can stay soggy, leading to rotted seeds and seedlings.
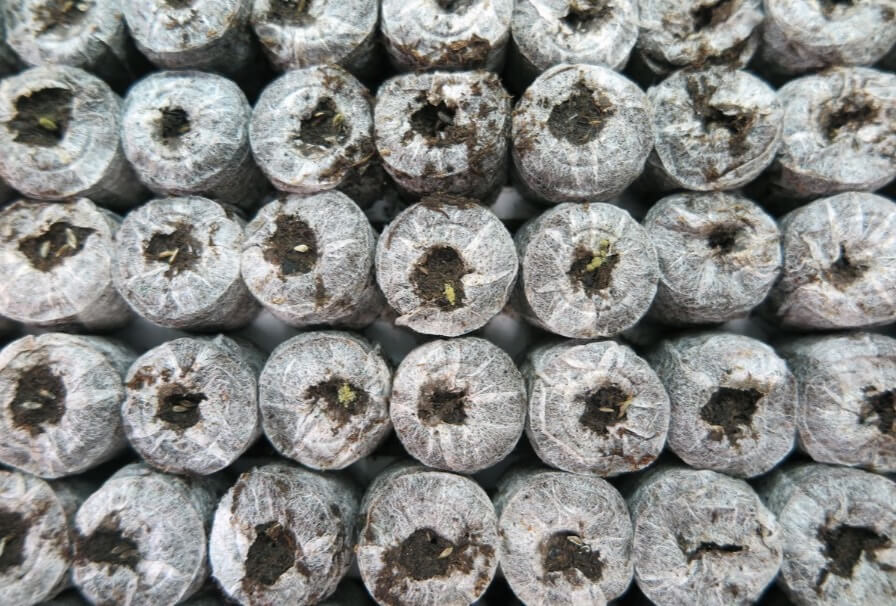
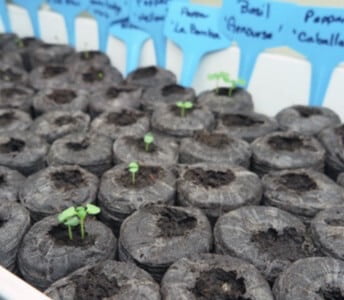
You won’t always achieve 100 percent germination from a group of seeds, whether you buy or harvest and keep for the next season. You can sow two seeds per container, cell, or plug, so if one seed doesn’t germinate, you have a backup. If your seed is on the older side, you might want to sow three seeds per cell, to improve your odds.
MOISTURE AND HUMIDITY
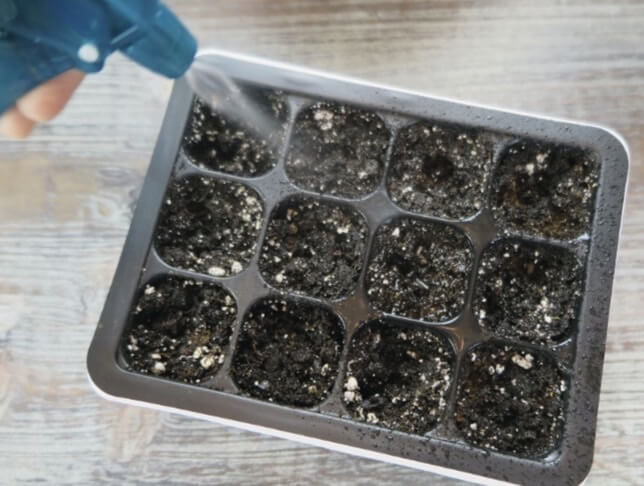
Maintaining proper moisture is key to successful germination and healthy seedlings. The growing media should always be damp to the touch, like a wrung-out sponge. Never let it dry out, but don’t let it stay soggy, either. Do not overwater seeds that haven’t yet germinated, as they can rot if they stay too wet. Use a plant mister bottle to keep the soil surface moist until seeds germinate and start developing, then begin adding a little water to the seed tray so the growing media can absorb it as seedlings mature. While succulents and cacti will need you to dial back on watering once they begin to mature, most will need similar moisture conditions as many of your other annual and perennial seeds when germinating—so don’t let them dry out too much when they are just getting started.
One trick to maintaining even moisture as seeds germinate and to keep the surface of the soil from drying out is to sprinkle a thin layer of a material such as coir or vermiculite on top of the soil. I prefer to use coir. These materials will hold additional moisture, which can help prevent your seeds from drying out before they germinate.
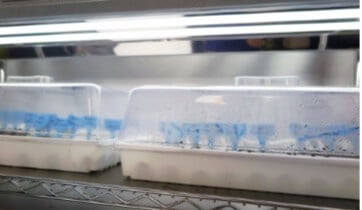
To help maintain adequate moisture and humidity place a humidity dome, or other type of clear cover,
on top of your seed trays or pots. Remove the cover once all your seedlings have germinated and begin to produce green growth. If you keep the dome on for too long, fungal diseases or rot could set in. While young seedlings need to remain moist, excess moisture can promote damping off disease, which causes seedlings to rot at the soil line and topple over. Too much humidity also encourages powdery mildew on young seedlings and transplants.
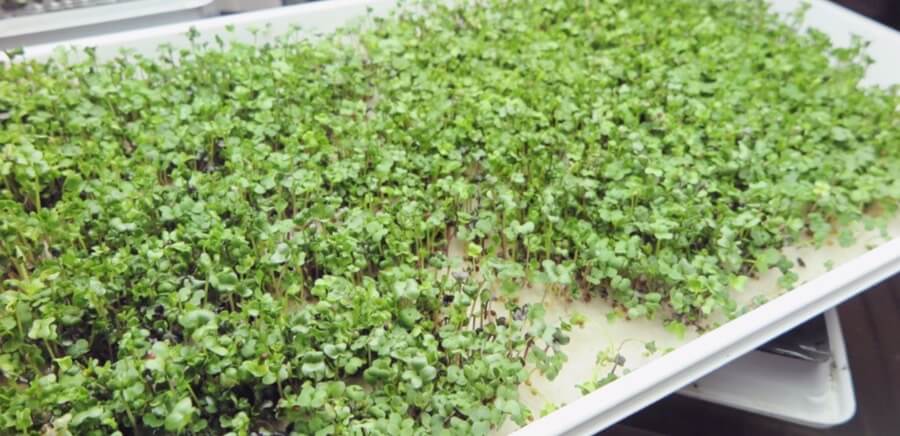
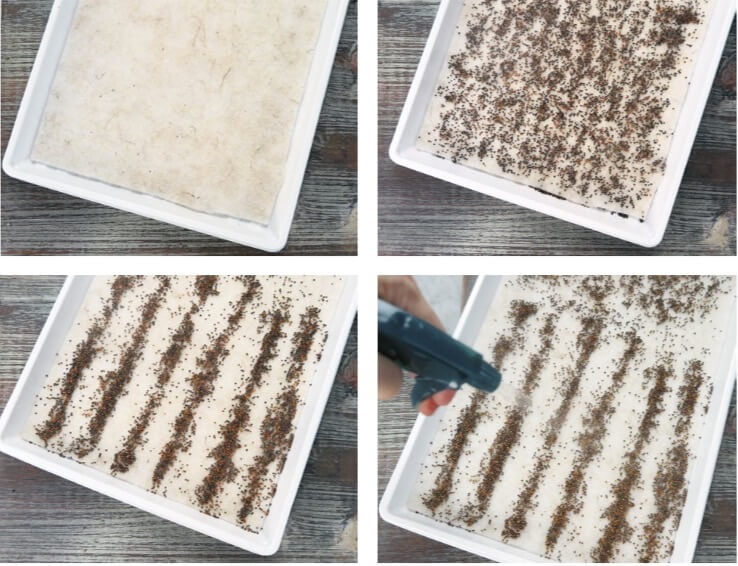
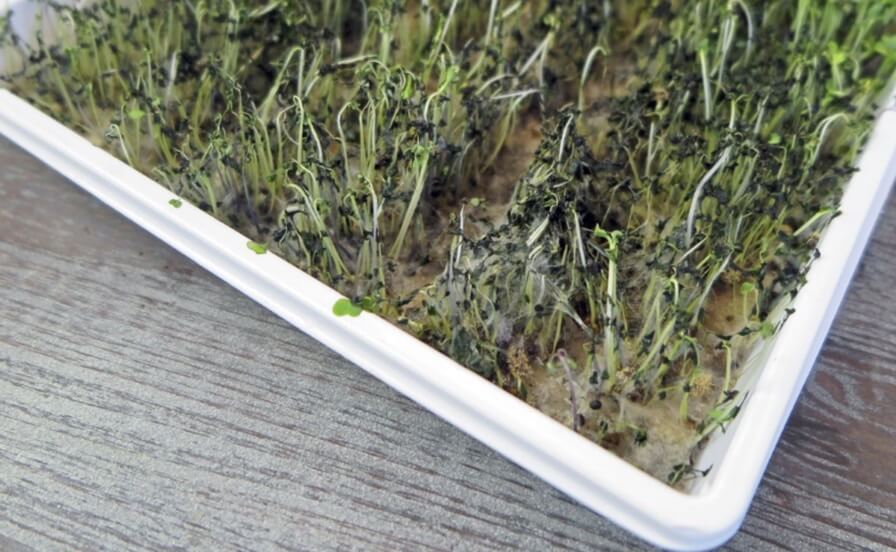
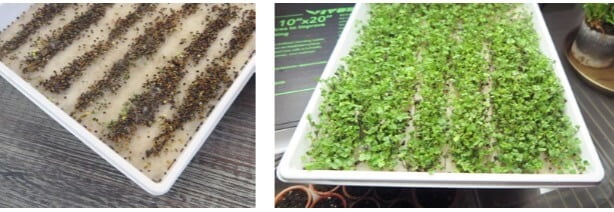
You can also use a felt-like capillary mat to keep seed plugs or small transplants from drying out or staying too soggy. Set your capillary mat under your seed plugs or pots and saturate it until it is moist to the touch. If you’re growing microgreens, you can also germinate the seeds directly on a capillary mat.
Let’s talk a bit more about damping off disease, as it can be an incredibly frustrating situation for new
and experienced seed starters alike. Damping off is a disease that young seedlings rarely survive. Species of fungi (Rhizoctonia spp. and Fusarium spp.) in conjunction with the water mold Pythium spp., are the typical culprits that cause damping off disease.
While older seedlings and transplants can typically fend off such attacks by the fungi that cause damp-
ing off, germinating seeds and young seedlings just developing their first set of true leaves are particularly susceptible.
Signs your seedlings are suffering from damping off
- Your seeds never emerge from the soil
- The cotyledons are discolored or look waterlogged or mushy
- The seedling stem becomes thin and water-soaked looking
- The new leaves wilt or look discolored
- You find no roots on your seedling or the roots are discolored and stunted
- White mold-like growth develops on seeds or seedlings in high humidity.
Moisture management is crucial to keeping damping off disease at bay. I find that you’ll have the most trouble with this disease in cold, damp soil, in low-light conditions, or in too much humidity. Using heat mats can warm up the soil to optimal temperatures and speed up germination; but if your emerging seedlings are not getting enough light or are kept covered by a humidity dome too long, damping off disease can still develop.
Another way to minimize chances of damping off is to use a sterile seed-starting mix. If you are reusing pots or other containers, be sure to sterilize them between plantings by soaking in a 10 percent bleach solution for 20 to 30 minutes. Also avoid adding fertilizer to your seeds before or right after they germinate. Fertilizers can encourage fungus and mold growth. Commercial growers will use synthetic chemicals to prevent damping off, but you probably don’t want to do this in your home or for edible crops. A handy alternative is to water your seedlings with a hydrogen peroxide solution. Hydrogen peroxide oxygenates the soil, which kills off many fungi and bacteria. Mix 1 teaspoon of hydrogen peroxide to 2 cups of water and then use the solution to water or mist your seedlings.
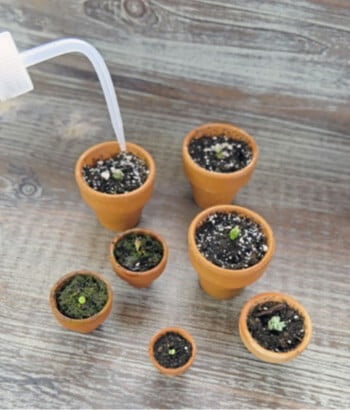
You’ll also need to take care with your watering habits for young seedlings and succulent plants.
As seedlings grow, you’re best to shift from a spray bottle—which wets the foliage—to small watering cans or squirt bottles, so you can deliver water directly to the root zone without getting water on the foliage. Keeping excess water off the foliage will help reduce fungal disease problems.
TEMPERATURE
Both air and soil temperature affect the speed and success rate of seed germination and growth. Each type of plant has a different optimal temperature range, based on its natural environment. Be sure to check the seed packet for specific optimal temperature ranges for germination. Many seeds germinate well in the 68°F to 80°F (20–26.6°C) range for both soil and air temperature. If temperatures are too cold or too warm, some seeds take a very long time to germinate or may not germinate at all.
Your goal is to get as many seeds to germinate as quickly as possible. For crops that need warmer
soil temperatures, such as tomatoes, basil, or zinnias, especially when starting them indoors during colder months, a seedling heat mat can speed up the germination process and ensure success. Heat mats, which are placed directly under your seed tray, can warm soil to an average of 15 to 20 degrees F above room temperature. Once your seeds have germinated and begin growing, you can remove the heat mat. If your growing space is a bit cool, keep the heat mat in place as the plants mature. Remember that you can use a thermostat with your heat mat to turn it on and off automatically.
Seed packets typically provide an estimated germination time based on optimal temperature ranges outdoors, but you can typically shorten germination time in a controlled environment with heat mats.
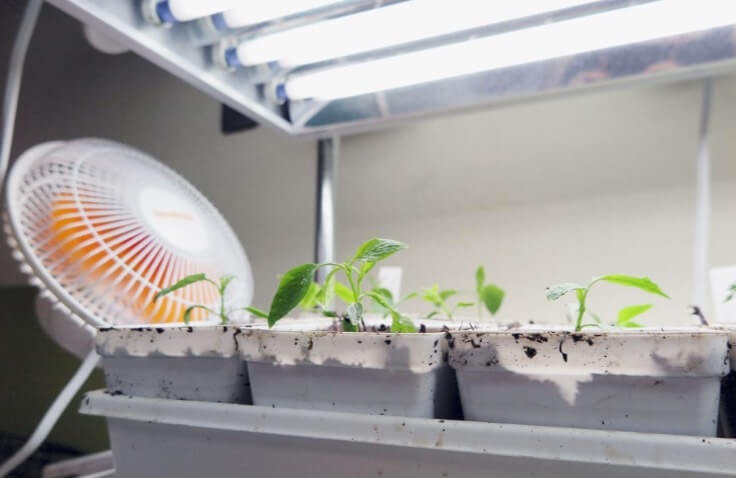
If you are growing cold-weather lovers, such as spinach, indoors in the summer, you might run into problems with temperatures being too hot for successful seed germination. Sometimes the problem is the heat emitted from your grow lighting, or you may be growing in a garage or other part of your home that gets very warm seasonally. You can always position small fans near your grow lamps when you need your lamps close to your seedlings and the room temperature is already warm.
CULLING THE HERD
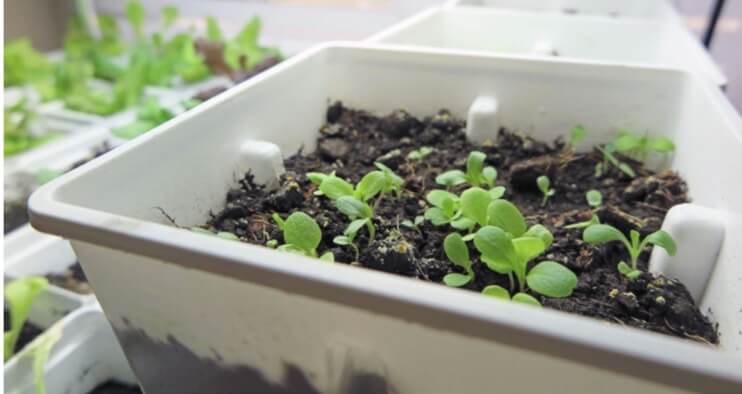
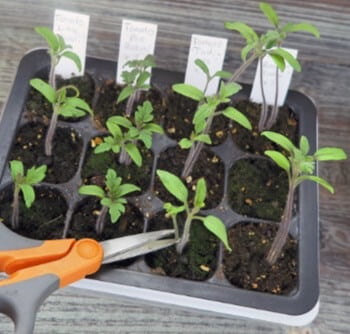
Now that your seeds have germinated, it is time to thin their numbers. This part can be tough—no one wants to kill the seedlings they just grew. Remember those two or three seeds you placed into the seed cell? Sometimes all of them germinate and you end up with a tiny seedling forest. When too many seeds germinate too closely together, the seedlings can struggle.
It is tempting to let them all continue to grow, but your seedlings will be better off if you cull the weakest ones. More than one seedling per cell causes too much shading and resource competition, resulting in weaker seedlings overall.
After your seeds have sprouted, choose the strongest, stockiest seedling in each cell and snip the remaining seedlings at the base. Throw the excess seedlings on your salad or feed them to any critters that would appreciate some greens.
LIGHTING YOUR SEEDLINGS
Many seeds require darkness underneath the soil to germinate properly. When germination occurs in dark- ness, all the seed’s energy funnels into root growth. Once the shoot breaks the soil surface and is exposed to light, things change dramatically. Root growth slows and shoot elongation accelerates.
Some seeds require exposure to light—and specific types of light—in order to germinate. Lettuce seeds, for example, need to be exposed to red light or they won’t sprout. (Red light will be present in natural ambient light and full spectrum grow lighting.) It is a good practice to check the seed packet for information about germination light or darkness requirements before starting your seeds.
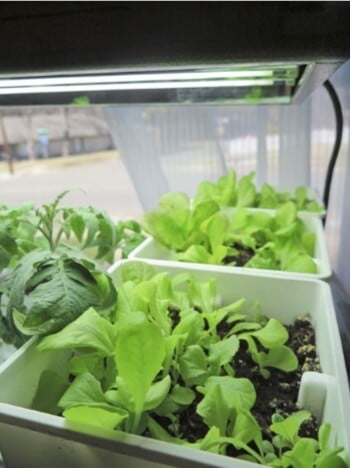
Remember from Grow Lighting 101 (see page 76), once your seedlings germinate and emerge from the soil, they will need 14 to 16 hours of continuous bright light to grow strong and sturdy. If your seedlings are elongating and stretching, they aren’t getting enough light. Place your grow-lighting fixture 3 to 4 inches above your seeds. Place a lighting timer on the fixture so your lamps turn on and off automatically at the right times of day and night. A 6:00 a.m. to 8:00 p.m. light schedule works well for bright grow lamps. If you are using lower-intensity lights, leave them on from 6:00 a.m. to 10:00 p.m.
After your seedlings have grown to have several true leaves, you can begin to raise the grow lamps, so your young plants don’t burn.
FEEDING YOUR SEEDLINGS
Once your seedlings or cuttings have developed four or five true leaves, and are no longer pulling resources from the seed, it is time to start feeding them with fertilizer. Small seedlings cannot handle full-strength fertilizer, so be sure to dilute your product with water by one-quarter to one-half the recommended rate.
There are many different types of beneficial fertilizers to use on young seedlings, but it’s best to use a liquid suspension rather than a granular formula. Liquid seaweed, fish emulsion, and liquid humus products are effective, natural options that won’t burn young plants. Dilute these products to half strength when applying to small seedlings, or choose a liquid fertilizer labeled specifically for seedlings and follow the manufacturer’s instructions. If you choose a synthetic fertilizer, you should dilute it by one-quarter of full strength, as these products are more likely to burn or damage your young plants than naturally derived fertilizers.
Feeding your seedlings once per week with diluted fertilizer is adequate, or every two weeks if you are using a stronger fertilizer mixture. As plants mature you can increase the rate of fertilizer application to full strength. Do not mix your fertilizer at a stronger-than-recommended rate. While there is little danger of damaging your seedlings with too much organic fertilizer—you’ll merely be wasting product—a synthetic fertilizer overdose could burn your plants beyond repair.
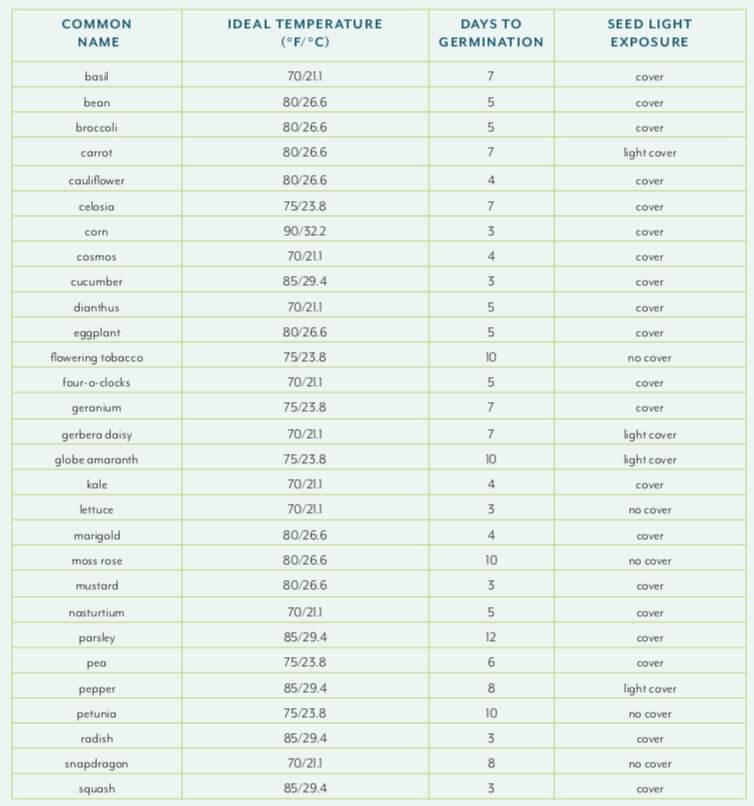
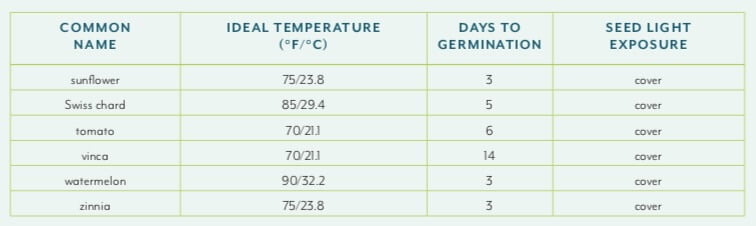
Ideal Seed Germination Temperatures for Popular Plants
Tiếng Việt
Trên gói hạt giống, bạn sẽ tìm thấy thông tin về thời điểm bạn có thể thu hoạch hoa hoặc quả từ một cây trưởng thành, còn được gọi là ngày thu hoạch. Nếu gói hạt giống Cà Chua ghi 85 ngày, điều đó có nghĩa là thường mất 85 ngày trồng để có thể thu hoạch quả, nhưng chính xác 85 ngày là kể từ khi nào?
Số ngày được thu hoạch có thể thay đổi đáng kể, tùy thuộc vào việc bạn gieo hạt trực tiếp vào vườn hay cấy ghép. Các loại cây nhiệt đới, chẳng hạn như Cà Tím, Ớt và Cà Chua, thường được trồng sớm trong nhà dưới dạng cấy ghép, khi các cây lớn hơn, chúng sẽ được đem trồng trong vườn ngoài trời khi có nhiệt độ thích hợp. Đối với những cây này, ngày thu hoạch được tính kể từ ngày chúng được trồng vào chậu cuối cùng hoặc vị trí vườn ngoài trời. Vì vậy, đối với giống Cà Chua 85 ngày, thời gian thu hoạch là 85 ngày cộng với 8 đến 10 tuần để trồng cây cấy sẵn trong vườn từ hạt giống, hoặc cần tổng cộng 135 đến 149 ngày (19 đến 21 tuần) để cây cho ra quả có thể thu hoạch.
Khi bắt đầu ươm cây giống trong nhà, bạn phải chuẩn bị hạt giống đủ sớm để trồng bên ngoài vào thời điểm thích hợp nhất. Các loại cây trồng như Bông Cải Xanh, Cải Xoăn và Bắp Cải có thể sẵn sàng để trồng ngoài vườn trong vòng 5 đến 6 tuần kể từ ngày chúng nảy mầm. Mặt khác, Tỏi Tây và Cần Tây có thể mất đến 12 tuần. Nghiên cứu tìm ra mất bao lâu để trồng một cây ghép sẵn sàng trồng và sau đó tính ngược lại từ ngày trồng ngoài trời. Đó là lúc bạn phải bắt đầu gieo hạt trong nhà. Đảm bảo trồng cây ngay sau khi hạt nảy mầm vì chúng có thể trở nên còi cọc nếu bạn để chúng sống quá lâu trong thùng nhỏ.
Nếu bạn gieo hạt trực tiếp vào vườn hoặc chậu trồng trong nhà, thì số ngày thu hoạch trên gói hạt giống được tính từ ngày hạt nảy mầm. Trồng những loại cây này khi nhiệt độ trong nhà hoặc ngoài trời lý tưởng. Tốt nhất bạn nên gieo thẳng các loại cây trồng lấy củ như Cà Rốt, ủ Cải, củ Cải Đường và một số cây hạt lớn như Đậu, Bí, Ngô vào vườn hoặc chậu trồng cuối cùng, vì ươm hạt trong nhà trước không phải lúc nào cũng tốt.
Các cây trồng khác có thể áp dụng một trong hai phương pháp gieo trồng là gieo cấy và gieo hạy trực tiếp. Ví dụ, bạn có thể trồng trực tiếp hạt giống rau Diếp và nhiều loại rau Xà Lách khác chậu trồng cuối cùng hoặc tại vị trí trong vườn, nhưng bạn cũng có thể trồng dưới dạng cấy ghép trước, sau đó mới trồng vào chậu trồng lớn hơn hoặc trồng trong vườn ngoài trời.
Trước khi gieo hạt, hãy làm ẩm kỹ chất trồng, viên nén hoặc ô cắm. Hãy gieo hạt ở độ sâu được khuyến nghị trên gói. Thông thường, bạn có thể gieo hạt lớn sâu hơn và hạt nhỏ ở mức nông hơn. Bạn nên gieo một ít hạt giống như rau Diếp lên trên lớp đất và ấn nhẹ xuống. Phun sương để làm ẩm hạt rau Diếp, nhưng không phủ đất lên nếu không chúng sẽ không nảy mầm.
Luôn đảm bảo rằng các chậu trồng lớn mà bạn đang trồng hạt trực tiếp có lỗ thoát nước. Và đối với những chậu trồng lớn hơn này, hãy lưu ý rằng bạn không tưới quá nhiều nước cho chúng trong giai đoạn đầu của quá trình nảy mầm và phát triển hạt. Với nhiều đất hơn, các chậu lớn hơn có thể bị sũng nước, dẫn đến hạt và cây con bị thối rữa.
Không phải lúc nào 100% số hạt bạn gieo đều nảy mầm, cho dù bạn mua hay thu hoạch và giữ lại cho mùa tiếp theo. Bạn có thể gieo hai hạt trên mỗi chậu nhỏ, ô hoặc nút cắm, vì vậy nếu một hạt không nảy mầm, bạn có một hạt dự phòng. Nếu hạt giống đã để lâu, bạn có thể gieo ba hạt trên mỗi ô để tăng tỷ lệ nảy mầm.
ĐỘ ẨM
Duy trì độ ẩm thích hợp là chìa khóa để hạt nảy mầm thành công và cây con phát triển khỏe mạnh. Chất trồng phải luôn ẩm, giống như một miếng bọt biển được vò ra. Đừng bao giờ để đất khô, nhưng cũng đừng để sũng nước. Không tưới quá nhiều cho hạt chưa nảy mầm vì chúng có thể bị thối nếu môi trường quá ướt. Sử dụng bình phun sương để giữ ẩm bề mặt đất cho đến khi hạt nảy mầm và bắt đầu phát triển, sau đó bắt đầu thêm một ít nước vào khay hạt giống để chất trồng có thể hấp thụ khi cây con trưởng thành. Mặc dù các loài Xương Rồng và cây mọng nước sẽ cần được tưới nước trở lại khi chúng bắt đầu trưởng thành, nhưng hầu hết sẽ cần điều kiện độ ẩm đảm bảo nảy mầm tương tự như nhiều loại hạt lâu năm và hàng năm khác, vì vậy đừng để những loại hạt giống này bị khô quá khi chúng vừa mới nảy mầm.
Một mẹo nhỏ để duy trì độ ẩm đều khi hạt nảy mầm và giữ cho bề mặt đất không bị khô là rắc một lớp mỏng các vật liệu như xơ dừa hoặc vermiculite lên trên đất. Tôi thích sử dụng xơ dừa hơn. Những vật liệu này sẽ giữ độ ẩm bổ sung, có thể giúp hạt không bị khô trước khi nảy mầm.
Để giúp duy trì độ ẩm thích hợp, hãy đặt một mái vòm độ ẩm, hoặc một loại tấm che trong suốt khác, lên trên khay hoặc chậu hạt giống. Bỏ lớp phủ khi tất cả hạt đã nảy mầm và bắt đầu phát triển xanh tốt. Nếu bạn để mái vòm quá lâu, nấm bệnh hoặc thối rữa có thể xâm nhập vào. Trong khi cây con còn nhỏ cần được giữ ẩm, tuy nhiên, độ ẩm dư thừa có thể thúc đẩy bệnh tắt ẩm, khiến cây con bị thối và đổ. Độ ẩm quá cao cũng khuyến khích bệnh phấn trắng trên cây con và cây cấy non.
Bạn cũng có thể sử dụng thảm mao dẫn giống như nỉ để giữ cho các ô gieo hạt giống hoặc các chồi cấy nhỏ không bị khô hoặc bị sũng nước. Đặt tấm thảm mao dẫn dưới ô gieo hạt hoặc chậu hạt giống và thấm đẫm nước cho đến khi ẩm. Nếu bạn đang trồng microgreen, bạn cũng có thể ươm mầm trực tiếp trên một tấm thảm mao dẫn.
Hãy nói thêm một chút về việc giảm thiểu bệnh tật, vì đây có thể là một tình huống cực kỳ khó khăn đối với những người mới gieo hạt giống và thiếu kinh nghiệm. Bệnh chết cây là một bệnh mà cây con hiếm khi vượt qua được. Các loài Nấm (Rhizoctonia spp. và Fusarium spp.) kết hợp với Nấm mốc nước Pythium spp., chính là nguyên nhân điển hình gây ra bệnh chết cây.
Trong khi các cây con và cây cấy già hơn thường có thể chống lại các loại bệnh gây ra bởi các loại nấm gây chết cây, thì hạt đang nảy mầm và cây con chỉ mới phát triển bộ lá thật đầu tiên lại đặc biệt dễ bị ảnh hưởng.
Các dấu hiệu cho thấy cây con đang tàn dần
- Hạt giống không nảy mầm và trồi lên khỏi mặt đất
- Các lá mầm bị biến màu hoặc trông úng hoặc nhão.
- Thân cây con trở nên mỏng và dễ ngấm nước
- Các lá mới bị héo hoặc trông biến màu
- Bạn không tìm thấy rễ trên cây con hoặc rễ bị bạc màu và còi cọc
- Mốc trắng đang phát triển trên hạt giống hoặc cây con ở độ ẩm cao.
Kiểm soát độ ẩm là yếu tố rất quan trọng để ngăn ngừa dịch bệnh. Tôi thấy rằng bạn sẽ gặp khó khăn nhất với bệnh này ở đất ẩm, lạnh, trong điều kiện ánh sáng yếu hoặc độ ẩm quá cao. Sử dụng thảm nhiệt có thể làm ấm đất đến nhiệt độ tối ưu và tăng tốc độ nảy mầm; nhưng nếu cây con mới mọc không nhận được đủ ánh sáng hoặc bị che phủ bởi mái vòm ẩm quá lâu, bệnh chết cây vẫn có thể phát triển.
Một cách khác để giảm thiểu nguy cơ chết cây là sử dụng hỗn hợp gieo hạt giống vô trùng. Nếu bạn đang sử dụng lại chậu hoặc các thùng trồng khác, hãy khử trùng chúng giữa các lần trồng bằng cách ngâm trong dung dịch thuốc tẩy 10% trong 20 đến 30 phút. Tránh bón phân cho hạt trước hoặc ngay sau khi chúng nảy mầm. Phân bón có thể khuyến khích nấm và nấm mốc phát triển. Những người trồng cây thương mại sẽ sử dụng các hóa chất tổng hợp để ngăn chặn hiện tượng chết cây, nhưng có thể bạn không muốn làm điều này trong nhà của mình hoặc đối với các loại cây trồng ăn được. Một giải pháp thay thế hữu ích là tưới cây con bằng dung dịch hydrogen peroxide. Hydrogen peroxide oxy hóa đất, tiêu diệt nhiều loại nấm và vi khuẩn. Hòa 1 muỗng cà phê hydrogen peroxide vào 2 cốc nước, sau đó dùng dung dịch này để tưới hoặc phun sương cho cây con.
Bạn cũng sẽ cần chú ý đến thói quen tưới nước cho cây con và cây mọng nước. Khi cây con phát triển, tốt nhất bạn nên chuyển từ bình xịt, làm ướt tán lá, sang bình tưới nhỏ hoặc bình phun, để có thể cung cấp nước trực tiếp đến vùng rễ mà không bị đọng nước trên tán lá. Loại bỏ lượng nước dư thừa khỏi tán lá sẽ giúp giảm các vấn đề về nấm bệnh.
NHIỆT ĐỘ
Cả nhiệt độ không khí và đất đều ảnh hưởng đến tốc độ và tỷ lệ nảy mầm và phát triển thành công của hạt giống. Mỗi loại thực vật có một phạm vi nhiệt độ tối ưu khác nhau, dựa trên môi trường tự nhiên của chúng. Đảm bảo kiểm tra gói hạt giống để biết khoảng nhiệt độ tối ưu cụ thể cho quá trình nảy mầm. Nhiều hạt nảy mầm tốt trong phạm vi nhiệt độ đất và không khí từ 68 °F đến 80 °F (20-26,6 °C). Nếu nhiệt độ quá lạnh hoặc quá ấm, một số hạt giống sẽ mất rất nhiều thời gian để nảy mầm hoặc có thể không nảy mầm.
Mục tiêu của bạn là có được càng nhiều hạt giống nảy mầm càng nhanh càng tốt. Đối với các loại cây trồng cần nhiệt độ đất ấm hơn, chẳng hạn như Cà Chua và Húng Quế, đặc biệt là khi bắt đầu trồng những loại cây này trong nhà vào những tháng lạnh hơn, thảm giữ nhiệt cho hạt giống có thể đẩy nhanh quá trình nảy mầm và đảm bảo hạt nảy mầm thành công. Thảm giữ nhiệt, được đặt ngay dưới khay hạt giống có thể làm ấm đất lên trung bình từ 15 đến 20 độ F so với nhiệt độ phòng. Khi hạt giống đã nảy mầm và bắt đầu phát triển, bạn có thể tháo tấm lót nhiệt ra. Nếu không gian trồng mát mẻ, hãy giữ tấm lót nhiệt tại chỗ khi cây trưởng thành. Hãy nhớ rằng bạn có thể sử dụng bộ điều nhiệt cùng với thảm nhiệt để bật và tắt tự động.
Các gói hạt giống thường cung cấp thời gian nảy mầm ước tính dựa trên phạm vi nhiệt độ tối ưu ngoài trời, nhưng bạn thường có thể rút ngắn thời gian nảy mầm trong môi trường được kiểm soát với thảm nhiệt.
Nếu bạn đang trồng những cây ưa thời tiết lạnh, chẳng hạn như rau Chân Vịt, trong nhà vào mùa hè, bạn có thể gặp vấn đề với nhiệt độ quá nóng. Đôi khi vấn đề là do nhiệt tỏa ra từ đèn chiếu sáng, hoặc vị trí trồng cây rất ấm áp theo mùa. Bạn luôn có thể đặt quạt nhỏ gần đèn trồng khi bạn cần đặt đèn gần cây con và nhiệt độ phòng đã ấm.
LỰA CHỌN CÂY CON
Bây giờ hạt giống đã nảy mầm, đã đến lúc giảm số lượng cây con. Bước này có thể khó khăn bởi không ai muốn loại bỏ những cây con họ vừa trồng. Tuy nhiên, vì bạn đã gieo hai hoặc ba hạt giống vào một ô gieo hạt? Đôi khi tất cả 2 hoặc 3 hạt giống này đều nảy mầm và nếu bạn không loại bỏ bớt thì bạn sẽ thu được một rừng cây con nhỏ bé. Khi có quá nhiều hạt giống nảy mầm quá gần nhau, cây con có thể khó phát triển.
Thật hấp dẫn khi để tất cả cây con tiếp tục phát triển, nhưng cây con sẽ phát triển tốt hơn nếu bạn loại bỏ những cây yếu nhất. Nhiều cây con trên mỗi ô tạo ra quá nhiều bóng râm và cạnh tranh tài nguyên, dẫn đến tổng thể cây con trông yếu hơn.
Sau khi hạt đã nảy mầm, hãy chọn cây con khỏe nhất, chắc chắn nhất trong mỗi ô và tỉa tận gốc những cây con còn lại. Hãy dùng những cây con được tỉa bớt để làm món salad hoặc để làm thức ăn cho các loài sinh vật thích ăn rau xanh.
CHIẾU SÁNG CHO HẠT GIỐNG
Nhiều loại hạt giống cần bóng tối bên dưới đất để nảy mầm đúng cách. Khi quá trình nảy mầm xảy ra trong bóng tối, tất cả năng lượng của hạt sẽ dồn vào sự phát triển của rễ. Một khi chồi nhô lên và tiếp xúc với ánh sáng, mọi thứ sẽ thay đổi đáng kể. Sự phát triển của rễ chậm lại và chồi sẽ phát triển nhanh hơn.
Một số hạt giống cần tiếp xúc với các loại ánh sáng cụ thể để nảy mầm. Ví dụ, hạt giống rau Diếp cần được tiếp xúc với ánh sáng đỏ nếu không chúng sẽ không nảy mầm. Ánh sáng đỏ sẽ xuất hiện trong ánh sáng tự nhiên và ánh sáng đèn trồng quang phổ. Bạn nên kiểm tra gói hạt giống để biết thông tin về yêu cầu ánh sáng hoặc bóng tối để nảy mầm trước khi bắt đầu gieo hạt.
Hãy nhớ rằng một khi hạt giống nảy mầm và trồi lên khỏi đất, chúng sẽ cần 14 đến 16 giờ chiếu sáng liên tục để phát triển mạnh mẽ và cứng cáp. Nếu cây con của bạn đang phát triển dài ra, chúng đang không nhận đủ ánh sáng. Đặt đèn trồng cao hơn hạt giống từ 3 đến 4 inch. Đặt bộ hẹn giờ chiếu sáng trên thiết bị cố định để đèn tự động bật và tắt vào những thời điểm thích hợp trong ngày và đêm. Từ 6 giờ sáng đến 8 giờ tối là thời gian chiếu sáng phù hợp cho đèn trồng sáng. Nếu bạn đang sử dụng đèn có cường độ sáng thấp hơn, hãy để đèn bật từ 6 giờ sáng đến 10 giờ tối.
Sau khi cây con đã phát triển được một số lá thật, bạn có thể nâng đèn trồng lên để cây non không bị cháy.
BÓN PHÂN CHO CÂY CON
Khi cây con hoặc cành giâm đã phát triển được bốn hoặc năm lá thật và không còn gắn với hạt nữa, đã đến lúc bắt đầu bón phân cho chúng. Cây con không thể xử lý được phân bón mạnh, vì vậy hãy pha loãng sản phẩm phân bón với nước theo tỷ lệ từ 1/4 đến 1/2 so với tỷ lệ khuyến nghị.
Có nhiều loại phân bón mang lại những lợi ích khác nhau cho cây con, nhưng tốt nhất bạn nên sử dụng dạng hỗn dịch lỏng thay vì dạng hạt. Rong biển lỏng, nhũ tương cá và các sản phẩm mùn lỏng là những lựa chọn tự nhiên, hiệu quả không làm cháy cây non. Pha loãng các sản phẩm này đến một nửa độ đậm đặc khi bón cho cây con hoặc chọn loại phân bón lỏng được dán nhãn dành riêng cho cây con và làm theo hướng dẫn của nhà sản xuất. Nếu bạn chọn một loại phân bón tổng hợp, bạn nên pha loãng với một phần tư nồng độ đầy đủ, vì những sản phẩm này khả năng cao sẽ làm cháy hoặc làm hỏng cây non hơn là phân bón có nguồn gốc tự nhiên.
Bón phân cho cây con một lần mỗi tuần với phân pha loãng, hoặc hai tuần một lần nếu bạn đang sử dụng hỗn hợp phân bón mạnh hơn. Khi cây trưởng thành, bạn có thể tăng tỷ lệ bón phân đến mức tối đa. Không trộn phân bón với tỷ lệ mạnh hơn khuyến cáo. Mặc dù có rất ít nguy cơ làm hỏng cây con nếu bạn bón quá nhiều phân hữu cơ, bạn chỉ đang lãng phí sản phẩm, đồng thời quá liều phân bón tổng hợp có thể làm cháy cây mà không thể cứu vãn được.
Nhiệt độ nảy mầm lý tưởng cho các loại cây phổ biến