[Ebook Việt Hoá] New Plant Parent (Darryl Cheng) – Phần 01 – 08. Pruning, Propagation, and Repotting (Cắt tỉa, nhân giống và thay chậu)

  • Nguồn: [Ebook] New Plant Parent: Develop Your Green Thumb and Care for Your House-Plant Family – Darryl Cheng
  • Biên tập: Dũng Cá Xinh (Tháng 01/2022)
  • Dịch: Team Codai.net 

English

Pruning, Propagation, and Repotting

There are lots of things you can do for your plants under the umbrella of “care.” Here I will explain some useful procedures that every plant parent should know how to execute. Consider this proverb I made up:

To keep your plant happy . . .

  • for a week: Give it daily light and dark.
  • for a month: Maintain proper soil moisture and aerate the soil.
  • for several months: Remove dead material.
  • for a year: Fertilize and prune it (if applicable).
  • for several years: Repot it.

We’ve covered light and soil management, which includes measuring light, watering, aeration, and fertilizing. Now we’ll look at pruning, propagation, and repotting, which are later-stage procedures.

Pruning

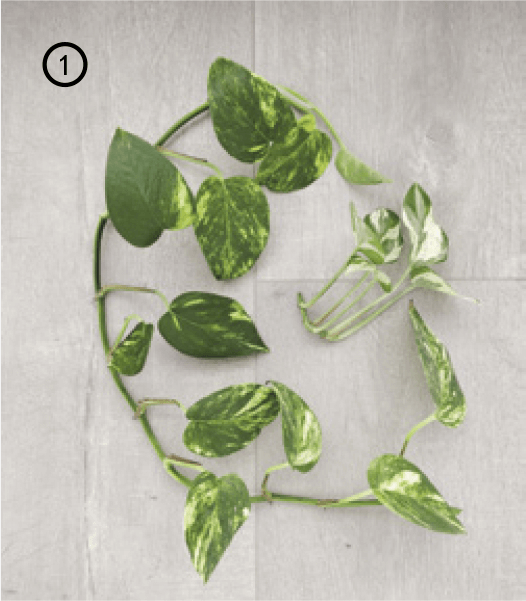
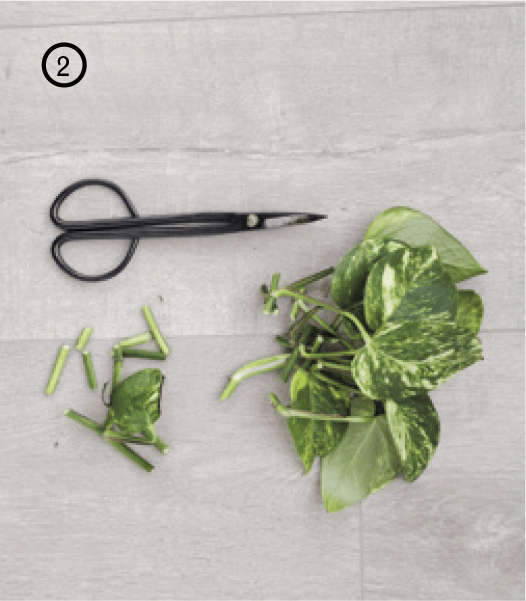
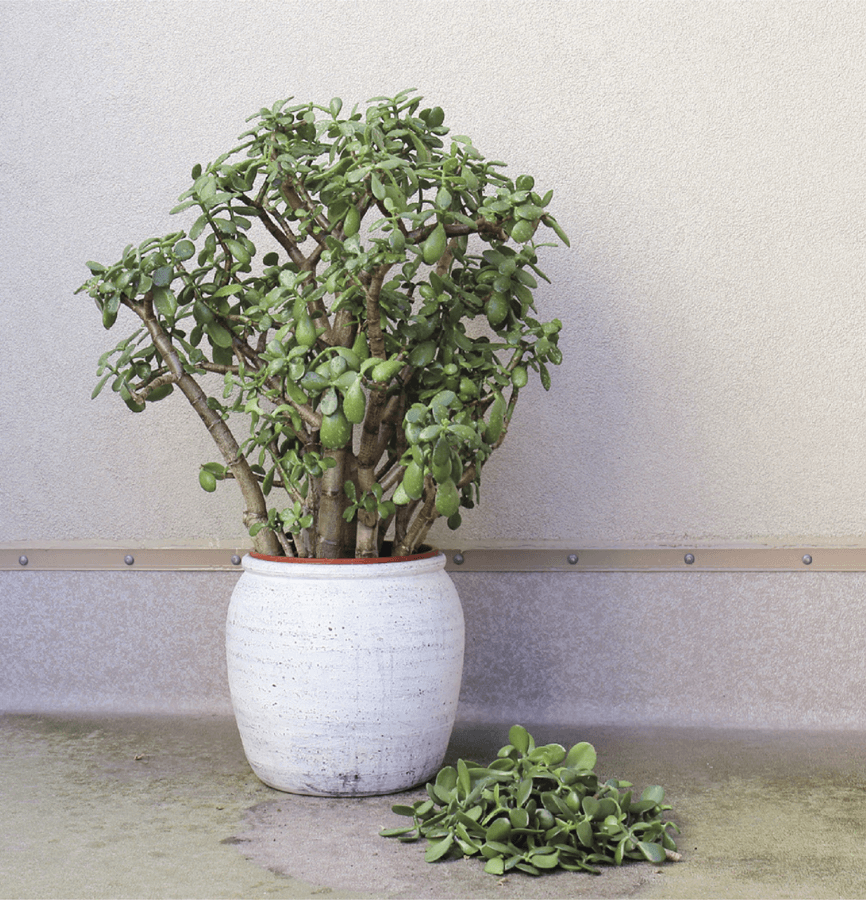
The overall concept of pruning is to cut back certain stems to maintain a desired shape and/or to stimulate branching. Not all house plants need to be pruned, but on some, such as jade plants, stems will bend or break if they are allowed to keep producing leaves without pruning. Often, pruning is about aesthetics—it’s a chance for you to decide how you want your plant to look.

Indoor specimens are relatively small compared to how the same species would grow in the wild, so pruning them produces more drastic change than does, say, pruning a tree. However, given time and the right conditions, your plant will continue to grow from the point where you cut it, as in the case of the dracaena on the previous page. Growers often take advantage of this phenomenon to produce multiply branched specimens of many of the common house plants we know and love.

Root Division and Offsets

Root division is essentially dividing a plant at the root level to produce two smaller plants. This works for bushy plants that grow in a compact form, such as ferns, peace lilies, spider plants, and snake plants. With a clean, sharp knife, simply cut the root ball in half and repot the divisions into appropriately sized pots. You should care for the plant as you would any newly repotted plant, providing bright indirect light but not direct sun, and keeping the soil evenly moist. Initially, the two plants will look like halves of plants, but when the roots reestablish themselves, the foliage will fill in nicely.

Occasionally, a plant will put up a miniature version of itself a short distance away from the main stem—snake plants and pilea will do this. When the baby has grown to approximately a third of the size of its mother, you can unpot the plant, cut off the baby with a sharp knife, and repot both mother and baby in separate pots.

Propagation

Propagation is a great way to experiment and learn about how plants develop, but don’t expect everything you propagate to grow up looking like the kind of plant you buy from the nursery—unless, of course, you live in a greenhouse! We’ll discuss propagation by stem cuttings and leaf cuttings.

Propagation is such a fun part of plant parenthood that dedicated vessels have been designed with elegance in mind.

Stem Cuttings:

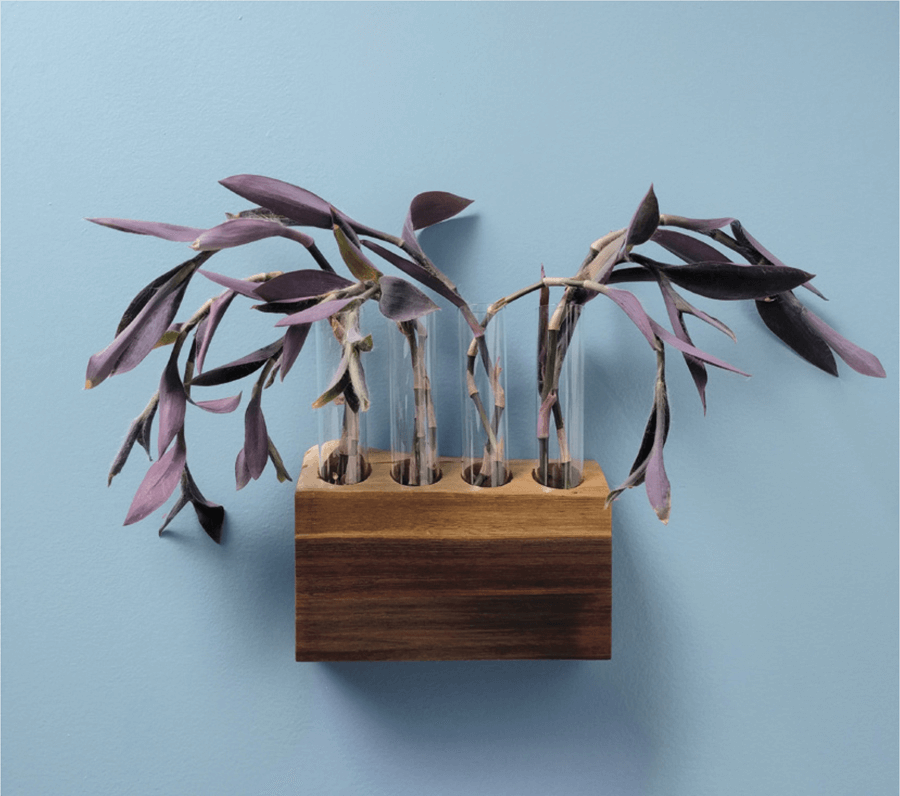
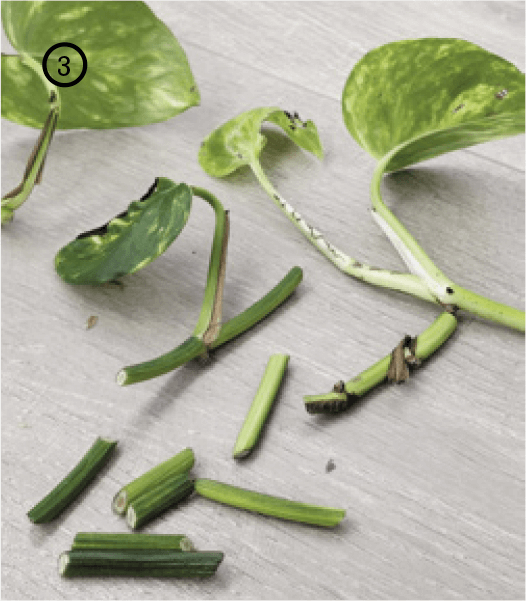
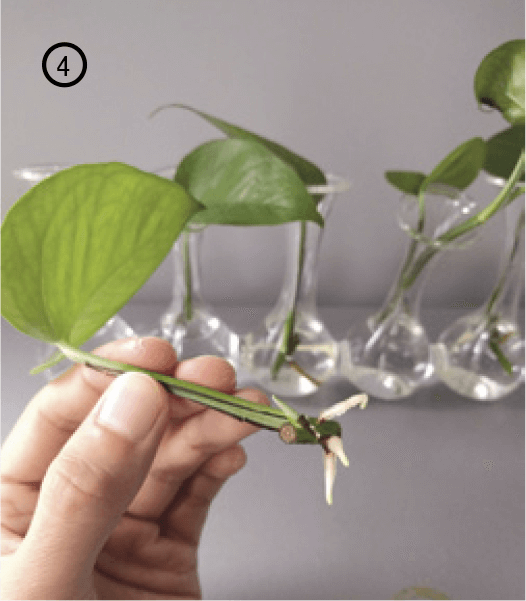
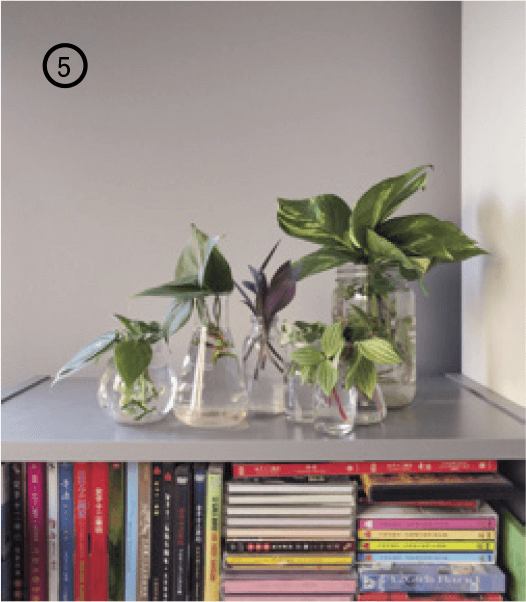
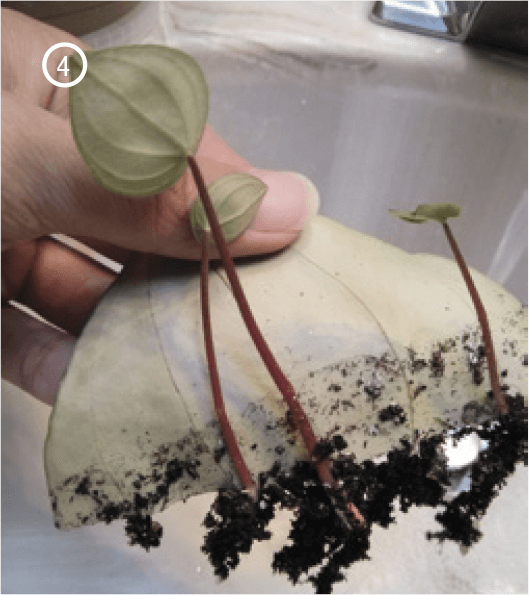
Stem cutting is probably the easier of the two methods. You’re basically cutting a piece off the main stem of a plant, getting it to grow roots, and transplanting the new plant into soil. This method works best on vines, such as pothos and philodendron. During the rooting, the stem remains submerged in water, which keeps it alive while it’s trying to grow new roots.

1. Pothos ‘Golden’ and ‘‘N’Joy’—ready to take cuttings!
2. Cut sections of the main vine so they include a root nub, a stem, and a leaf.
3. You can discard extra pieces of the main vine and any damaged leaves.
4. After a few weeks, you should see some new roots growing from the stem. You can transplant the cuttings into a small pot once the new roots are about an inch long.
5. Not only does rooting in water allow you to see when roots develop, you also get to display the cuttings with intriguing glass-ware—save those interesting bottles or go thrifting for jars and lab glassware!

Leaf Cuttings:

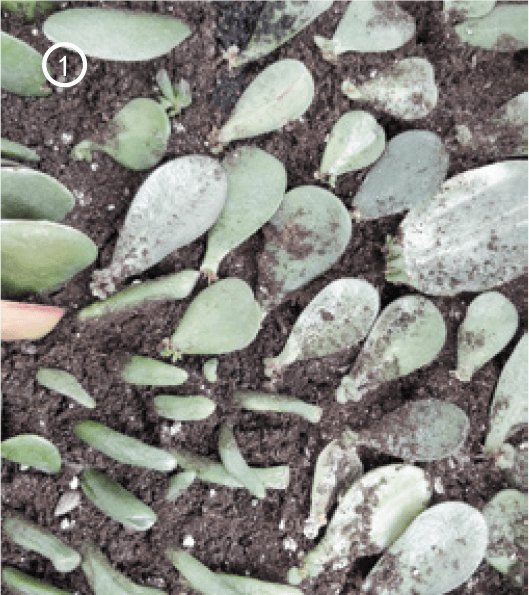
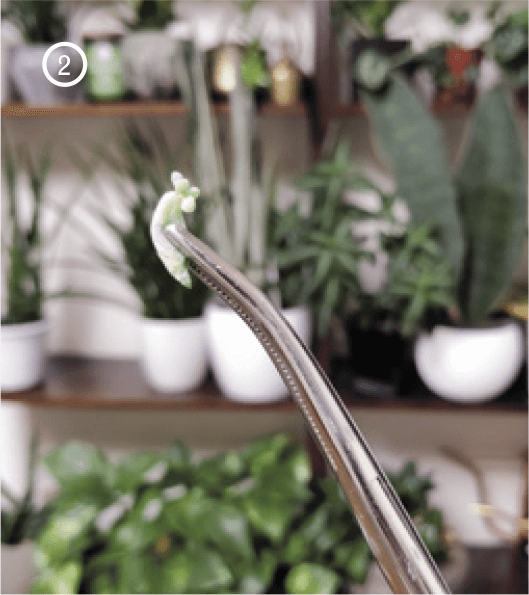
Propagation by leaf cutting is a favorite among succulent owners. Remove a healthy leaf from the plant, place it on a dry surface so it can develop a scab where it was cut (one to two days), then place it onto moist sand (or even put it back into the pot of the main plant). In a few months, a new plant will develop from the base of the old leaf. If you’ve ever accidentally broken off a succulent leaf and left it sitting on the soil or even on your windowsill, after a few weeks, the leaf will be brimming with young roots and maybe even the tiniest hint of a new plant.

1. An army of leaf cuttings from a jade plant rooting in a mixture of peat moss, perlite, and coarse sand.
2. Burro’s tail (Sedum morganianum) is a trailing succulent. A few of these burro’s tail leaves can be placed onto moist sand and in a few months to a year . . .
2. Burro’s tail (Sedum morganianum) is a trailing succulent. A few of these burro’s tail leaves can be placed onto moist sand and in a few months to a year . . .
3. . . . you’ll be able to start the whole process again.
3. . . . you’ll be able to start the whole process again.
4. A different version of propagation by leaf cutting involves cutting a section of a leaf and inserting the cut edge into the soil. Each vein on the leaf has the potential to root and start a new plant. This method works with peperomia (pictured above), sansevieria, and begonia.

General Tips for Propagators

  • Use the sharpest, cleanest knife/pruning shears you can find.
  • For stem cuttings, replace the water if you see it getting murky.
  • Keep your cuttings away from direct sun; just about any level of indirect light will be fine.
  • Keep your cuttings on the warm side. Warmth encourages root growth for typical house plants.
  • Be patient. After you transplant your cutting into soil, it will be several weeks or months before you’ll have plants that are large enough to enjoy.

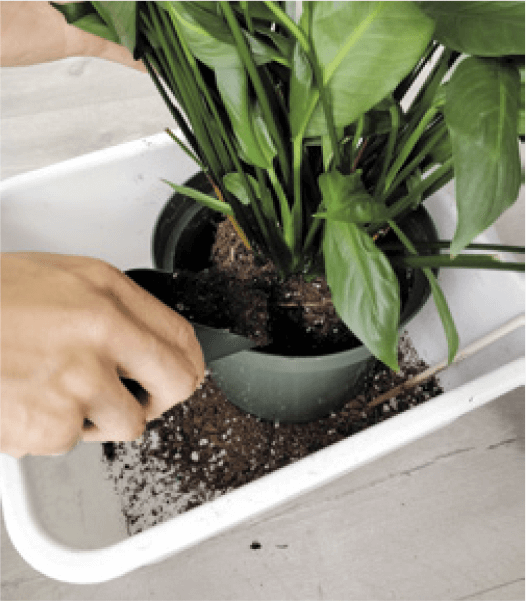
Refreshing the Soil (Repotting and Top Dressing)

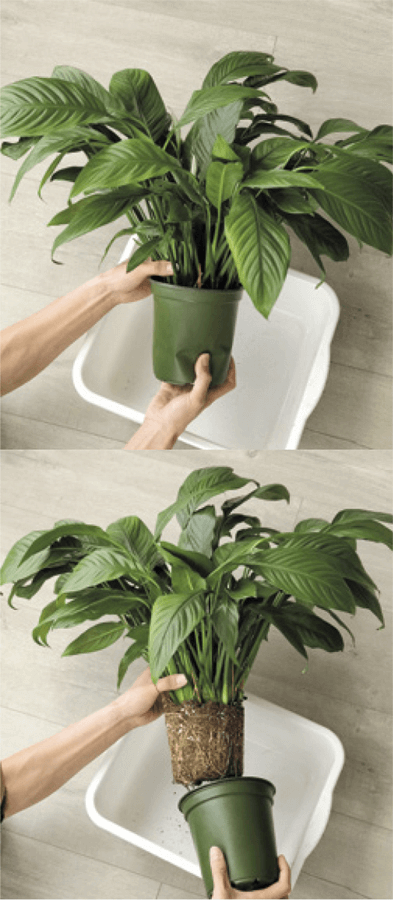
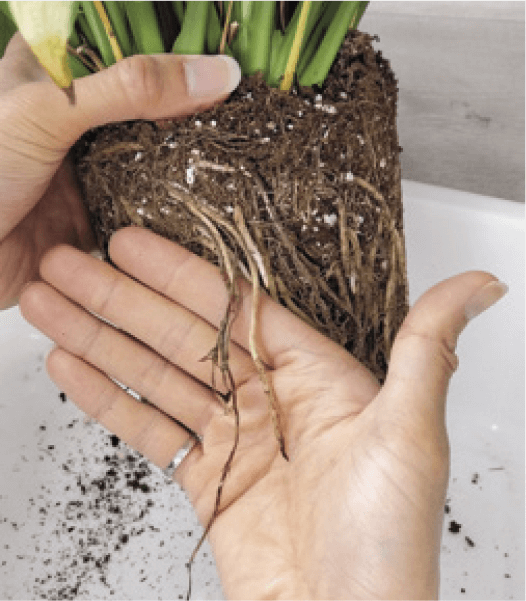
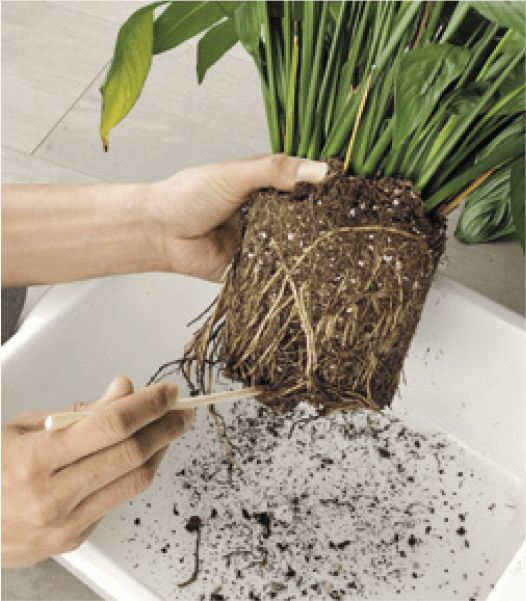
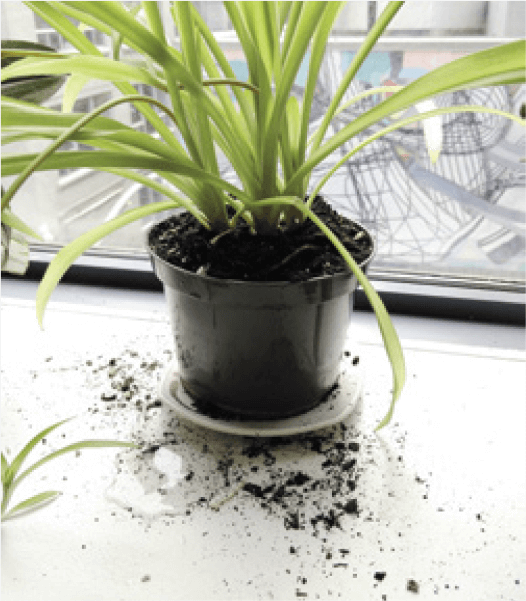
To repot or not to repot—I know I’ve had to make this diagnosis many times. Some people overzealously decide to repot immediately after bringing home a new plant from the nursery, thinking that the “cheap plastic pot” just won’t do (in fact, those are the best pots for soil management!). Others have the idea floating around in their minds but just never get around to doing it until it is too late, and so their plants suffer to the point of looking terrible—too terrible to be worth the time and effort to care for (remember the subjective life span). While you’re deciding (or procrastinating), roots keep getting longer, but in a container, there’s nowhere for them to go but out the drainage hole. In a year or so, the roots will have encircled the base of the pot, forming a tight, tangled mass—this is a root-bound plant. These are signs that you need to repot your plant:

  • Roots are emerging from the top or bottom of the pot or they are tightly circling the bottom of the pot.
  • The soil hasn’t been changed for a year or more (depleted nutrients).
  • The soil is compacted beyond repair.
  • The soil is disintegrated, and particles no longer stick together when wet.
  • The plant is not seated at a convenient height.

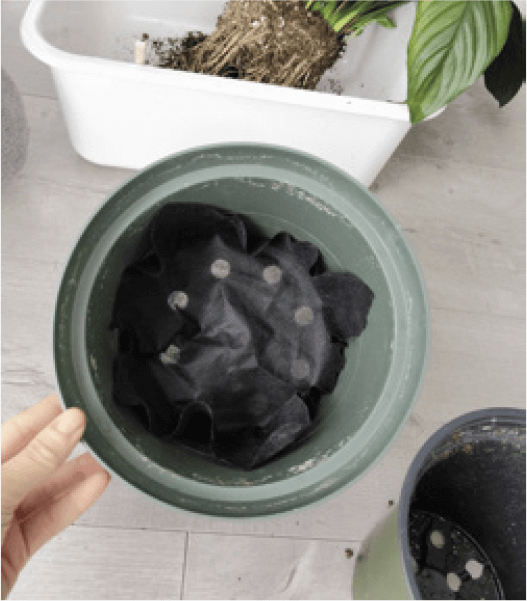
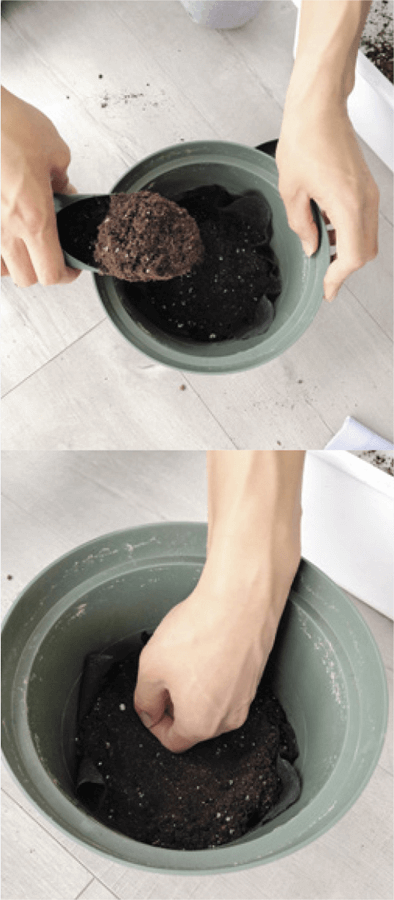
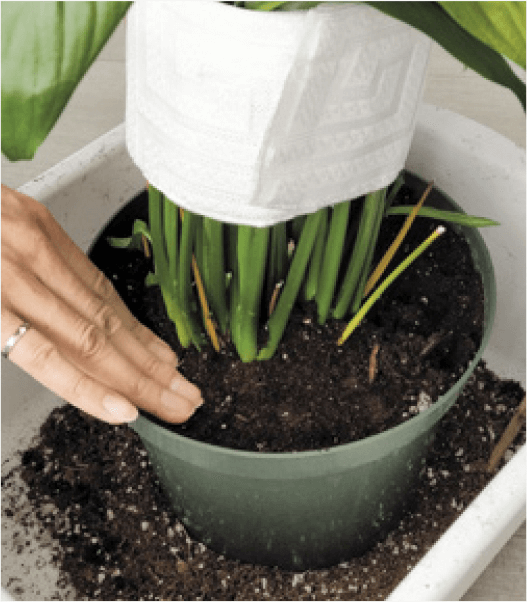
Aside from seeing physical signs, you should also think about how long the plant has been growing in the same pot. For any of the above situations to occur, the plant would have been growing in its soil for at least a year. So before you diagnose “repotting necessary,” look for the signs and consider the length of time the plant has been potted. Finally, anytime you’re on the fence about repotting a plant, you can always help it out by giving it a new top dressing. Top dressing is when you remove some of the old soil from the surface of the pot (go down around one to three inches) and add new soil with similar drainage properties to the current soil. Gently mix in the new with the old—it doesn’t have to be perfectly mixed; over time, the nutrients in the fresh soil will gradually find their way to the plant’s roots.

Pot Sizing: People tend to overestimate the size of pot necessary for their plants, thinking the roots will be “more comfortable” with more space. In general, just a tad cramped is better than too loose. The main reason is this: You want the roots to occupy as much of the soil volume as possible so that, when you moisten the soil, the roots will have access to the moisture. If there are pockets of soil where roots are absent, that area will stay moist longer. Whenever you have a consistently moist and stale environment, there’s a chance for root-rot bacteria to breed.

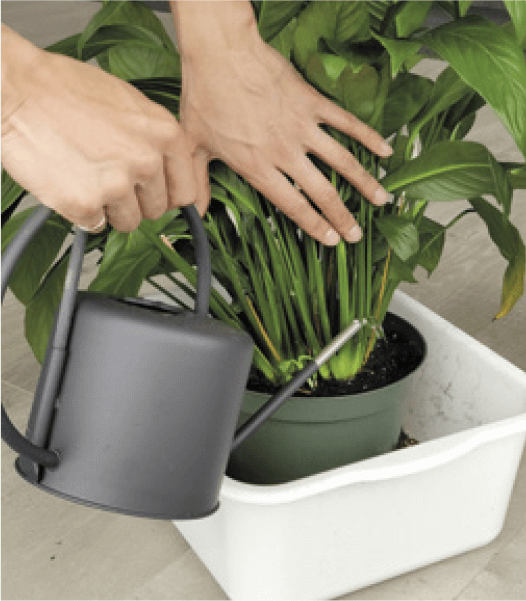
While repotting a root-bound plant, it’s important to gently loosen some of the tangled roots. Yes, some of them will break, but they’ll grow back stronger. It’s best to repot when soil is on the dry side.

1–2. Unpot the plant: If the pot is planted in a plastic nursery pot, you can squeeze the base of the pot as you gently pull the entire plant out. If the pot is rigid, you can use a small trowel to separate the root ball from the outer edges of the pot as you pull up the plant.
3. Check for any rotting roots—they’ll be dark brown or black and mushy. Remove these!
4. Gently tease apart the root ball with a chopstick. As much as possible, avoid breaking roots, but don’t worry if you do. It’s more important that you untangle the root ball to give the roots a head start in establishing themselves in the new soil.
5. Cover the drainage hole with a piece of landscape fabric instead of a piece of broken clay pot. Just buy yourself one roll, and it should last you several years of plant parenthood. It’s cheap, lets water through, and who has pieces of broken clay pots lying around?
6–7. Fill the bottom of the pot with some soil and tamp it down gently so it is somewhat compressed. The height of this base layer should allow your plant to sit with its soil line about half an inch from the top of the pot. This will make watering more convenient, as you can allow the water to initially pool on the surface of the soil and let it gradually seep down, ensuring an even moisture distribution.
8. Place the plant in the center of the pot. Using a small trowel/scoop, fill the pot with soil from the sides of the root ball. You can gently shake the pot to get the soil to settle around the roots—you want the soil to fill in the spaces between the roots
9. Continue to fill and settle the soil until you reach the top of the pot. Then gently tamp down the soil. It should now sit at least a half inch below the rim of the pot. I’m using a curtain tie to hold up the foliage—makes it easier to see your soil line as you work!
10. If the soil level is even with or above the rim of the pot, proper watering will be an annoying task, since some water will roll off the soil surface, getting soil particles everywhere. Whenever you repot, it’s best to get the soil surface to sit a half inch or more below the rim of the pot. This gives the pooled water a chance to trickle down into the rest of the soil.
11. Bring the newly potted plant to the sink or a place where water can drain away, and water the plant thoroughly. Put the plant where it can see as much of the sky as possible but be shielded from the sun. You want the plant to get bright indirect light but not be burned by direct sun. By the next time this plant needs water, you can move it to its usual growing space.
This mealy bug–infested jade plant went through a hard pruning, which will both get rid of many mealy bugs and encourage new growth—a win-win situation!

Tiếng Việt

Cắt tỉa, nhân giống và thay chậu

Có rất nhiều điều bạn có thể làm cho cây của mình dưới cái tên “chăm sóc”. Ở đây tôi sẽ giải thích một số thủ tục hữu ích mà mọi phụ huynh thực vật nên biết cách thực hiện. Hãy xem xét câu tục ngữ này mà tôi đã tạo ra:

Để giữ cho cây của bạn hạnh phúc. . .

  • trong một tuần: Cung cấp cho cây ánh sáng và bóng tối hàng ngày.
  • trong một tháng: Duy trì độ ẩm thích hợp của đất và sục khí cho đất.
  • trong vài tháng: Loại bỏ các phần chết.
  • trong một năm: Bón phân và tỉa cành (nếu có).
  • trong vài năm: Thay chậu cho cây

Chúng tôi đã đề cập đến việc quản lý đất và ánh sáng, bao gồm đo ánh sáng, tưới nước, sục khí và bón phân. Bây giờ chúng ta sẽ xem xét việc cắt tỉa, nhân giống và thay chậu, đây là các quy trình ở giai đoạn sau.

Cắt tỉa

Khái niệm chung về cắt tỉa là cắt bớt một số thân cây để duy trì hình dạng mong muốn và/hoặc để kích thích phân nhánh. Không phải tất cả các loại cây trồng trong nhà đều cần phải cắt tỉa, nhưng đối với một số loại cây, chẳng hạn như cây ngọc bích, thân cây sẽ bị uốn cong hoặc gãy nếu chúng được phép tiếp tục ra lá mà không cần cắt tỉa. Thông thường, việc cắt tỉa mang tính thẩm mỹ—đó là cơ hội để bạn quyết định xem bạn muốn cây của mình trông như thế nào.

Các mẫu vật trong nhà tương đối nhỏ so với cách mà cùng một loài sẽ phát triển trong tự nhiên, vì vậy việc cắt tỉa chúng sẽ tạo ra sự thay đổi mạnh mẽ hơn so với việc cắt tỉa một cái cây. Tuy nhiên, với thời gian và điều kiện thích hợp, cây của bạn sẽ tiếp tục phát triển từ điểm bạn cắt, như trường hợp cây huyết dụ ở trang trước. Những người trồng trọt thường tận dụng hiện tượng này để tạo ra các mẫu vật phân nhánh của nhiều loại cây trồng trong nhà phổ biến mà chúng ta biết và yêu thích.

Phân chia rễ và chồi

Phân chia rễ về cơ bản là phân chia một cây ở phần rễ để tạo ra hai cây nhỏ hơn. Cách này phù hợp với những loại cây thân bụi phát triển ở dạng nhỏ gọn, chẳng hạn như dương xỉ, cây lan ý, cây lan chi và cây lưỡi hổ. Với một con dao sắc, sạch, bạn chỉ cần cắt đôi bầu rễ và trồng lại các phần đã chia vào các chậu có kích thước phù hợp. Bạn nên chăm sóc cây như đối với bất kỳ cây mới trồng lại nào, cung cấp ánh sáng gián tiếp nhưng không phải ánh nắng trực tiếp và giữ cho đất ẩm đều. Ban đầu, hai cây sẽ trông giống như một nửa của cây, nhưng khi bộ rễ tự phục hồi, tán lá sẽ lấp đầy một cách độc đáo.

Đôi khi, một cây sẽ tạo ra một phiên bản thu nhỏ của chính nó cách thân chính một đoạn ngắn—cây lưỡi hổ và cây cỏ gương sẽ làm việc này. Khi cây con đã phát triển bằng khoảng một phần ba kích thước của cây mẹ, bạn có thể bỏ cây ra, dùng dao sắc cắt bỏ cây con và thay chậu cho cả cây mẹ và cây con trong các chậu riêng.

Nhân giống

Nhân giống là một cách tuyệt vời để thử nghiệm và tìm hiểu về cách thực vật phát triển, nhưng đừng mong đợi mọi thứ bạn nhân giống sẽ lớn lên trông giống như loại cây bạn mua từ vườn ươm—tất nhiên, trừ khi bạn sống trong nhà kính! Chúng ta sẽ thảo luận về việc nhân giống bằng cách giâm cành và giâm lá.

Propagation is such a fun part of plant parenthood that dedicated vessels have been designed with elegance in mind.
Nhân giống là một phần thú vị trong quá trình làm người chăm sóc cây đến nỗi các bình chuyên dụng đã được thiết kế với sự tinh tế trong tâm trí.

Giâm cành:

Giâm cành có lẽ là dễ dàng hơn trong hai phương pháp. Về cơ bản, bạn đang cắt một đoạn thân chính của cây, để nó mọc rễ và cấy cây mới vào đất. Phương pháp này hoạt động tốt nhất trên dây leo, chẳng hạn như cây trầu bà (pothos) và cây Ráy thơm (philodendron). Trong quá trình ra rễ, thân cây vẫn ngập trong nước, giúp nó sống sót trong khi cố gắng mọc rễ mới.

1. Pothos ‘Golden’ and ‘‘N’Joy’—ready to take cuttings!
1. Trầu bà Vàng (Pothos ‘Golden’) và Trầu bà Sữa (Pothos ‘‘N’Joy’)—sẵn sàng để giâm cành
2. Cut sections of the main vine so they include a root nub, a stem, and a leaf.
2. Cắt các đoạn của thân chính sao cho chúng bao gồm cả rễ, thân và lá.
3. You can discard extra pieces of the main vine and any damaged leaves.
3. Bạn có thể loại bỏ những phần thừa của thân chính và những chiếc lá bị hư hỏng.
4. After a few weeks, you should see some new roots growing from the stem. You can transplant the cuttings into a small pot once the new roots are about an inch long.
4. Sau một vài tuần, bạn sẽ thấy một số rễ mới mọc ra từ thân cây. Bạn có thể cấy các cành giâm vào chậu nhỏ sau khi rễ mới dài khoảng 1inch.
5. Not only does rooting in water allow you to see when roots develop, you also get to display the cuttings with intriguing glass-ware—save those interesting bottles or go thrifting for jars and lab glassware!
5. Việc cắm rễ trong nước không chỉ cho phép bạn nhìn thấy thời điểm rễ phát triển, mà bạn còn có thể trưng bày các cành giâm bằng đồ thủy tinh hấp dẫn—hãy để dành những chiếc lọ thú vị đó hoặc tiết kiệm để mua lọ và đồ thủy tinh trong phòng thí nghiệm!

Giâm lá:

Nhân giống bằng cách giâm lá là một phương pháp yêu thích của những người sỡ hửu cây mọng nước. Lấy một chiếc lá khỏe mạnh ra khỏi cây, đặt nó trên một bề mặt khô ráo để nó có thể phát triển thành vảy nơi nó bị cắt (một đến hai ngày), sau đó đặt nó lên cát ẩm (hoặc thậm chí đặt nó trở lại chậu của cây chính ). Trong một vài tháng, một cây mới sẽ phát triển từ gốc của chiếc lá cũ. Nếu bạn đã từng vô tình làm gãy một chiếc lá mọng nước và để nó nằm trên đất hoặc thậm chí trên bậu cửa sổ, thì sau vài tuần, chiếc lá đó sẽ mọc đầy rễ non và thậm chí có thể là dấu hiệu nhỏ nhất của một cây mới.

1. An army of leaf cuttings from a jade plant rooting in a mixture of peat moss, perlite, and coarse sand.
1. Một đội quân giâm lá từ cây phỉ thúy (jade plant) mọc rễ trong hỗn hợp rêu than bùn, đá trân châu và cát thô.
2. Burro’s tail (Sedum morganianum) is a trailing succulent. A few of these burro’s tail leaves can be placed onto moist sand and in a few months to a year . . .
2. Sen đá chuỗi ngọc (Burro’s tail (Sedum morganianum)) là một loại cây mọng nước. Một số lá đuôi của những con burro này có thể được đặt trên cát ẩm và trong vài tháng đến một năm…
3. . . . you’ll be able to start the whole process again.
3. …bạn sẽ có thể bắt đầu lại toàn bộ quá trình.
4. A different version of propagation by leaf cutting involves cutting a section of a leaf and inserting the cut edge into the soil. Each vein on the leaf has the potential to root and start a new plant. This method works with peperomia (pictured above), sansevieria, and begonia.
4.Một cách nhân giống khác bằng cách cắt lá liên quan đến việc cắt một phần của lá và cắm mép cắt vào đất. Mỗi tĩnh mạch trên lá có khả năng bén rễ và bắt đầu một cây mới. Phương pháp này hoạt động với cây trường sinh (peperomia) (hình trên), lưỡi hổ (sansevieria) và thu hải đường (begonia)

Mẹo chung cho những người dùng phương pháp nhân giống

  • Sử dụng dao/kéo cắt tỉa sắc nhất, sạch nhất mà bạn có thể tìm thấy.
  • Đối với cành giâm, hãy thay nước nếu bạn thấy nước bị đục.
  • Giữ cành giâm của bạn tránh ánh nắng trực tiếp; bất kỳ mức độ ánh sáng gián tiếp nào cũng sẽ ổn.
  • Giữ cho cành giâm của bạn ở nơi ấm áp. Sự ấm áp khuyến khích sự phát triển của rễ đối với các loại cây trồng trong nhà điển hình.
  • Hãy kiên nhẫn. Sau khi bạn cấy cành giâm vào đất, sẽ mất vài tuần hoặc vài tháng trước khi bạn có những cây đủ lớn để thưởng thức.

Làm mới đất (thay chậu và bón thúc)

Thay chậu hay không thay chậu—tôi biết mình đã phải chẩn đoán điều này nhiều lần. Một số người quá nóng nảy quyết định thay chậu ngay sau khi mang cây mới từ vườn ươm về nhà, nghĩ rằng “chậu nhựa rẻ tiền” sẽ không hiệu quả (thực tế, đó là những chậu tốt nhất để quản lý đất!). Những người khác thì nảy ra ý tưởng trong đầu nhưng không bao giờ bắt tay vào thực hiện cho đến khi quá muộn, và vì vậy cây cối của họ trông thật tồi tệ—quá khủng khiếp đến mức không đáng để bỏ thời gian và công sức chăm sóc (hãy nhớ tuổi thọ chủ quan). Trong khi bạn đang quyết định (hoặc đang chần chừ), rễ tiếp tục dài ra, nhưng trong một thùng chứa, chúng không có chỗ nào để chui ra ngoài lỗ thoát nước. Trong khoảng một năm, rễ sẽ bao quanh đáy chậu, tạo thành một khối chặt và rối—đây là loại cây bám rễ. Đây là những dấu hiệu cho thấy bạn cần thay chậu cho cây:

  • Rễ mọc ra từ trên hoặc dưới đáy chậu hoặc chúng bám chặt quanh đáy chậu.
  • Đất đã không được thay đổi trong một năm hoặc lâu hơn (cạn kiệt chất dinh dưỡng).
  • Đất được nén chặt không thể sửa chữa.
  • Đất bị phân hủy và các hạt không còn dính vào nhau khi ướt.
  • Nhà máy không được đặt ở độ cao thuận tiện.

Ngoài việc nhìn thấy các dấu hiệu vật lý, bạn cũng nên nghĩ xem cây đã phát triển trong cùng một chậu bao lâu. Đối với bất kỳ tình huống nào ở trên xảy ra, cây sẽ phát triển trong đất của nó ít nhất một năm. Vì vậy, trước khi bạn chẩn đoán “cần thay chậu”, hãy tìm các dấu hiệu và xem xét khoảng thời gian cây đã được thay chậu. Cuối cùng, bất cứ khi nào bạn phân vân về việc thay chậu cho cây, bạn luôn có thể giúp đỡ bằng cách bón phân mới cho cây. Bón thúc là khi bạn loại bỏ một ít đất cũ trên bề mặt chậu (xuống khoảng 1 đến 3 inch) và thêm đất mới có đặc tính thoát nước tương tự như đất hiện tại. Nhẹ nhàng trộn cái mới với cái cũ—không nhất thiết phải trộn hoàn hảo; theo thời gian, các chất dinh dưỡng trong đất tươi sẽ dần dần tìm đến rễ cây.

Kích thước chậu: Mọi người có xu hướng đánh giá quá cao kích thước chậu cần thiết cho cây của họ, nghĩ rằng rễ sẽ “thoải mái” hơn với nhiều không gian hơn. Nói chung, chật chội một chút vẫn tốt hơn là lỏng lẻo. Lý do chính là: Bạn muốn rễ chiếm càng nhiều thể tích đất càng tốt để khi bạn làm ẩm đất, rễ sẽ tiếp cận được với độ ẩm. Nếu có những túi đất không có rễ, khu vực đó sẽ giữ ẩm lâu hơn. Bất cứ khi nào bạn có một môi trường luôn ẩm ướt và ôi thiu, sẽ có cơ hội cho vi khuẩn thối rễ sinh sôi.

Trong khi thay chậu cho cây bị dính rễ, điều quan trọng là phải nhẹ nhàng nới lỏng một số rễ bị rối. Vâng, một số trong số chúng sẽ bị gãy, nhưng chúng sẽ mọc lại mạnh mẽ hơn. Tốt nhất là thay chậu khi đất khô ráo.

1–2. Unpot the plant: If the pot is planted in a plastic nursery pot, you can squeeze the base of the pot as you gently pull the entire plant out. If the pot is rigid, you can use a small trowel to separate the root ball from the outer edges of the pot as you pull up the plant.
1–2. Rút cây ra: Nếu chậu được trồng trong chậu nhựa, bạn có thể bóp đáy chậu khi nhẹ nhàng kéo toàn bộ cây ra ngoài. Nếu chậu cứng, bạn có thể dùng bay nhỏ để tách bầu rễ ra khỏi mép ngoài của chậu khi kéo cây lên.
3. Check for any rotting roots—they’ll be dark brown or black and mushy. Remove these!
3. Kiểm tra xem có rễ thối rữa nào không—chúng sẽ có màu nâu sẫm hoặc đen và nhũn. Loại bỏ những thứ này!
4. Gently tease apart the root ball with a chopstick. As much as possible, avoid breaking roots, but don’t worry if you do. It’s more important that you untangle the root ball to give the roots a head start in establishing themselves in the new soil.
4. Nhẹ nhàng tách bóng gốc bằng đũa. Tránh làm gãy rễ càng nhiều càng tốt, nhưng đừng lo lắng nếu bạn làm vậy. Điều quan trọng hơn là bạn phải gỡ rối bầu rễ để giúp rễ bắt đầu tự thiết lập trong đất mới.
5. Cover the drainage hole with a piece of landscape fabric instead of a piece of broken clay pot. Just buy yourself one roll, and it should last you several years of plant parenthood. It’s cheap, lets water through, and who has pieces of broken clay pots lying around?
5. Che lỗ thoát nước bằng một mảnh vải (landscape fabric) thay vì một mảnh từ chậu đất sét vỡ. Chỉ cần mua cho mình một cuộn, và nó sẽ kéo dài cho bạn vài năm làm người chăm sóc cây. Nó rẻ, cho nước chảy qua, và ai có những mảnh chậu sành vỡ nằm xung quanh?
6–7. Fill the bottom of the pot with some soil and tamp it down gently so it is somewhat compressed. The height of this base layer should allow your plant to sit with its soil line about half an inch from the top of the pot. This will make watering more convenient, as you can allow the water to initially pool on the surface of the soil and let it gradually seep down, ensuring an even moisture distribution.
6–7. Đổ một ít đất vào đáy chậu và nén nhẹ để đất hơi nén lại. Chiều cao của lớp nền này phải cho phép cây của bạn ngồi cách đường đất cách miệng chậu khoảng nửa inch. Điều này sẽ giúp việc tưới nước trở nên thuận tiện hơn, vì ban đầu bạn có thể cho phép nước đọng lại trên bề mặt đất và để nước thấm dần xuống, đảm bảo độ ẩm phân bổ đồng đều.
8. Place the plant in the center of the pot. Using a small trowel/scoop, fill the pot with soil from the sides of the root ball. You can gently shake the pot to get the soil to settle around the roots—you want the soil to fill in the spaces between the roots
8.Đặt cây vào giữa chậu. Sử dụng một cái bay/muỗng nhỏ, đổ đầy đất từ ​​các mặt của bầu rễ vào chậu. Bạn có thể lắc nhẹ chậu để đất lắng xuống xung quanh rễ—bạn muốn đất lấp đầy khoảng trống giữa các rễ
9. Continue to fill and settle the soil until you reach the top of the pot. Then gently tamp down the soil. It should now sit at least a half inch below the rim of the pot. I’m using a curtain tie to hold up the foliage—makes it easier to see your soil line as you work!
9.Tiếp tục lấp đầy và lắng đất cho đến khi bạn đạt đến miệng chậu. Sau đó nhẹ nhàng nén đất xuống. Bây giờ nó sẽ nằm dưới mép nồi ít nhất nửa inch. Tôi đang sử dụng dây buộc rèm để giữ tán lá—giúp bạn dễ dàng nhìn thấy đường đất hơn khi làm việc!
10. If the soil level is even with or above the rim of the pot, proper watering will be an annoying task, since some water will roll off the soil surface, getting soil particles everywhere. Whenever you repot, it’s best to get the soil surface to sit a half inch or more below the rim of the pot. This gives the pooled water a chance to trickle down into the rest of the soil.
10.Nếu mức đất bằng hoặc cao hơn mép chậu, thì việc tưới nước đúng cách sẽ là một công việc khó chịu, vì một số nước sẽ lăn khỏi bề mặt đất, cuốn theo các hạt đất khắp nơi. Bất cứ khi nào bạn thay chậu, tốt nhất là nên để bề mặt đất thấp hơn nửa inch hoặc hơn so với mép chậu. Điều này giúp nước gộp có cơ hội chảy xuống phần còn lại của đất.
11. Bring the newly potted plant to the sink or a place where water can drain away, and water the plant thoroughly. Put the plant where it can see as much of the sky as possible but be shielded from the sun. You want the plant to get bright indirect light but not be burned by direct sun. By the next time this plant needs water, you can move it to its usual growing space.
11. Mang cây mới trồng trong chậu vào bồn rửa hoặc nơi có thể thoát nước và tưới nước thật kỹ cho cây. Đặt cây ở nơi nó có thể nhìn thấy bầu trời nhiều nhất có thể nhưng được che chắn khỏi ánh nắng mặt trời. Bạn muốn cây nhận được ánh sáng gián tiếp nhưng không bị cháy nắng trực tiếp. Vào lần tiếp theo cây này cần nước, bạn có thể chuyển nó đến không gian sinh trưởng thông thường của nó.

This mealy bug–infested jade plant went through a hard pruning, which will both get rid of many mealy bugs and encourage new growth—a win-win situation!


Xem thêm các phần khác của sách

Comments are closed.

0988110300
chat-active-icon