[Ebook Việt Hóa] New Plant Parent - Darryl Cheng, Chi Platycerium - Chi Ổ Phụng
[Ebook Việt Hoá] New Plant Parent (Darryl Cheng) – Phần 02 – Staghorn Fern (cây Ổ Rồng, Platycerium bifurcatum)
Th2
- Nguồn: [Ebook] New Plant Parent: Develop Your Green Thumb and Care for Your House-Plant Family – Darryl Cheng
- Biên tập: Dũng Cá Xinh (Tháng 01/2022)
- Dịch: Team Codai.net
English
Staghorn Fern
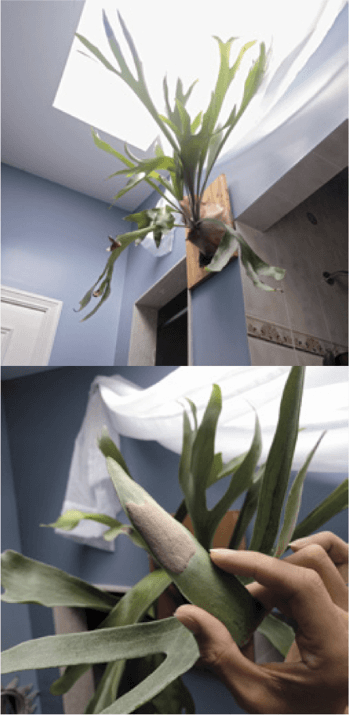
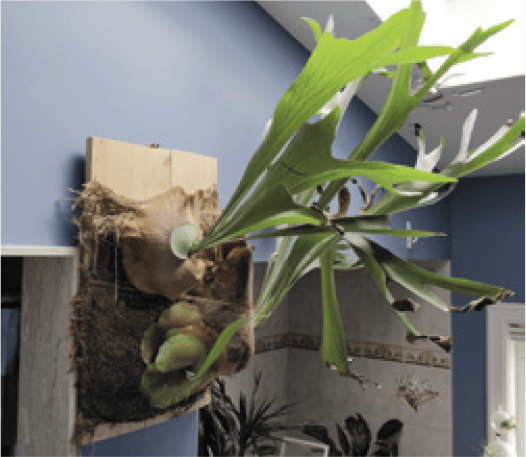
Like all members of the genus Platycerium, the staghorn fern (Platycerium bifurcatum) has two main parts: the fertile fronds, which can be dangling or upright, like hands reaching up for the sky, and the shield frond, or sterile frond, which grows around the base, forming a dome that covers the surface upon which the plant rests. When the plant matures in favorable conditions, the underside of the fertile fronds develop deep brown patches—these are the spores. And don’t fret about the shield frond becoming brown—the plant tends to put out a new one every few months during its growing season.
Survival strategy
I’m going to quote Michael Jackson here: “If you can’t feed your baby, then don’t have a baby.” A mounted staghorn fern will slowly die in typical “low light” conditions, that is, less than 100 foot-candles. Avoid the temptation to proudly mount one on the wall above your couch, away from any windows.
Growth strategy
Give it 300 foot-candles or more and you’ll enjoy a happy staghorn fern. A large window or a skylight is ideal, with daytime highs of 500–600 foot-candles. The plant will want to see as much of the open sky as possible but be protected from direct sun—one or two hours of direct sun is tolerable.
Soil management
In a pot, the staghorn fern will probably come in typical tropical plant soil (peat moss, perlite, maybe compost). Keep it aerated and evenly moist. When the plant is mounted on a board (instructions to follow) in a bed of sphagnum moss, the increased moisture-retention ability of the moss as compared to soil is counterbalanced by the increased rate of evaporation, since more of the planting medium is exposed to air. You can easily feel the moss to judge moisture—once the outer parts are crispy, it’s time to resoak the moss. If you wait longer—and you shouldn’t—the whole mound will feel like a dry sponge. Prior to watering, it’s helpful to loosen the sphagnum moss. You’ll have to be gentle but firm, as the moss tends to harden and become quite compacted. Some plant-care directions say to soak the entire board in a bathtub, but that’s too much of a hassle and really not necessary. If the mound of moss is small, you can simply lay the plant in a large sink or bathtub and pour water into the sphagnum moss until it is completely soaked through. Leave the plant for a few hours to let the excess water drip away, then put it back in its growing position. Whether or not you wet the fronds doesn’t really matter; what matters is that the planting medium should be evenly moistened. For my own plant, I run it under the shower at night and leave it to drip-dry overnight. By the following morning, the entire board can be put back up on the wall. Fertilize whenever you see new fronds growing.
Subjective life span
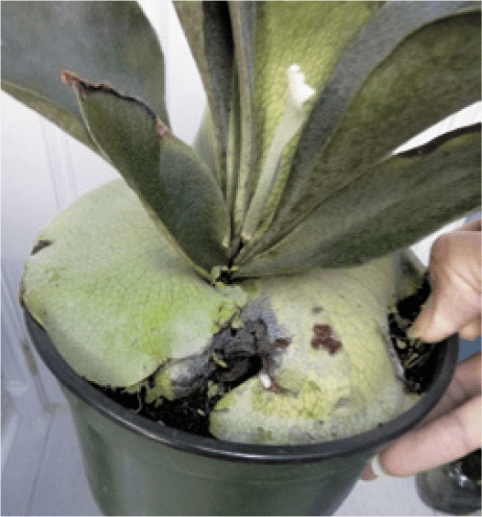
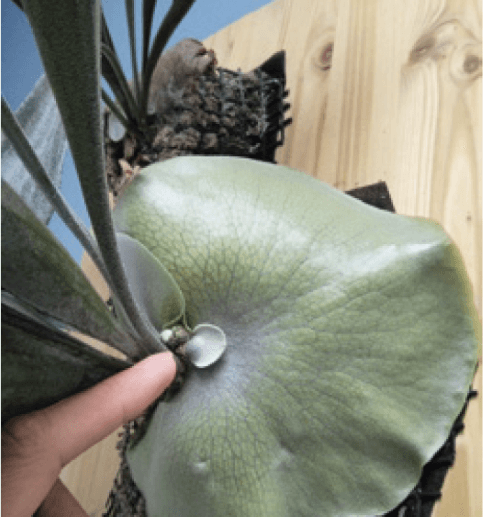
Staghorn ferns are long-lived, but there is a leaf progression of loss and replacement. On older fertile fronds, some yellowing begins somewhere in the middle of the leaf, then spreads to the rest of it. At this time, you should be able to pull it off from the base of the plant. After three years of my own plant growing under a skylight, I’d say it has stabilized to growing three to five new fertile fronds while losing three to five old ones each year. The sterile frond (or shield frond) grows to cover the base of the plant and is easily bruised. By the time this shield frond covers the entire base, it will begin to turn brown, which is natural. In favorable conditions, a staghorn fern will grow pups that you can either let grow together as a cluster or separate by root division.


Observations from Staghorn Fern Parenthood
Day 1
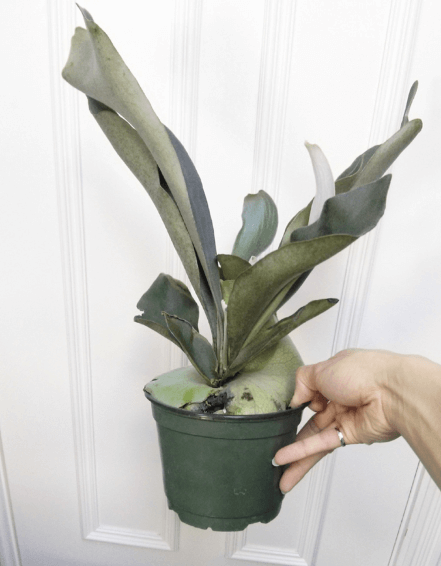
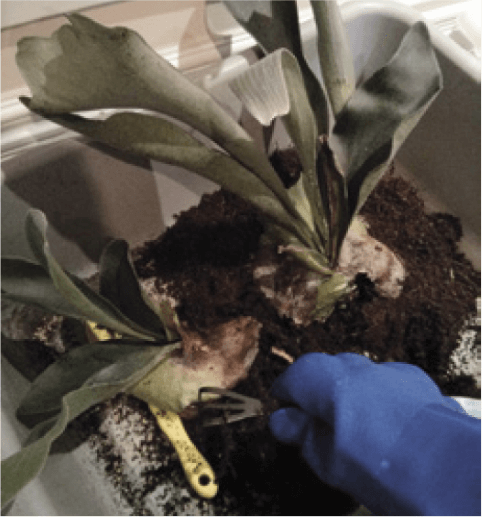
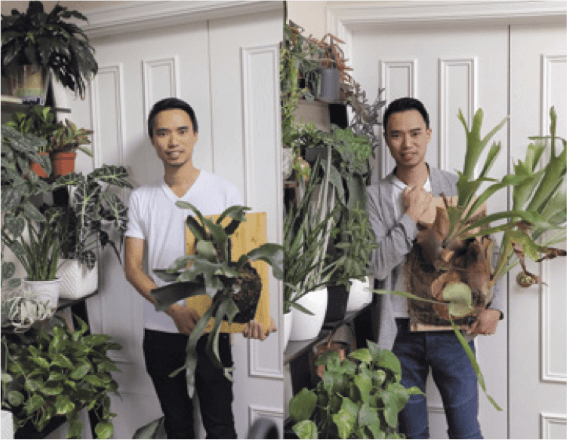
Bought this lovely staghorn fern in a 6-inch pot. The shield frond was a bit damaged, but so were all the other specimens. I picked out all these stowaway seedlings.
1 month
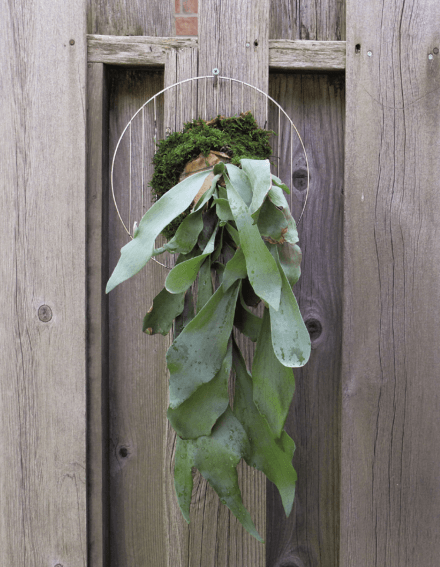
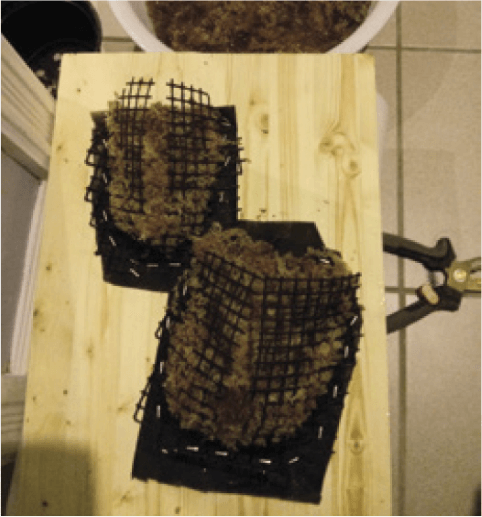
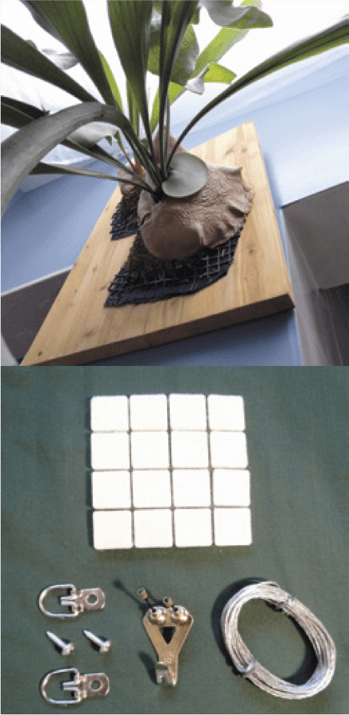
Let the mounting begin! Here’s a description of my materials:
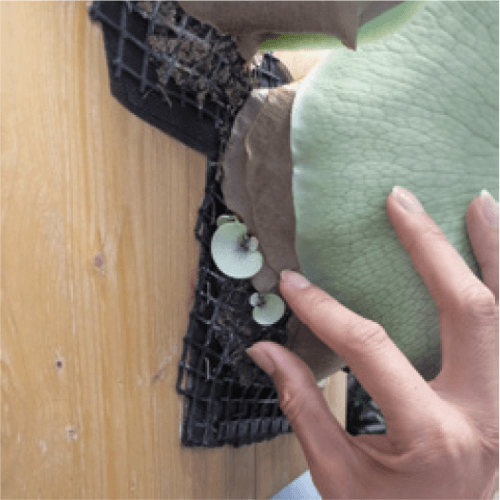
- Mounting board: The hardware store sells pine project boards for shelf-making. I cut one to size and treated it with a non-toxic varnish, thinking that it would protect the board from the high moisture of the sphagnum moss.
- Landscape fabric: I felt that a barrier between the board and the sphagnum moss would be good to have.
- Plastic mesh: I stapled pieces to the board to make little baskets. I probably should have made them a bit bigger.
- Sphagnum moss: From my research, you really have to pack this in tightly around the staghorn’s roots.
- Heavy-duty frame-mounting hardware: Soon, I’ll mount the hanging wire on the board and find a place to hang this plant trophy!
Regardless of your mounting process, you will damage the existing shield frond, so don’t get hung up on it.
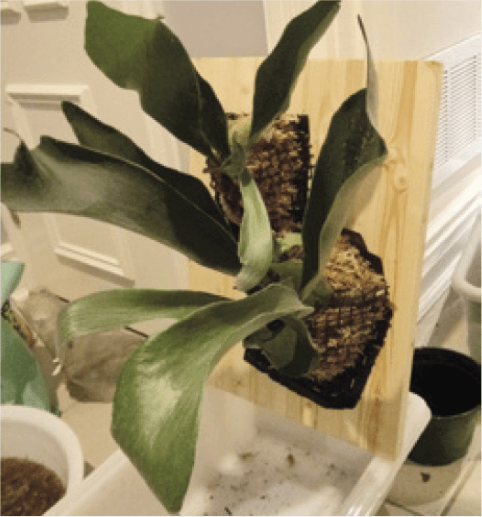
3 months
The first sign of the new shield frond!
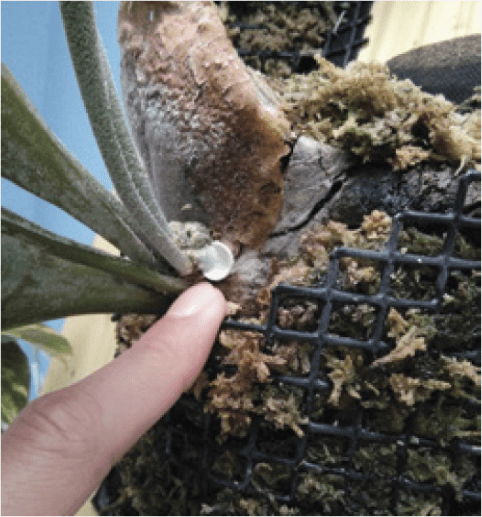
4 months
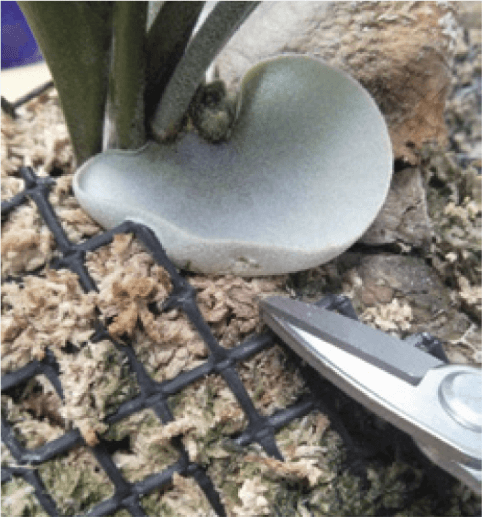
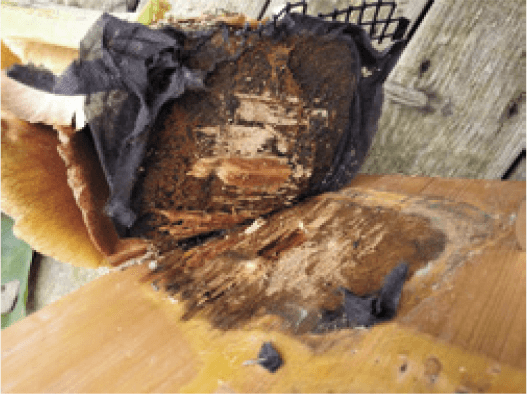
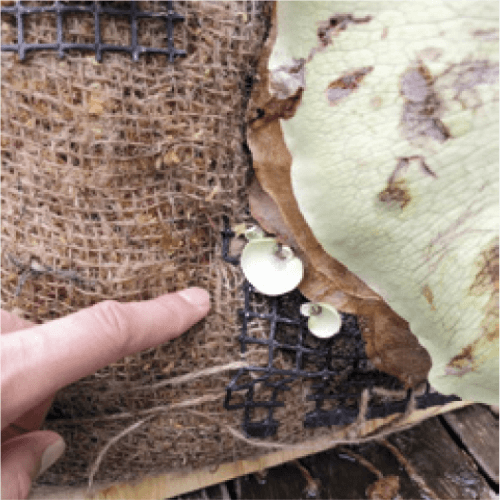
Remember how I said using the plastic mesh wasn’t the best idea? It’s because of how the shield frond grows tightly around its planting mound—it eventually pushed itself against the mesh. I did a little operating to remove pieces of the mesh, but the shield frond bruises like a peach! Still, the scars give the plant more character.
5 months
A second shield frond has started to grow!
1 year since mounting
The board has finally been mounted to the wall. I used standard picture-hanging hardware—D-rings, wood screws, and wire. The wall hook is rated for 50 pounds.
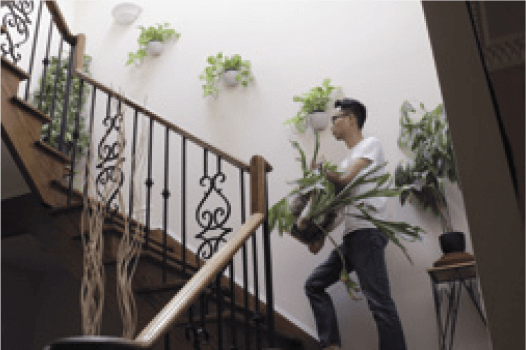
At this size, the most convenient way to water was to put the entire board into the shower stall and shower it with tepid water. I would leave the plant to drip-dry in the shower overnight, then place it back on the wall the next day.
2 years since mounting
The staghorn has passed plant puberty—the fuzzy brown patch on the undersides of the fingerlike fronds represents spores!
2 years, 4 months
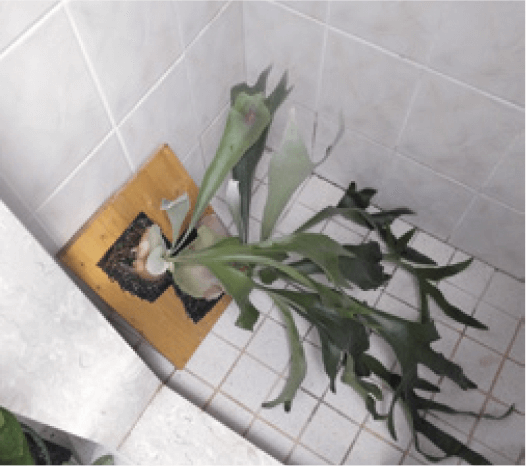
Even with its limited space, the staghorn is starting to push out some babies. Knowing how large they can get, I decided it would be wise to remount the plant with a larger mound of sphagnum moss.

2 years, 8 months
Remember the three baby staghorns that were growing out from the side? They were so close together that only one managed to put out a fertile frond, while the others were buried.
3 years since mounting
The Platycerium has grown some magnificent fronds that are definitely antlerlike, living up to its name.
Tiếng Việt
Đang cập nhật
