[Ebook] Indoor Gardening Houseplants 2016 USA Magazine 2016 USA, Indoor Gardening Houseplants Magazine
[Ebook] Indoor Gardening Houseplants 2016 USA Magazine – XVII – Dirt-Cheap Plants (Cây rẻ tiền và phổ thông)
Th2
- Dịch: Huyền Nguyễn
ENGLISH
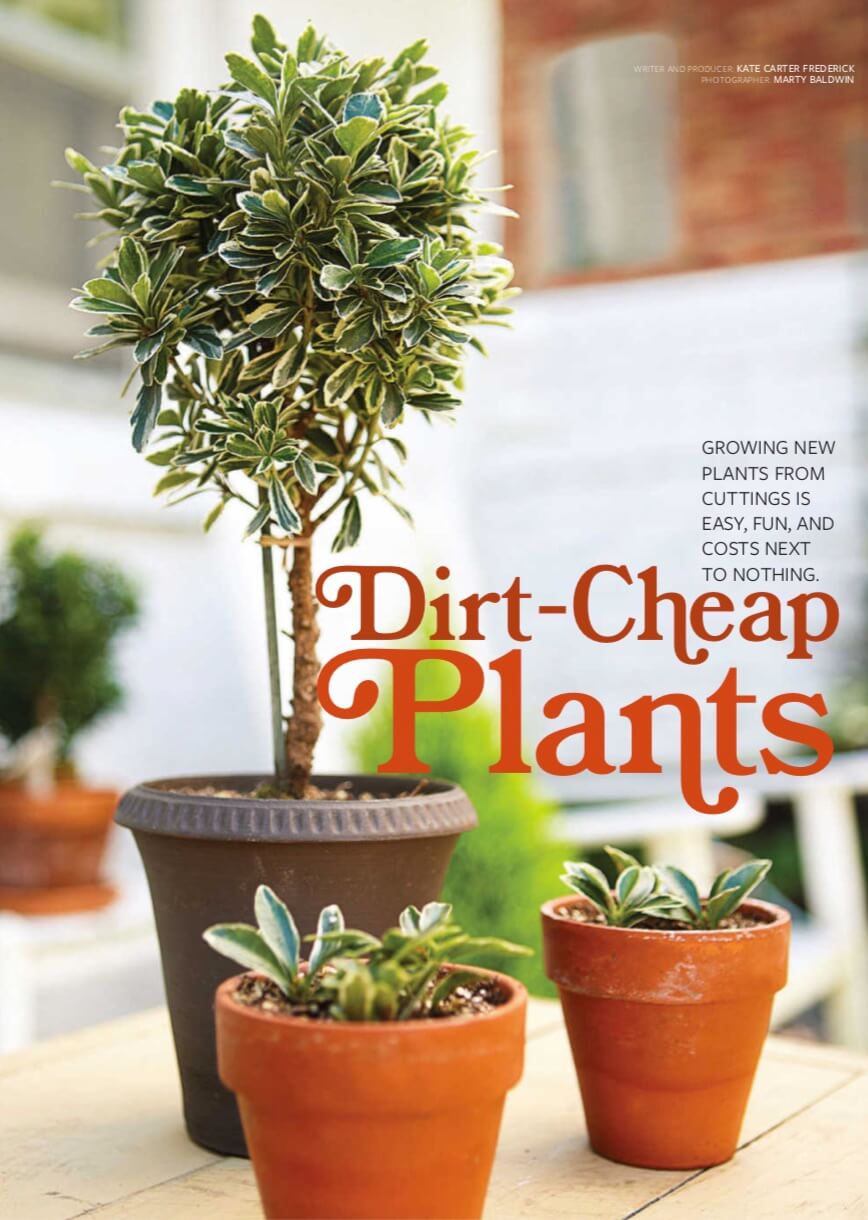
GROWING NEW PLANTS FROM CUTTINGS IS EASY, FUN, AND COSTS NEXT TO NOTHING.
- WRITER AND PRODUCER: KATE CARTER FREDERICK
- PHOTOGRAPHER: MARTY BALDWIN
Feature image: One mother plant, Euonymus japonicus ‘Microphyllus Aureovariegatus’ topiary, produced several passalong plants for friends. This topiary’s neat form requires regular snipping, making it a prime candidate for semiripe cuttings.
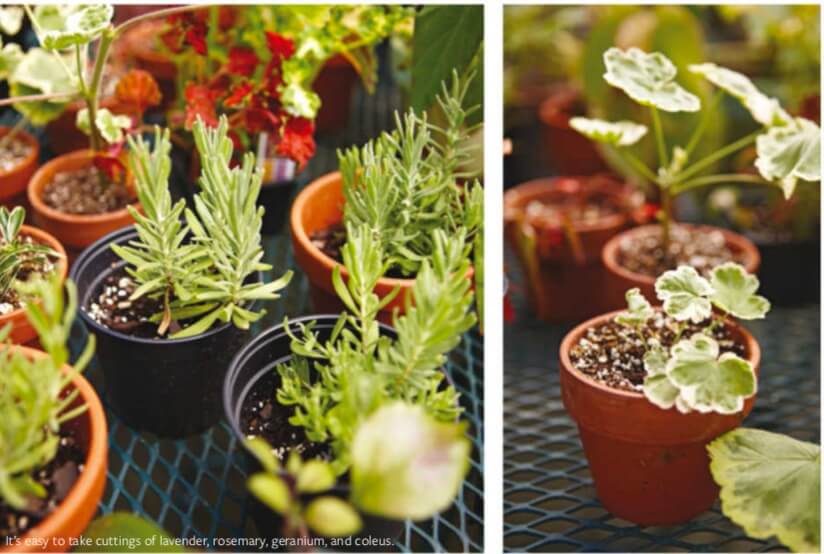
- It’s easy to take cuttings of lavender, rosemary, geranium, and coleus.
- Above right: When mature, the fancy-leaf geranium ‘Wilhelm Langguth’ (Pelargonium ×hortorum) will have silvery green leaves with creamy white edges and double scarlet blooms. Plant this annual in ordinary soil and fertilize lightly. Too much fertilizer promotes excessive foliage growth and sparse flowers.
Cut and Cut Again
Follow the step-by-step guide, opposite, to this rewarding means of multiplying some of your favorite plants, and next thing you know you’ll be sharing loads of freebies with friends and family. Take cuttings throughout the summer and nursery them outdoors to garner an ongoing supply of new plants.
Geraniums—including the fancy-leaf ‘Wilhelm Langguth’ shown on pages 115 and 117—are among the easiest plants you can duplicate with stem cuttings. Prepare nursery containers by filling small pots or cell packs with premoistened soilless mix, whether you make it and keep some handy or start with packaged seed-starting mix. Cuttings may rot if placed in soil because it holds too much moisture.
While your cuttings are developing, water the soilless medium regularly to keep it damp but not wet. When the cuttings show new growth, remove their plastic covering. In another week or two, your new plants should be ready for transplanting into a larger container. It may take a few weeks or more for the youngsters to reach garden-ready size, depending on the type of plant.
How to Make Stem Cuttings
Materials
- Small pots or cell packs
- Soilless seed-starting mix
(equal parts peat moss, perlite, vermiculite, sterilized coarse sand) - Mother plant
- Small knife
- Rooting hormone powder
- Chopstick or pencil
- Plastic bag and twist tie
- Water
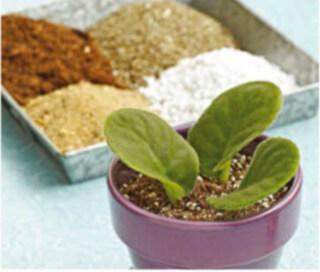
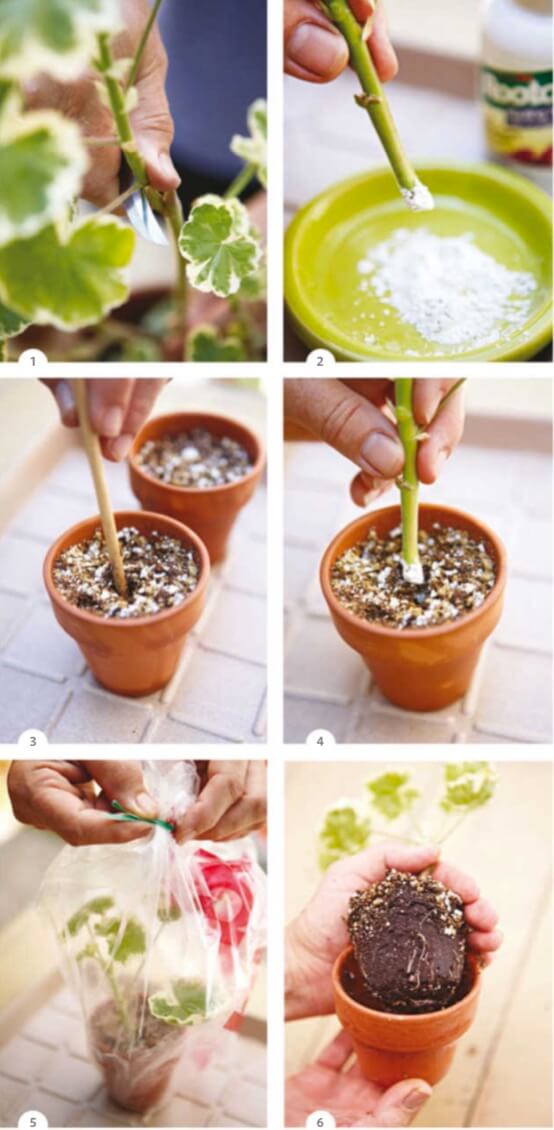
Step 1
- Prepare nursery containers by filling small pots or cell packs with premoistened soilless medium. Potting soil and regular potting mix hold too much moisture. Select healthy, nonflowering stems from the mother plant for cuttings. Use a clean, sharp knife to cut a 3- to 4-inch shoot below a leaf node (the spot where a leaf emerges from a stem as shown). Cut off the bottom leaves of the shoot and snip off any flowers or buds. This prompts the plant to use its energy for rooting rather than growing leaves or flowers.
Step 2
- Encourage root growth by dipping the cut end into powdered rooting hormone. Cover any cut parts with the powder.
Step 3
- Use a chopstick or a pencil to poke a planting hole in the damp soilless medium.
Step 4
- Slide the cutting into the planting hole without knocking off the rooting powder. Gently press the medium against the stem.
Step 5
- Slip a plastic bag over the nursery container and twist tie the bag shut to create a humid, greenhouse like environment that will boost the cutting’s growth. Set cuttings in bright, indirect light. Open and water as needed to keep the medium damp.
Step 6
- A few weeks after taking a cutting, check its root development by gently tipping the container on its side and tapping out the soil and rootball. A new plant will be ready for transplanting when roots appear strong and have begun to fill out the inside of the nursery pot.
TIẾNG VIỆT
TRỒNG CÂY MỚI BẰNG PHƯƠNG PHÁP GIÂM CÀNH DỄ DÀNG, VUI VẺ VÀ GẦN NHƯ KHÔNG TỐN CHI PHÍ.
- TÁC GIẢ: KATE CARTER FREDERICK
- ẢNH: MARTY BALDWIN
Hình ảnh đại diện: Một cây mẹ, cây cảnh Euonymus japonicus ‘Microphyllus Aureovariegatus’, đã tạo ra một số cây con để có thể chia sẻ cho bạn bè. Hình thức gọn gàng của cây cảnh này đòi hỏi phải cắt tỉa thường xuyên, do vậy đây là loài cây phù hợp cho phương pháp giâm cành.
- Thật dễ dàng để giâm cành hoa Oải Hương (lavender), cây Hương Thảo (rosemary), cây Phong Lữ (geranium) và cây Lá Kim (coleus).
- Ảnh trên bên phải: Khi trưởng thành, cây Phong Lữ lá lạ mắt ‘Wilhelm Langguth’ (Pelargonium × hortorum) sẽ có lá màu xanh bạc với viền màu trắng kem và những bông hoa kép màu đỏ tươi. Trồng cây này hàng năm trong đất thông thường và bón phân nhẹ. Quá nhiều phân bón thúc đẩy sự phát triển quá mức của tán lá và khiến hoa thưa thớt.
Cắt tỉa
Làm theo hướng dẫn từng bước, với phương pháp bổ ích này, bạn không chỉ nhân giống một số loại cây yêu thích mà còn có thể chia sẻ vô số cây miễn phí với bạn bè và gia đình. Hãy giâm cành trong suốt mùa hè và ươm chúng ngoài trời để thu được cây mới liên tục.
Phong Lữ (Geraniums), bao gồm cả giống ‘Wilhelm Langguth’ có chiếc lá lạ mắt được trình bày trên các trang 115 và 117, là một trong những loài cây dễ dàng nhân giống bằng cách giâm cành. Chuẩn bị các thùng ươm bằng cách đổ hỗn hợp không đất đã ủ sẵn vào các chậu nhỏ hoặc túi chứa ô, bạn có thể tự làm hỗn hợp hoặc mua hỗn hợp ươm hạt giống đã đóng gói. Hom có thể bị thối nếu đặt trong đất vì đất giữ quá nhiều ẩm.
Trong khi cành giâm của bạn đang phát triển, hãy tưới nước thường xuyên cho môi trường không đất để giữ ẩm nhưng không ướt. Khi cành giâm có dấu hiệu mọc mới, hãy loại bỏ lớp nhựa che phủ của chúng. Trong một hoặc hai tuần nữa, cây mới của bạn sẽ sẵn sàng để trồng vào một thùng lớn hơn. Có thể mất một vài tuần hoặc hơn để những cây non đạt đến kích thước sẵn sàng xuất vườn, tùy thuộc vào loại cây.
Làm thế nào để giâm cành?
Vật liệu
- Chậu nhỏ hoặc khay ô
- Hỗn hợp gieo hạt không đất (thành phần của rêu than bùn, đá trân châu, đá vermiculite và cát thô đã khử trùng bằng nhau)
- Cây mẹ
- Dao nhỏ
- Bột kích thích ra rễ
- Đũa hoặc bút chì
- Túi nhựa và dây buộc
- Nước
Bước 1
- Chuẩn bị thùng ươm bằng cách đổ đầy hỗn hợp không đất đã ủ sẵn vào các chậu nhỏ hoặc túi chứa ô. Đất trồng trong bầu và hỗn hợp bầu thông thường giữ quá nhiều độ ẩm. Chọn những thân cây khỏe mạnh, không ra hoa từ cây mẹ để giâm cành. Dùng một con dao sạch và sắc để cắt một chồi dài 3 đến 4 inch bên dưới nút lá (vị trí mà lá nhô ra từ thân như hình minh họa). Cắt bỏ các lá dưới cùng của chồi và cắt bỏ bất kỳ hoa hoặc chồi nào. Điều này thúc đẩy cây sử dụng năng lượng của nó để ra rễ thay vì phát triển lá hoặc hoa.
Bước 2
- Kích thích sự phát triển của rễ bằng cách nhúng phần đầu đã cắt vào thuốc kích thích ra rễ dạng bột. Phủ bột lên các phần đã cắt.
Bước 3
- Dùng đũa hoặc bút chì chọc lỗ trồng trên giá thể không ẩm.
Bước 4
- Trượt vết cắt vào lỗ trồng mà không làm rơi bột kích thích ra rễ. Nhẹ nhàng ấn môi trường vào thân cây.
Bước 5
- Trùm một túi nhựa lên thùng ươm và xoắn lại, buộc chặt túi lại để tạo ra một môi trường ẩm ướt giống như nhà kính sẽ thúc đẩy sự phát triển của cành giâm. Đặt hom ở nơi có ánh sáng gián tiếp, sáng sủa. Mở và tưới nước khi cần thiết để giữ ẩm vừa phải.
Bước 6
- Một vài tuần sau khi giâm cành, hãy kiểm tra sự phát triển của rễ bằng cách nhẹ nhàng nghiêng thùng chứa ở phía bên của nó và lấy đất và rễ cây ra. Một cây mới sẽ sẵn sàng để trồng khi rễ đã phát triển mạnh và lấp đầy bên trong bầu ươm.
