[Ebook] Indoor Gardening Houseplants 2016 USA Magazine 2016 USA, Indoor Gardening Houseplants Magazine
[Ebook] Indoor Gardening Houseplants 2016 USA Magazine – VI – Forcing Bulbs (Thúc củ ra hoa)
Th2
- Dịch: Huyền Nguyễn
ENGLISH
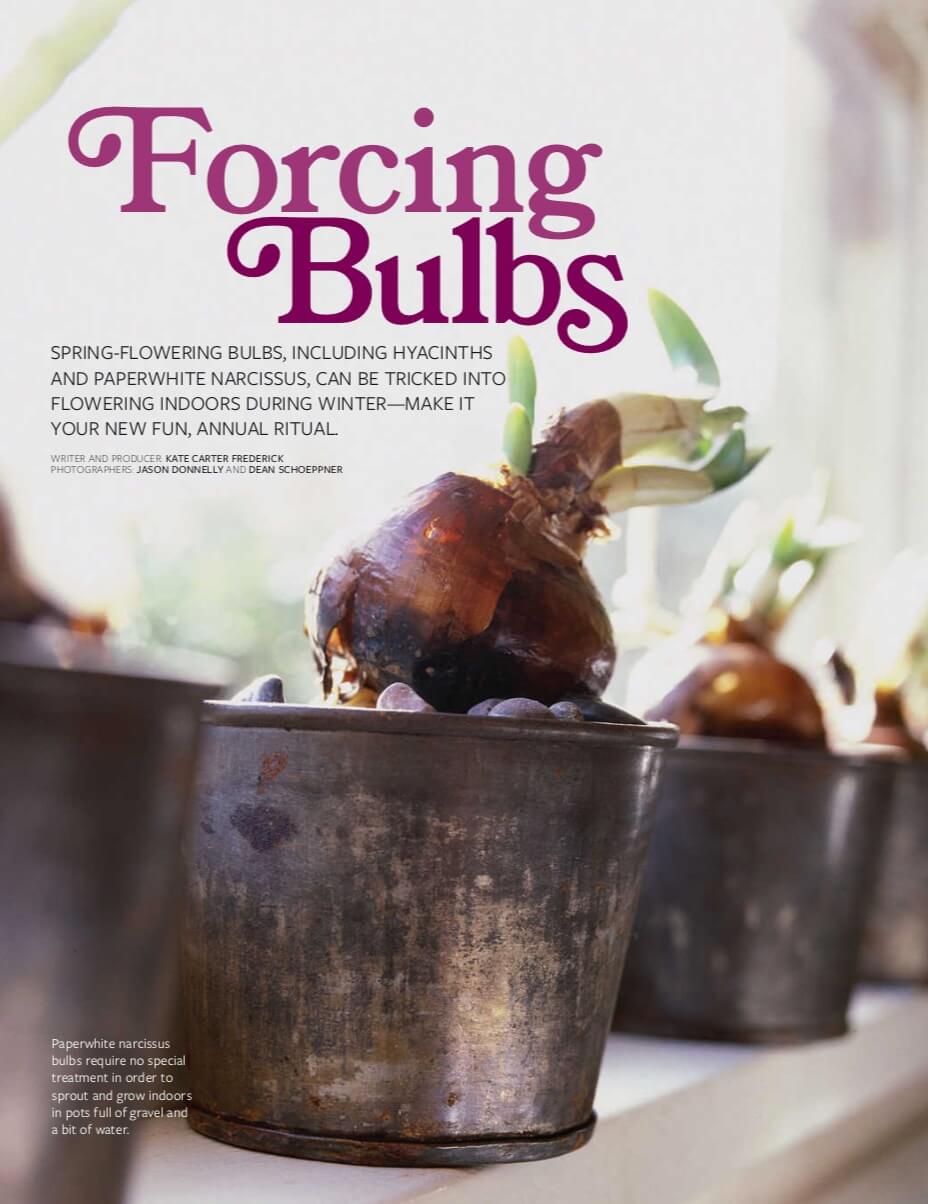
SPRING-FLOWERING BULBS, INCLUDING HYACINTHS AND PAPERWHITE NARCISSUS, CAN BE TRICKED INTO FLOWERING INDOORS DURING WINTER—MAKE IT YOUR NEW FUN, ANNUAL RITUAL.
- WRITER AND PRODUCER: KATE CARTER FREDERICK
- PHOTOGRAPHERS: JASON DONNELLY AND DEAN SCHOEPPNER
Breath of Spring
Slender canning jars fit a windowsill garden. Each one holds a hyacinth bulb inside a tepee of flowering branches. Stand a half-dozen forsythia and pussy willow branches in each jar and tie the branch tops with a bit of raffia to form a tepee. Add enough water to each jar to sustain the bulb and the branches.
Force bulbs en masse in a small bucket or similar container and move them into displays when the green leaf tips have emerged. For this display, each bulb was lifted from the forcing container and roots trimmed to fit into the jar. Trim no more than 1/3 of the roots.
Materials:
- Quilted-glass jelly jars
- Spring-flowering branches
- Hyacinth bulbs
- Raffia

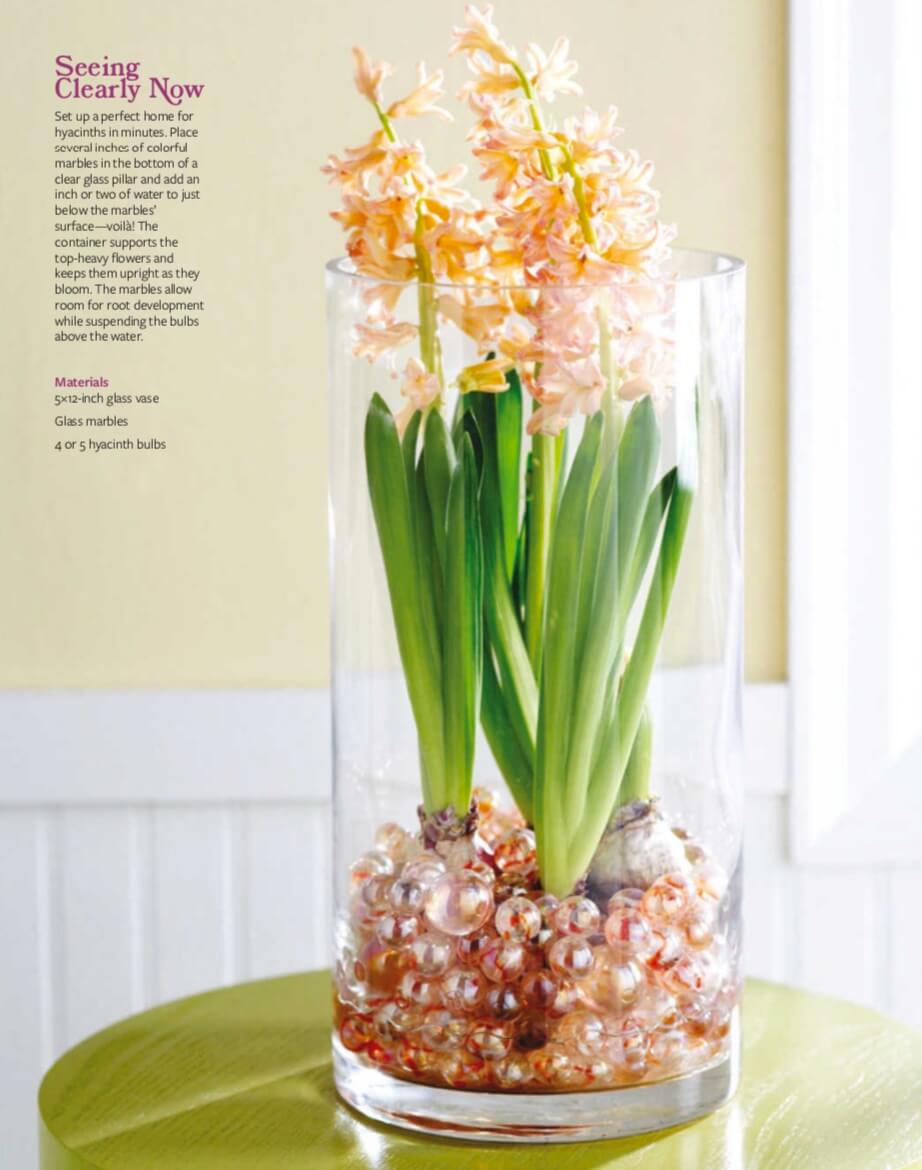
Seeing Clearly ?Now
Materials
- 5×12-inch glass vase
- Glass marbles
- 4 or 5 hyacinth bulbs
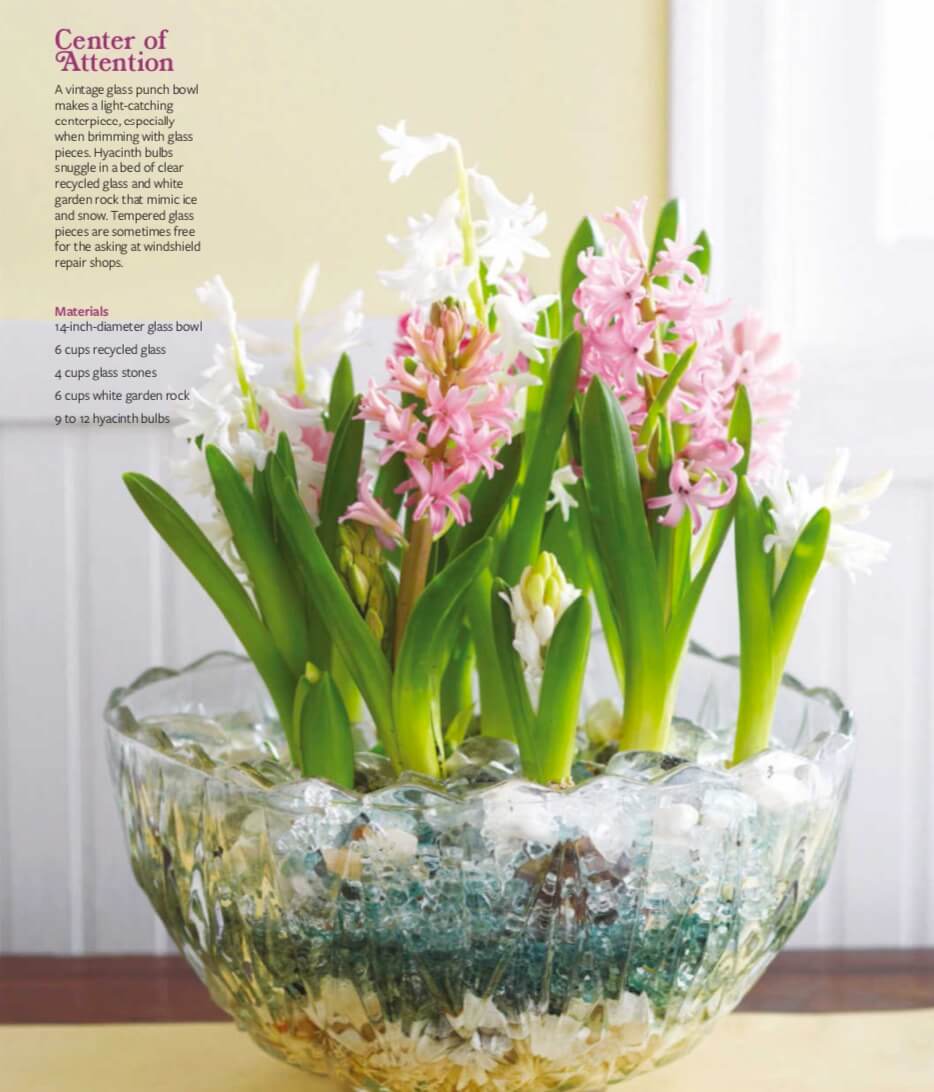
Center of Attention
A vintage glass punch bowl makes a light-catching centerpiece, especially when brimming with glass pieces. Hyacinth bulbs snuggle in a bed of clear recycled glass and white garden rock that mimic ice and snow. Tempered glass pieces are sometimes free for the asking at windshield repair shops.
Materials
- 14-inch-diameter glass bowl
- 6 cups recycled glass
- 4 cups glass stones
- 6 cups white garden rock
- 9 to 12 hyacinth bulbs
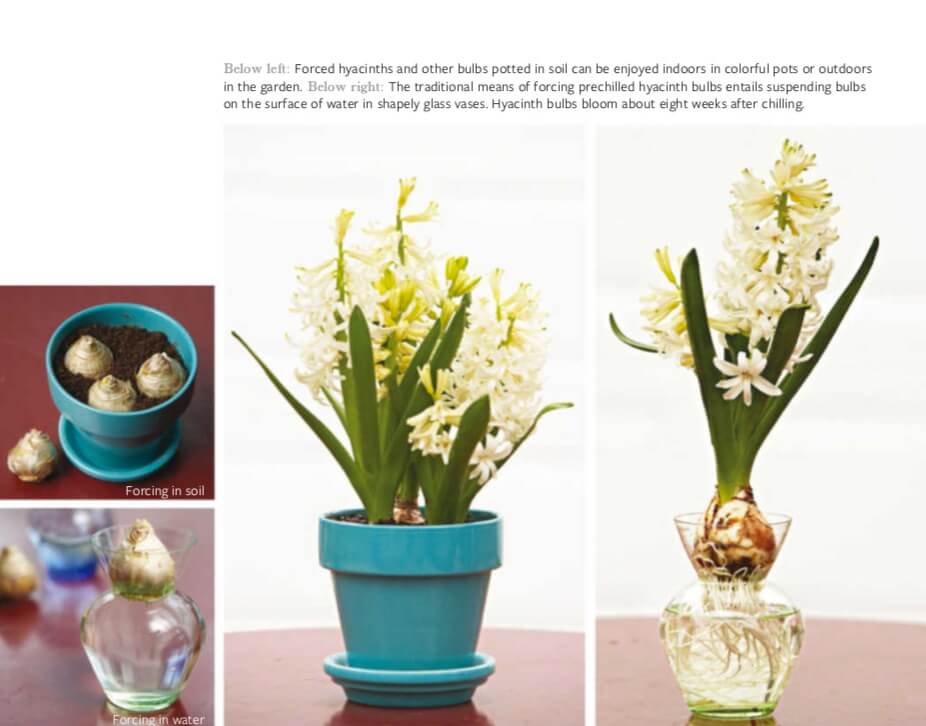
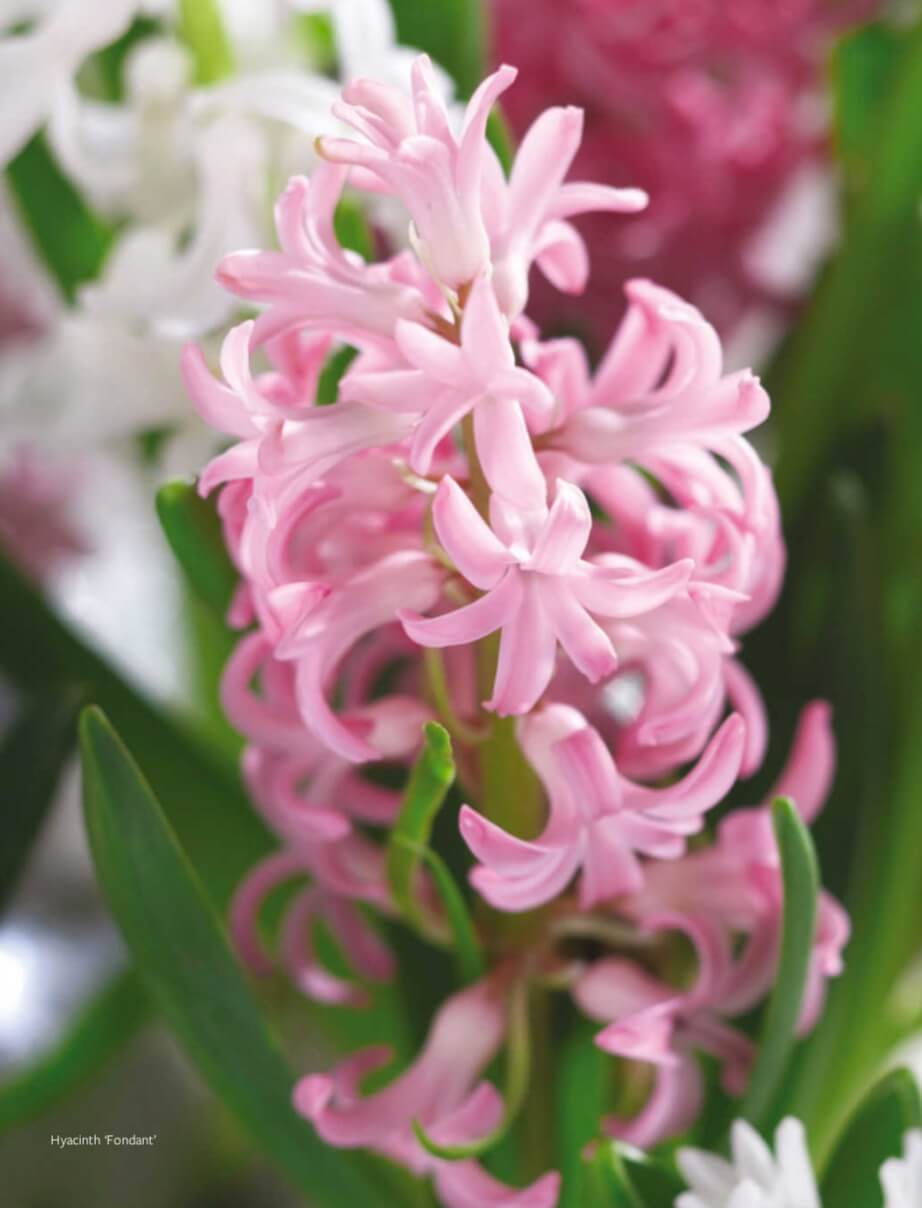
Prechilling and Forcing Hyacinth Bulbs
Buy prechilled hyacinth bulbs at a garden retail outlet or prechill them as well as other hardy, spring-flowering bulbs, such as Narcissus ‘Tête-à-Tête’, grape hyacinths, Fritillaria, and crocuses. Hardy bulbs can be forced into bloom only once. After that, commit the bulbs to compost or plant them outdoors with a handful of bulb food in late spring and let the foliage wither naturally. Follow these steps:
Choose good bulbs
- Purchase bulbs from a garden center or mail- order source. Choose plump, firm bulbs. Hyacinth blooms are intensely fragrant; other flowering bulbs, such as some daffodils and grape hyacinths, are not.
Chill out
- Place your bulbs in a paper bag. Count ahead 12 to 14 weeks on a calendar and write that date and the type of bulb on the bag. Research other types of bulbs online to determine their chilling time. Store the bag of bulbs in the refrigerator away from apples or other fruits, which produce a gas that can cause the bulbs to rot. After 12 to 14 weeks of chilling, it’s time to trick your hyacinth bulbs into behaving as if spring has come. Your bulbs will most likely develop roots and bloom in about eight more weeks.
How to plant
- Plant your bulbs in a pot of soil, nestling them together. Cover the bulbs at least half way from their bottoms, leaving their tips poking out of the soil. Or force a bulb in water by placing it in a shapely vase that supports the base of the bulb and adding water until it barely reaches the bottom of the bulb. Force multiple bulbs in a watertight container that holds 3 inches of gravel and an inch or two of water. Avoid immersing the bulbs in water because they will rot. Add a tablespoon of activated charcoal to help keep the water fresh longer.
Transition time
- Place the pot, vase, or watertight container in a cool room out of direct sunlight. After several weeks, the bulbs will begin to show signs of growth that resemble little green noses. Add water as needed only to dampen the soil or reach the developing roots.
Ready to flower
- Move the pot, vase, or other container into a warmer room with more light. Within a few more weeks, your bulbs will be ready for gentle transplanting into pretty arrangements. To use potted bulbs in arrangements, unpot them and gently tug their roots apart. Rinse any soil off of the roots.
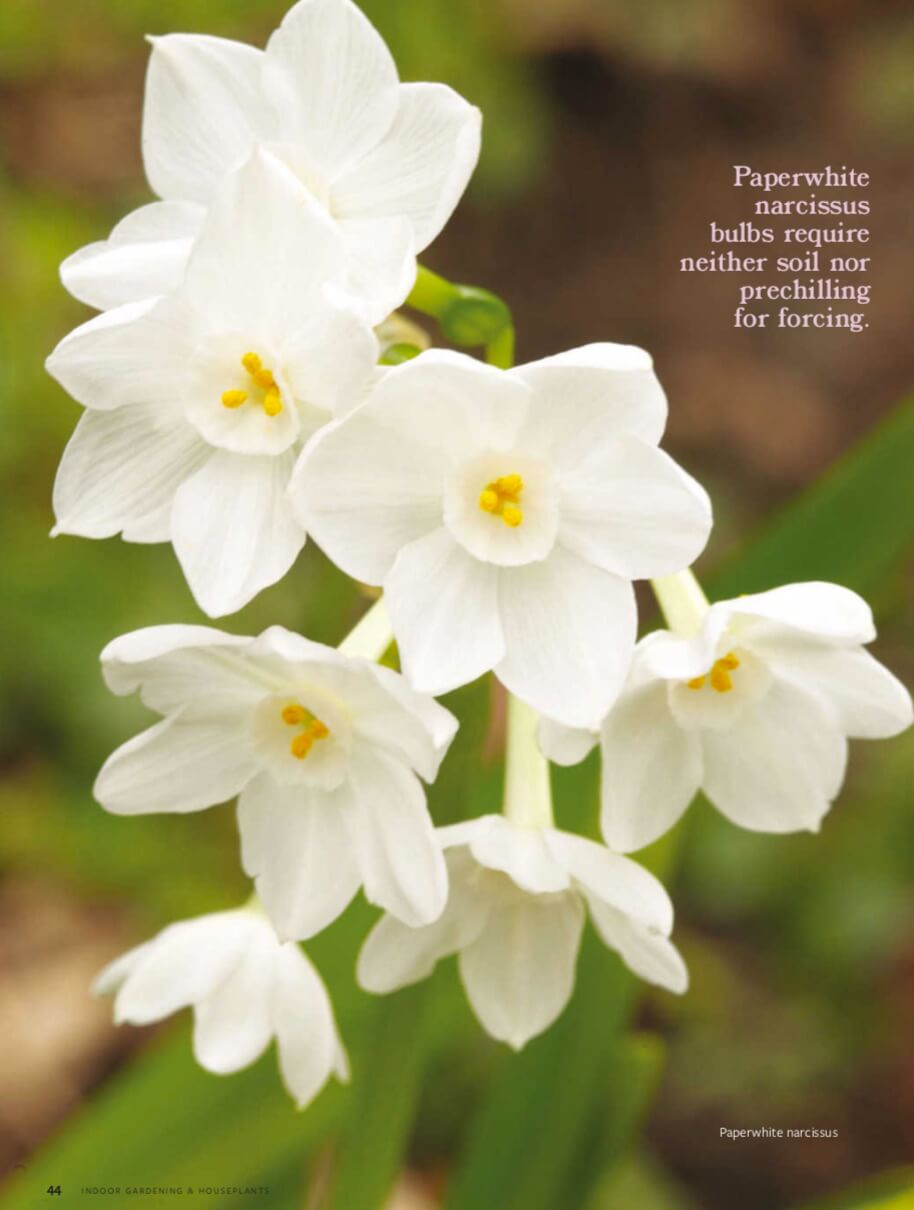
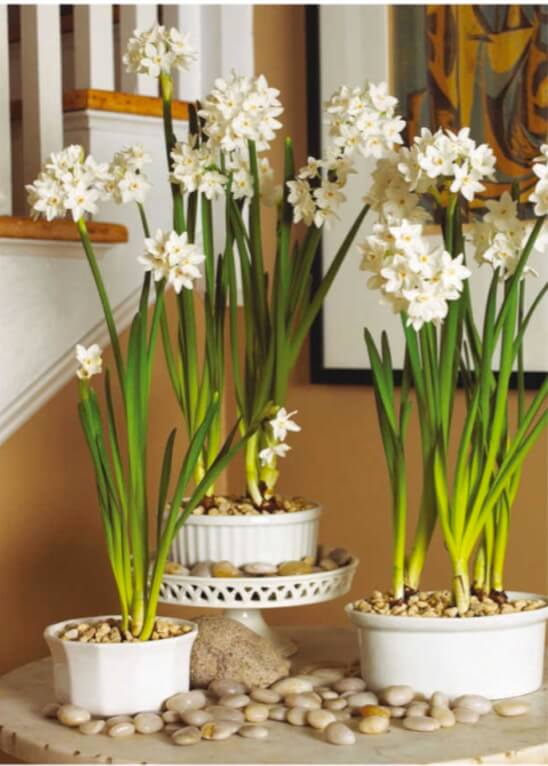
How to Force Paperwhite arcissus
Paperwhite narcissus bulbs require neither soil nor prechilling for forcing. Start bulbs anytime from early fall to midwinter for blooming within three to six weeks. Use a container that holds a single bulb or a handful. Plant paperwhites in a potting medium of pebbles, glass marbles, sand or potting mix. Multiple containers grown at intervals create an ongoing display of intensely scented flowers.
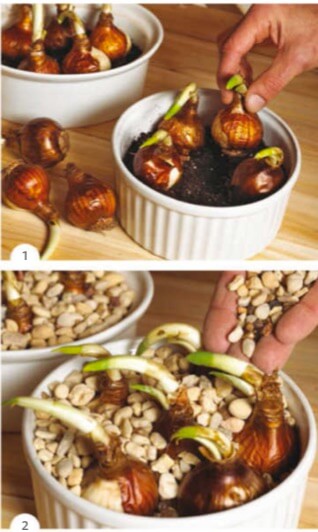
Step 1
Cover the bottom of a watertight container
with gravel 2-3 inches deep. Substitute potting mix for gravel if desired. Snuggle the narcissus bulb bases into the pebbles with their pointed ends facing up.
Step 2
Cover the bulbs up to their necks with pebbles. The tips of the bulbs should remain above the gravel. Add enough water to reach the bottoms of the bulbs— about 1 inch deep in gravel or until the potting mix is moistened. To maximize blooms, set the container in a cool (40°F to 60°F) place with bright light.
TIẾNG VIỆT
CÁC CỦ HOA MÙA XUÂN, BAO GỒM HOA TIÊN ÔNG (HYACINTH) VÀ HOA THỦY TIÊN (PAPERWHITE NARCISSUS), CÓ THỂ ĐƯỢC TRỒNG TRONG MÙA ĐÔNG. HÃY COI ĐÓ LÀ NIỀM VUI MỚI CỦA BẠN VÀ THỰC HIỆN THƯỜNG XUYÊN HÀNG NĂM NHÉ!
- TÁC GIẢ: KATE CARTER FREDERICK
- ẢNH: JASON DONNELLY VÀ DEAN SCHOEPPNER
Hơi thở của mùa xuân
Những chiếc lọ đóng hộp mảnh mai phù hợp với một khu vườn bên cửa sổ. Mỗi lọ được đặt một củ lục bình đang trổ một cành hoa. Cho cành lá kim tước và dương liễu vào mỗi lọ và buộc các ngọn cành bằng sợi cọ tự nhiên (raffia) để tạo thành hình lều. Thêm đủ nước vào mỗi bình để nuôi dưỡng củ và cành hoa.
Buộc chặt củ vào một cái xô nhỏ hoặc chậu chứa và chuyển chúng vào nơi trưng bày khi ngọn lá xanh đã nhú lên. Đối với cách trưng bày này, mỗi củ được nhấc ra khỏi chậu và các rễ được cắt tỉa để vừa với bình. Cắt tỉa không quá 1/3 số rễ.
Vật liệu:
- Lọ thạch thủy tinh chần bông
- Cành hoa mùa xuân
- Củ Lục Bình
- Sợi cọ tự nhiên (raffia)
Các bước cụ thể
Vật liệu:
- Bình thủy tinh 5 × 12 inch
- Viên bi thủy tinh
- 4 hoặc 5 củ Lục Bình
Trung tâm của sự chú ý
Một chiếc bát đục lỗ bằng thủy tinh cổ điển tạo nên một tâm điểm bắt sáng, đặc biệt là khi được trang trí bằng những mảnh thủy tinh. Củ Lục Bình ôm gọn trong một chiếc bát thủy tinh tái chế trong suốt và đá trắng trong vườn mô phỏng băng và tuyết. Các miếng kính cường lực đôi khi được tặng miễn phí tại các cửa hàng sửa chữa kính chắn gió.
Vật liệu:
- Bát thủy tinh đường kính 14 inch
- 6 cốc thủy tinh tái chế
- Đá thủy tinh 4 ly
- Đá trắng sân vườn 6 ly
- 9 đến 12 củ Lục Bình
Sơ chế và cố định các củ Lục Bình
Mua củ Lục Bình đã được sơ chế sẵn hoặc cắt sẵn cũng như các củ có hoa mùa xuân cứng khác tại một cửa hàng bán lẻ, chẳng hạn như Thủy Tiên ‘Tête-à-Tête’ (Narcissus ‘Tête-à-Tête), hoa Tiên Ông (grape hyacinths), cây Triết Bối Mẫu (Fritillaria) và hoa Nghệ Tây (crocuse). Những củ cứng chỉ có thể nở hoa một lần. Sau đó, đem củ ủ hoặc trồng ngoài trời với một lượng phân bón cho củ vào cuối mùa xuân và để các tán lá khô héo tự nhiên. Làm theo các bước sau:
Chọn củ tốt
- Mua củ từ trung tâm làm vườn hoặc nguồn đặt hàng qua đường bưu điện. Chọn những củ căng mọng, chắc. Hoa Lục Bình có mùi thơm nồng nàn, trong khi các củ có hoa khác như hoa Thủy Tiên vàng (daffodil) và hoa Tiên Ông (grape hyacinths) thì không.
Làm lạnh
- Đặt củ vào túi giấy. Dánh dấu 12 đến 14 tuần trên lịch và ghi ngày đó và loại củ trên túi. Nghiên cứu về các loại củ khác trên mạng để xác định thời gian làm lạnh của chúng. Cất túi củ trong tủ lạnh tránh xa táo hoặc các loại trái cây khá vì chúng tạo ra khí có thể làm thối củ. Sau 12 đến 14 tuần làm lạnh, đã đến lúc đánh lừa các củ Lục Bình của bạn phát triển như thể mùa xuân đã đến. Củ của bạn rất có thể sẽ phát triển rễ và nở hoa trong khoảng tám tuần nữa.
Cách trồng
- Trồng các củ hoa vào một chậu đất, đặt chúng sát nhau. Đặt củ hoa cách đáy ít nhất một nửa chiều cao của chậu để phần ngọn của chúng nhô ra khỏi đất. Hoặc ép củ hoa vào nước bằng cách đặt củ hoa vào một chiếc bình có hình dáng phù hợp với đế của củ hoa và thêm nước cho đến khi ngập gần đáy củ. Cố định nhiều củ vào một thùng kín nước chứa 3 inch sỏi và một hoặc hai inch nước. Tránh ngâm củ vào nước vì chúng sẽ bị thối. Thêm một thìa than hoạt tính để giúp nước ngọt lâu hơn.
Thời gian chờ đợi
- Đặt chậu, bình hoặc thùng kín nước trong phòng mát, tránh ánh nắng trực tiếp. Sau vài tuần, các củ sẽ bắt đầu có dấu hiệu phát triển với những chiếc búp nhỏ màu xanh lá cây. Chỉ bổ sung nước khi cần thiết để làm ẩm đất hoặc để nước thấm vào rễ đang phát triển.
Sẵn sàng cắm hoa
- Di chuyển chậu, bình hoa hoặc vật chứa khác vào một căn phòng ấm hơn với nhiều ánh sáng hơn. Trong vòng vài tuần nữa, các củ của bạn sẽ sẵn sàng để trưng bày. Để sắp xếp các củ hoa trong chậu, bạn hãy lấy chúng ra và tách nhẹ các rễ của chúng. Rửa sạch đất bám trên rễ.
Làm thế nào để cố định củ hoa Thủy Tiên trắng (Paperwhite arcissus)
Củ Thủy Tiên trắng không cần đất cũng như không cần mài trước để cố định. Trồng củ bất cứ lúc nào từ đầu mùa thu đến giữa mùa đông để củ nở hoa trong vòng ba đến sáu tuần. Sử dụng hộp chứa một củ duy nhất hoặc một số ít củ hoa. Trồng hoa Thủy Tiên trắng trong bầu đất gồm sỏi, bi thủy tinh, cát hoặc hỗn hợp ruột bầu. Nhiều chậu được trồng xen kẽ nhau sẽ tạo ra một khu trưng bày dài hạn với những bông hoa có hương thơm nồng nàn.
Bước 1
Phủ đáy chậu kín với một lớp sỏi sâu 2-3 inch. Thay thế hỗn hợp bầu cho sỏi nếu muốn. Rúc phần gốc củ Thủy Tiên vào những viên sỏi với đầu nhọn hướng lên trên.
Bước 2
Lấy đá cuội đắp vào các củ sao cho các đầu ở trên sỏi. Thêm đủ nước để ngập đến đáy củ – rải sỏi sâu khoảng 1 inch hoặc cho đến khi hỗn hợp bầu được làm ẩm. Để tối đa hóa sự nở hoa, hãy đặt chậu ở nơi mát mẻ có nhiệt độ từ 4,5 đến 15,5 độ C (40 °F đến 60 °F) với ánh sáng rực rỡ.
