[Ebook Việt Hoá] Plant parenting – LESLIE F. HALLECK (Nhân giống cây) – WHEN TO BUMP UP YOUR PLANTS (Thời điểm để “Thổi” cây lên)

  • Nguồn: [Ebook Việt Hoá] Plant parenting: Easy ways to make more houseplants, vegetables, and flowers – LESLIE F. HALLECK (Nhân giống cây: Những cách dễ nhất để nhân giống cây cảnh trong nhà, rau và hoa)
  • Biên tập: Dũng Cá Xinh (Tháng 08/20201)
  • Dịch: Huyền Nguyễn

English

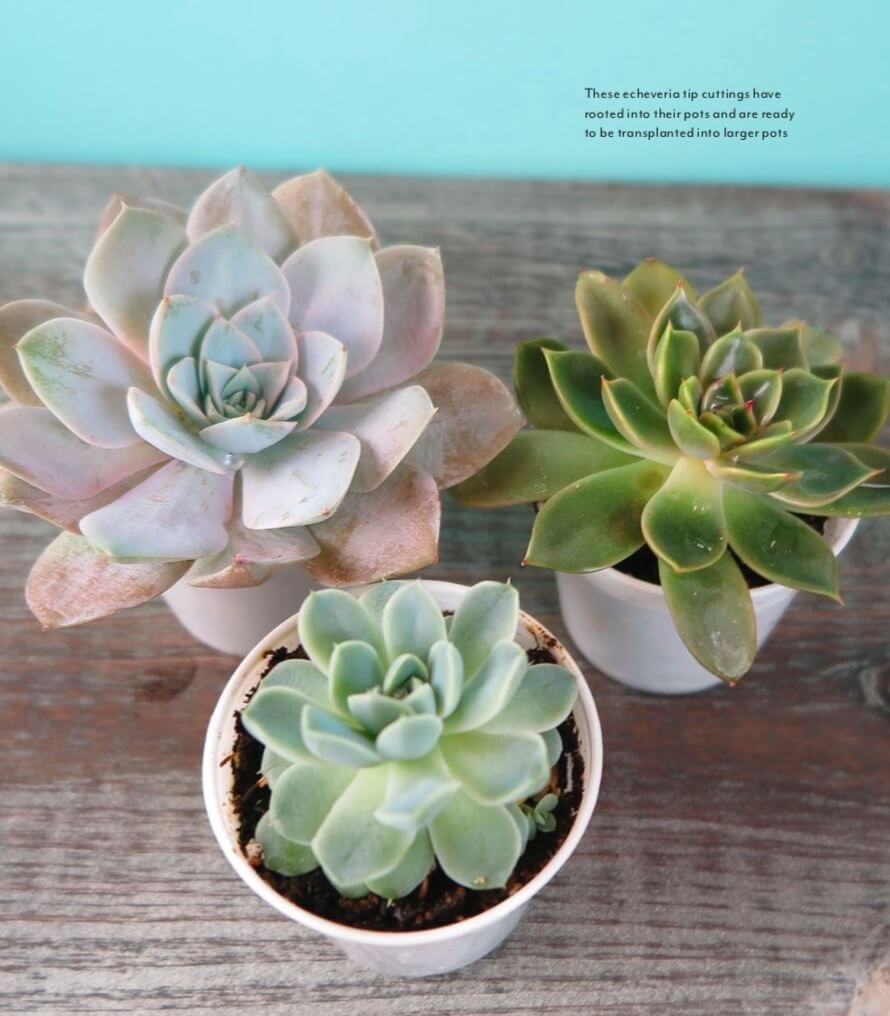
It’s all about good timing when it comes to transplanting, or bumping up, your plants. If you’re not sure
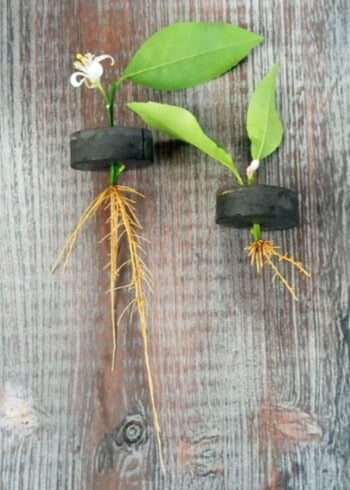
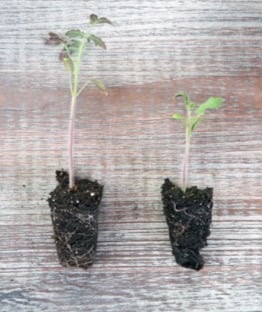
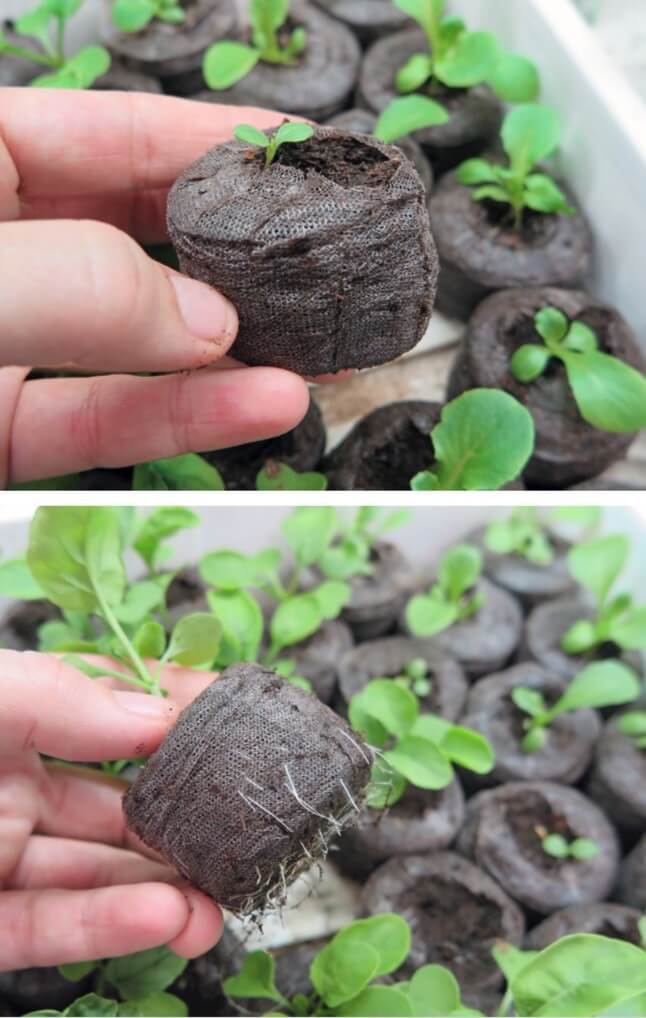
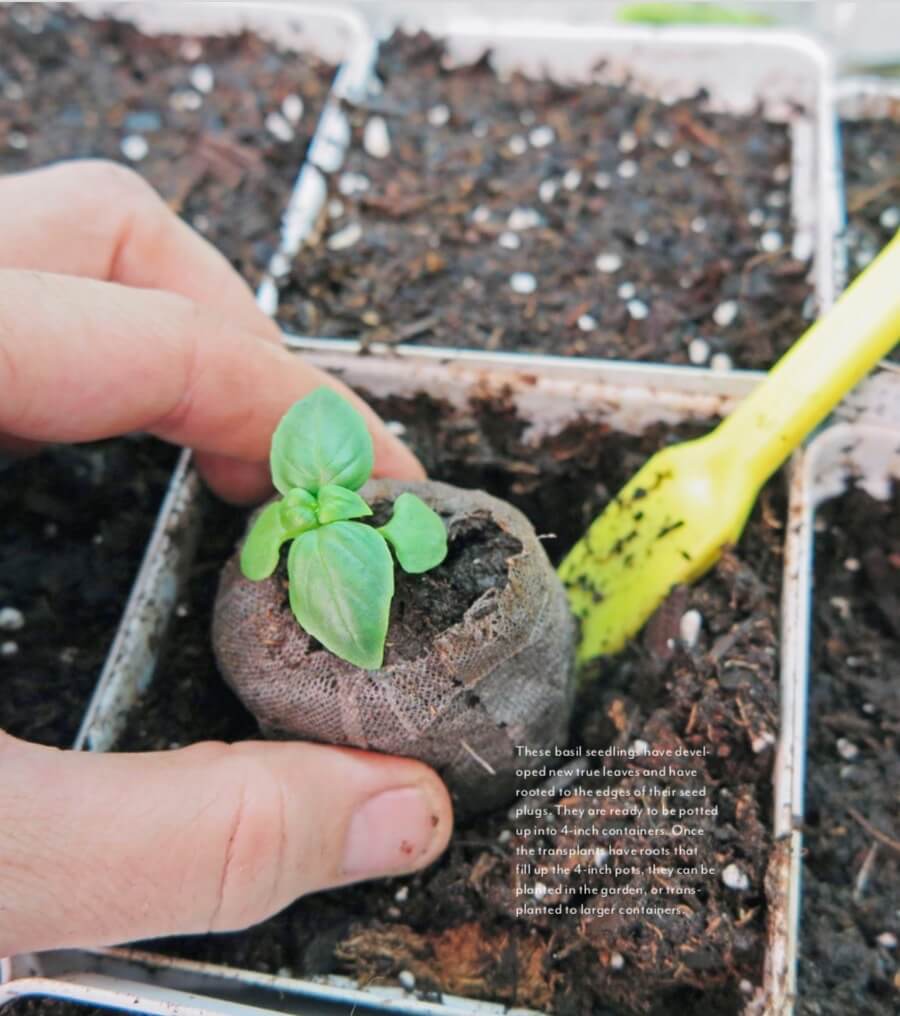
how to gauge when a young plant is ready for transplanting to a larger container, the root system will tell you. Once the roots of your seedlings or cuttings have grown to the edges of their seed plug or pot, and the seedling has sprouted three or more true leaves (or the cutting has begun to put out new foliage), it is time to bump them up to larger containers. If you’re water rooting or growing cuttings in an aeroponic propagator, your cuttings are ready to be potted up when roots are 1 to 2 inches long and begin branching. 

Two common mistakes that new plant propagators make include transplanting young seedlings or clones before they’ve developed a large enough root system—or waiting too long to transplant them. If you transplant your young seedling or cutting too early, it could fail, since the root system isn’t big enough to handle the disruption or a bigger pot with more soil. 

On the other hand, if you wait too long to transplant your seedlings and cuttings, they can become stunted from overgrowing in their seed plug or cell and may never recover. If you leave water-rooted cuttings in water too long, allowing your plants to develop a large root system, they can have trouble transitioning to soil. Growth can be stunted for a while as plants acclimatize to their new growing environment. Either way, we call this phenomenon transplant shock. 

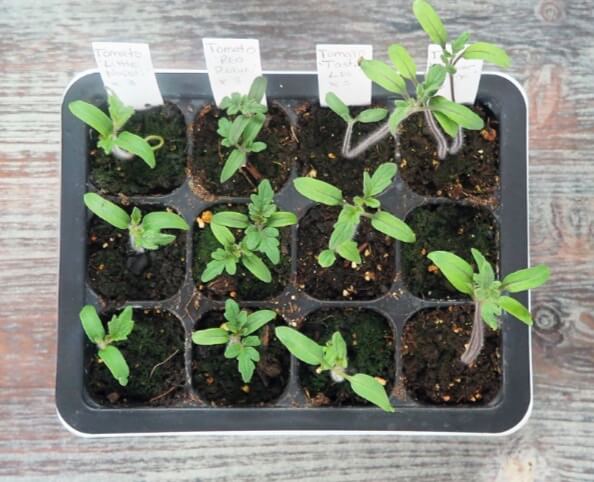
True leaves on seedlings look like a miniature version of mature leaves. Once they emerge, the process of photosynthesis begins; the seedling is no longer relying on reserves. That’s my signal to check their root growth to see if they are ready to transplant. 

When you use pellets, seed plugs, or soil blocks, it allows the seedling to grow in the small casing until the roots hit the edge of the netting, newspaper, or soil block. That’s when you know your seedling or cutting is ready to transplant to a larger container. 

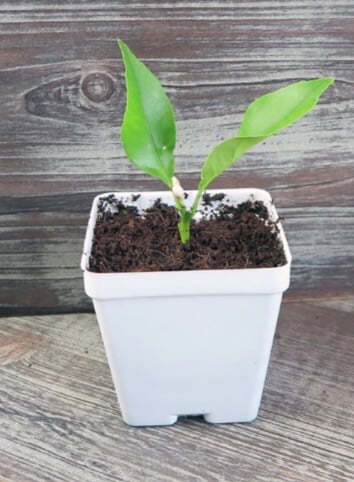
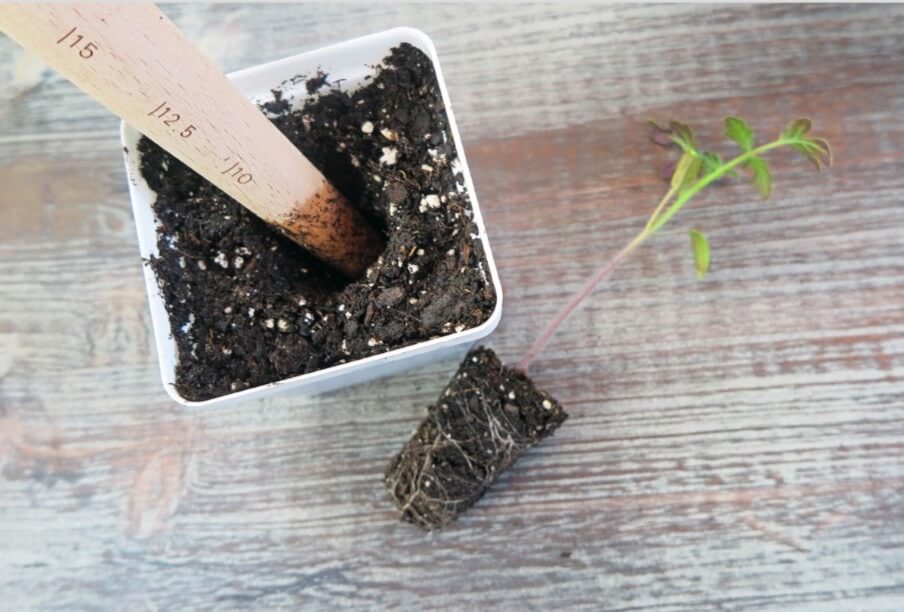
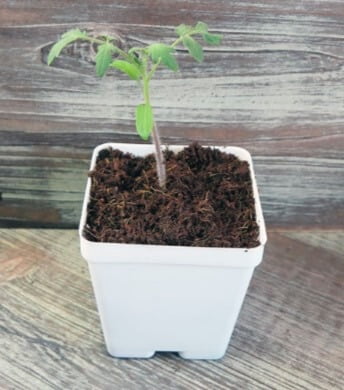
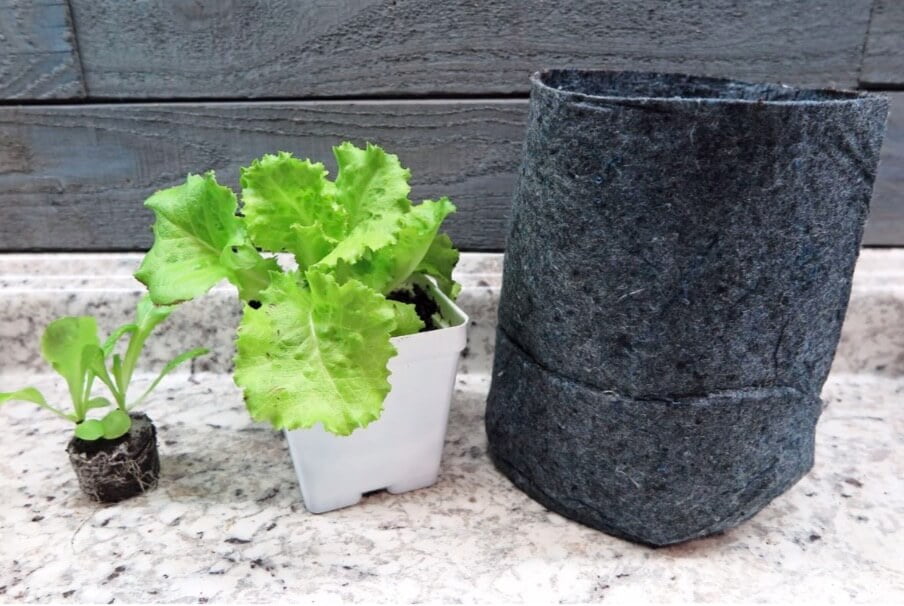
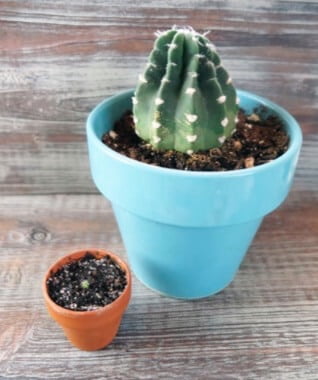
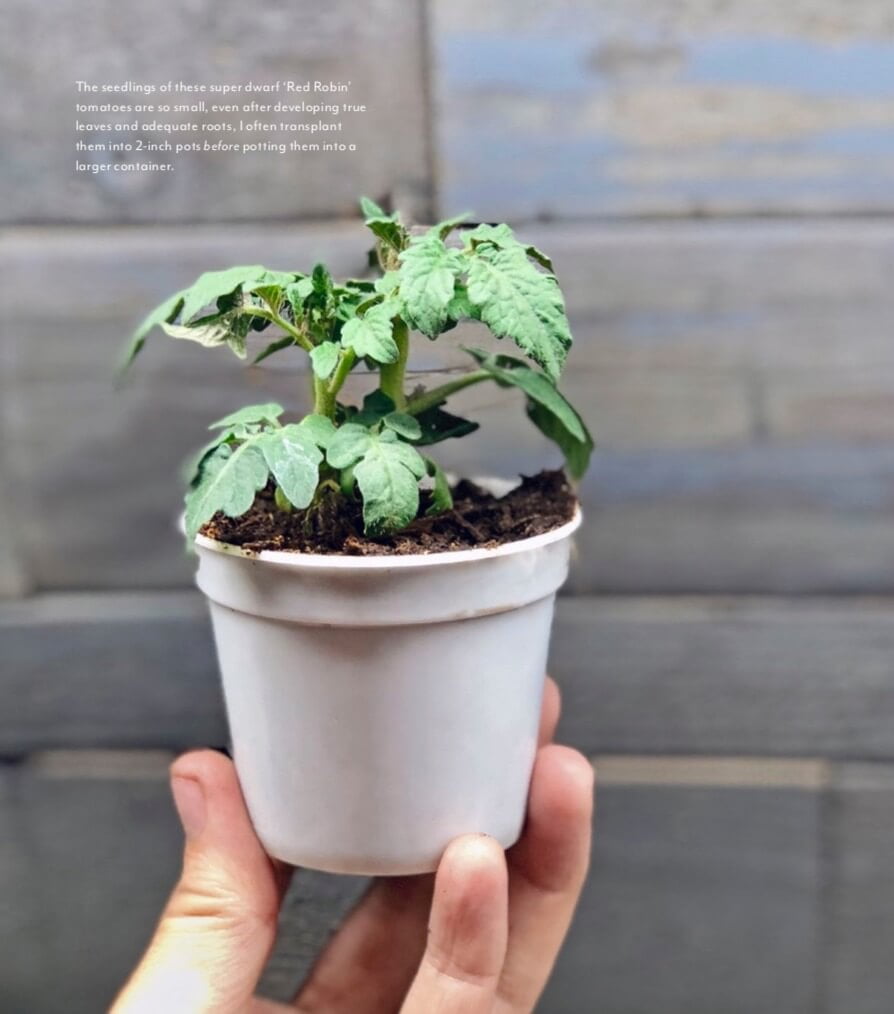
Scale up your container sizes in phases—don’t go too big too soon. Generally speaking, you should replant a 2-inch seedling plug or cutting into a 4-inch diameter pot—not a 1-gallon pot. Once the root system has filled out the 4-inch container, then you can graduate it to a larger pot, its final container, or outdoor garden destination. If you plant a very small seedling in a much bigger container or into the outdoor garden, it may drown in too much water held by the larger soil volume or it could dry out as water moves away from the root ball to the edges of the container or in drying soil outdoors. 

These echeveria tip cuttings have rooted into their pots and are ready to be transplanted into larger pots
The cutting on the right is just about ready to transplant to a container with growing media. I kept the cutting on the left in the propagator a little longer than necessary. It will probably end up growing okay, but it might initially experience a bit more transplant shock.
A rooted citrus cutting potted up into a 4-inch plant pot.
These tomato seedlings have started developing their first set of true leaves. Time to check their root growth.
After gently removing two plugs from the growing tray, I can see that the tomato seedling on the left has rooted completely
to the bottom of the cell and is ready for transplanting. The plug on the right belongs to a slower-growing dwarf variety; its root system hasn’t quite filled the entire plug and some soil has fallen away when I removed it.
I filled a 4-inch pot with a loose potting mix, then used a dibber to make a plug-sized hole for the tomato seedling. I dropped it into the hole, then gently pressed soil around the root ball and covered any exposed root area with some additional pot- ting mix. I sprinkled some coir on top to help regulate moisture.
The arugula seedling on the left has no roots emerging from the seed plug casing. The seedling below has rooted out of the casing and is ready
for planting into a 4-inch container.
The arugula seedling on the left has no roots emerging from the seed plug casing. The seedling below has rooted out of the casing and is ready
for planting into a 4-inch container.
The arugula seedling on the left has no roots emerging from the seed plug casing. The seedling below has rooted out of the casing and is ready
for planting into a 4-inch container.
The arugula seedling on the left has no roots emerging from the seed plug casing. The seedling below has rooted out of the casing and is ready
for planting into a 4-inch container.
While many cactus seeds can germi- nate quickly, seedlings can remain small for years. It will take quite a long time before this baby is ready to graduate to a larger pot.
These basil seedlings have devel- oped new true leaves and have rooted to the edges of their seed plugs. They are ready to be potted up into 4-inch containers. Once the transplants have roots that fill up the 4-inch pots, they can be planted in the garden, or trans- planted to larger containers.
The seedlings of these super dwarf ‘Red Robin’ tomatoes are so small, even after developing true leaves and adequate roots, I often transplant them into 2-inch pots before potting them into a larger container.

Tiếng Việt

Như vậy chúng ta đã tìm hiểu tất cả về thời điểm thích hợp khi bạn cấy hoặc trồng cây. Nếu bạn không chắc chắn về cách đánh giá thời điểm cây non đã sẵn sàng để cấy sang thùng lớn hơn, hệ thống rễ của cấy sẽ cho bạn biết. Một khi rễ của cây con hoặc cành giâm đã mọc đến mép ô gieo hạt hoặc chậu gieo hạt và cây con đã mọc ra ba lá thật trở lên (hoặc cành giâm đã bắt đầu tạo ra những tán lá mới), thì đã đến lúc bạn nên chuyển cây sang các chậu lớn hơn. Nếu bạn đang giâm rễ trong nước hoặc trồng cành giâm trong máy nhân giống khí canh, thì cành giâm của bạn đã sẵn sàng để trồng trong chậu khi rễ dài từ 1 đến 2 inch và bắt đầu phân nhánh.

Hai sai lầm phổ biến mà những người nhân giống cây trồng mới mắc phải bao gồm cấy ghép cây con hoặc cây non vô tính trước khi chúng phát triển hệ thống rễ đủ lớn, hoặc đợi quá lâu để trồng cây. Nếu bạn cấy hoặc trồng cây con quá sớm, nó có thể bị hỏng, vì hệ thống rễ không đủ lớn để ứng phó với sự xáo trộn hoặc một chậu lớn hơn với nhiều đất hơn.

Mặt khác, nếu bạn đợi quá lâu để cấy cây con và cành giâm, chúng có thể bị còi cọc do phát triển quá mức trong ô gieo hạt hoặc chậu ươm nhỏ và có thể không bao giờ phục hồi. Nếu bạn để cành giâm trong nước quá lâu, cây phát triển bộ rễ lớn,và gặp khó khăn khi chuyển sang trồng vào đất. Cây có thể sẽ tăng trưởng còi cọc trong một thời gian khi chúng thích nghi với môi trường mới. Cho dù bằng cách nào, chúng tôi gọi hiện tượng này là sốc cấy ghép.

Những chiếc lá thật trên cây con trông giống như một phiên bản thu nhỏ của những chiếc lá trưởng thành. Một khi chúng xuất hiện, quá trình quang hợp bắt đầu, cây con không còn dựa vào nguồn dinh dưỡng dự trữ. Đó là tín hiệu để kiểm tra sự phát triển rễ của chúng để xem chúng đã sẵn sàng để cấy ghép chưa.

Khi bạn sử dụng viên nén, ô gieo hạt hoặc khối đất, bạn nên để cây con phát triển trong vỏ bọc nhỏ cho đến khi rễ chạm vào mép lưới, giấy báo hoặc khối đất. Đó là khi bạn biết cây con hoặc cành giâm của mình đã sẵn sàng để trồng sang một chậu lớn hơn.

Tăng kích thước chậu cây theo từng giai đoạn, nhưng đừng tăng quá sớm. Nói chung, bạn nên trồng cây con hoặc cành giâm dài 2 inch vào chậu có đường kính 4 inch, không phải loại chậu 1 gallon. Khi hệ thống rễ đã lấp đầy thùng chứa 4 inch, bạn có thể chuyển cây sang một chậu lớn hơn, rồi đến một chậu lớn hơn nữa hoặc trồng trong vườn ngoài trời. Nếu bạn trồng một cây con rất nhỏ trong một chậu lớn hơn nhiều hoặc trồng ra vườn ngoài trời, cây có thể bị úng nước do lượng đất lớn giữ lại hoặc nó có thể bị khô khi nước di chuyển từ bóng rễ đến các cạnh của chậu hoặc đất trồng phơi ngoài trời.

These echeveria tip cuttings have rooted into their pots and are ready to be transplanted into larger pots
Những cành giâm Sen Đá (echeveria) này đã bén rễ vào bầu và sẵn sàng để trồng vào các bầu lớn hơn
The cutting on the right is just about ready to transplant to a container with growing media. I kept the cutting on the left in the propagator a little longer than necessary. It will probably end up growing okay, but it might initially experience a bit more transplant shock.
Cành giâm bên phải chuẩn bị được trồng vào chậu có chất trồng. Tôi để cành giâm bên trái trong máy nhân giống lâu hơn một chút so với mức cần thiết. Cành giâm bên trái có thể sẽ không gặp vấn đề trong quá trình phát triển, nhưng ban đầu nó có thể hơi sốc khi cấy ghép.
A rooted citrus cutting potted up into a 4-inch plant pot.
Một cành giâm cây Cam Quýt đã được trồng vào chậu cây 4 inch.
These tomato seedlings have started developing their first set of true leaves. Time to check their root growth.
Những cây giống Cà Chua (tomato) này đã bắt đầu phát triển bộ lá thật đầu tiên. Đã đến lúc kiểm tra sự phát triển rễ của chúng.
After gently removing two plugs from the growing tray, I can see that the tomato seedling on the left has rooted completely
to the bottom of the cell and is ready for transplanting. The plug on the right belongs to a slower-growing dwarf variety; its root system hasn’t quite filled the entire plug and some soil has fallen away when I removed it.
Sau khi nhẹ nhàng rút hai ô cắm ra khỏi khay trồng, tôi có thể thấy cây giống cà chua bên trái đã bén rễ xuống đáy ô và sẵn sàng để cấy. Ô cắm bên phải thuộc giống lùn phát triển chậm hơn; hệ thống rễ của nó chưa lấp đầy toàn bộ ô cắm và một ít đất đã rơi ra khi tôi tháo ra.
I filled a 4-inch pot with a loose potting mix, then used a dibber to make a plug-sized hole for the tomato seedling. I dropped it into the hole, then gently pressed soil around the root ball and covered any exposed root area with some additional pot- ting mix. I sprinkled some coir on top to help regulate moisture.
Tôi lấp đầy một cái chậu rộng 4 inch bằng hỗn hợp bầu lỏng, sau đó sử dụng một chiếc máy xới để tạo một lỗ vừa vặn cho cây Cà Chua con. Tôi thả cây vào lỗ, sau đó nhẹ nhàng ấn đất xung quanh bầu rễ và phủ đất lên các khu vực rễ bị lộ ra ngoài bằng một ít hỗn hợp bổ sung. Tôi rắc một ít xơ Dừa lên trên để điều chỉnh độ ẩm.
The arugula seedling on the left has no roots emerging from the seed plug casing. The seedling below has rooted out of the casing and is ready
for planting into a 4-inch container.
Cây con Arugula (thuộc họ Xà Lách) bên trên không có rễ mọc ra từ bầu hạt giống. Cây con bên dưới đã bén rễ ra khỏi vỏ và sẵn sàng để trồng vào chậu 4 inch.
While many cactus seeds can germi- nate quickly, seedlings can remain small for years. It will take quite a long time before this baby is ready to graduate to a larger pot.
Trong khi nhiều hạt Xương Rồng có thể nảy mầm nhanh chóng, cây con có thể vẫn ở kích thước nhỏ trong nhiều năm. Sẽ mất một thời gian khá lâu trước khi loài cây nhỏ bé này sẵn sàng chuyển sang một chiếc chậu lớn hơn.
These basil seedlings have devel- oped new true leaves and have rooted to the edges of their seed plugs. They are ready to be potted up into 4-inch containers. Once the transplants have roots that fill up the 4-inch pots, they can be planted in the garden, or trans- planted to larger containers.
Những cây giống Húng Quế (basil) này đã mọc ra những lá thật mới và mọc rễ ra các mép của ô gieo hạt. Chúng đã sẵn sàng để được trồng vào các chậu kích thước 4 inch. Khi cây cấy đã có rễ lấp đầy chậu 4 inch, chúng có thể được trồng trong vườn hoặc chuyển sang các chậu lớn hơn.
The seedlings of these super dwarf ‘Red Robin’ tomatoes are so small, even after developing true leaves and adequate roots, I often transplant them into 2-inch pots before potting them into a larger container.
Cây Cà Chua con ‘Red Robin’ siêu lùn này rất nhỏ, ngay cả khi đã phát triển đủ lá thật và rễ, tôi thường cấy chúng vào những chiếc chậu 2 inch trước khi chuyển sang một chậu lớn hơn.

Xem thêm các phần khác của sách

Trả lời

0988110300
chat-active-icon