[Ebook] Indoor Gardening Houseplants 2016 USA Magazine – XIII – Starting Seeds (Bắt đầu bằng hạt)

ENGLISH

  • WRITERS: CARRIE BEBRIS AND KATE CARTER FREDERICK
  • PHOTOGRAPHER: PETE KRUMHARDT

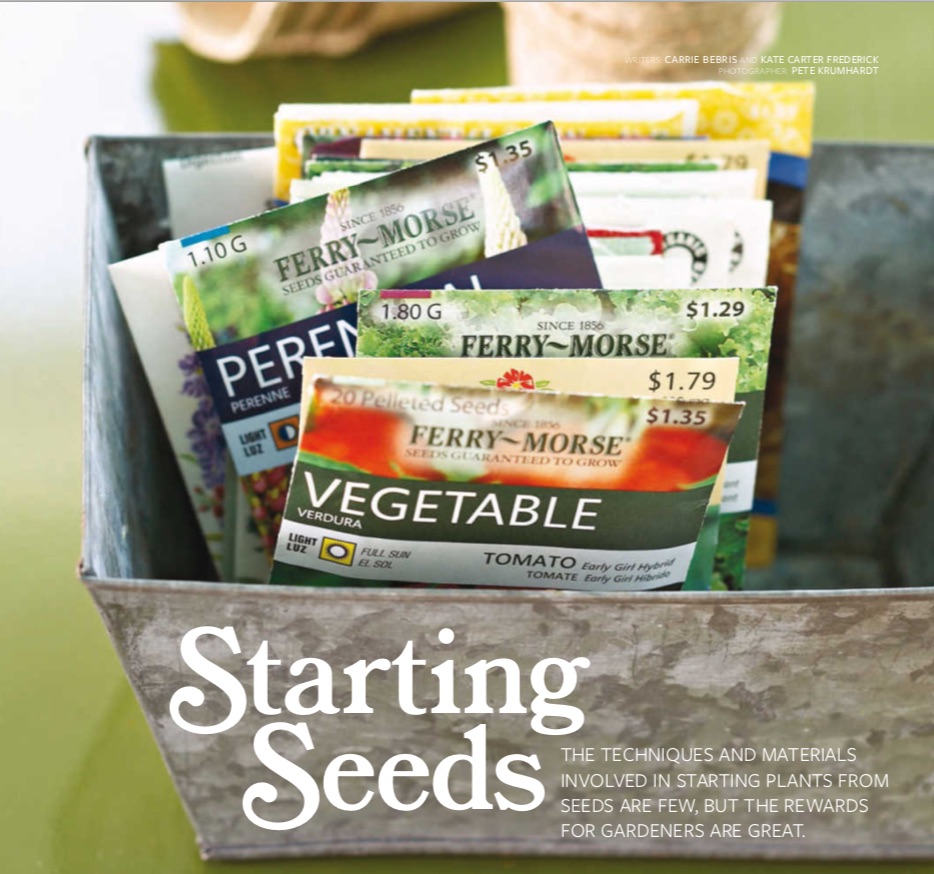
THE TECHNIQUES AND MATERIALS INVOLVED IN STARTING PLANTS FROM SEEDS ARE FEW, BUT THE REWARDS FOR GARDENERS ARE GREAT.

Planting seeds indoors has practical benefits: saving money, getting a head start on the growing season, and selecting from varieties more diverse than those available at your local garden center. There are also the seemingly magical benefits of the joy and wonder that come with watching an innocuous seed sprout into a living plant. You will be so amazed and proud!

Knowing that your garden plants can be grown from seeds or seedlings (transplants), think ahead. When the outdoor world remains wintry, start vegetables, herbs, and flowers from seeds indoors, and be alert in spring to favorable conditions to sow them directly in the garden.

When purchasing seeds, check packets for freshness dates and choose the best varieties for your garden and climate. It’s easy to get carried away and purchase too many seed packets. What’s more, a packet of seeds includes dozens—even hundreds—of potential plants and most likely more than you will need for this year’s garden. Buy only what you need and have room to raise, then save leftover seeds for next year or share them with friends and neighbors.

 Opposite: Seed packets contain all the planting details needed: seed spacing, depth, number of days until maturity, and much more. Plant seeds in damp soilless seed-starting medium, following directions on the seed packet for the appropriate planting depth. Above: Seedlings root quickly and stay healthier when grown in a sterile, fine-textured seed-starting mix rather than soil. Commercial seed-starting mix, available from garden suppliers and nurseries, usually includes peat moss, perlite, and vermiculite. Pop-up containers made from peat moss pellets provide another option. Premoisten the medium—whether bulk seed-starting mix or pellets—by sprinkling it with warm water, then fill containers with damp mix.
Opposite: Seed packets contain all the planting details needed: seed spacing, depth, number of days until maturity, and much more. Plant seeds in damp soilless seed-starting medium, following directions on the seed packet for the appropriate planting depth. Above: Seedlings root quickly and stay healthier when grown in a sterile, fine-textured seed-starting mix rather than soil. Commercial seed-starting mix, available from garden suppliers and nurseries, usually includes peat moss, perlite, and vermiculite. Pop-up containers made from peat moss pellets provide another option. Premoisten the medium—whether bulk seed-starting mix or pellets—by sprinkling it with warm water, then fill containers with damp mix.

Germinating Seeds

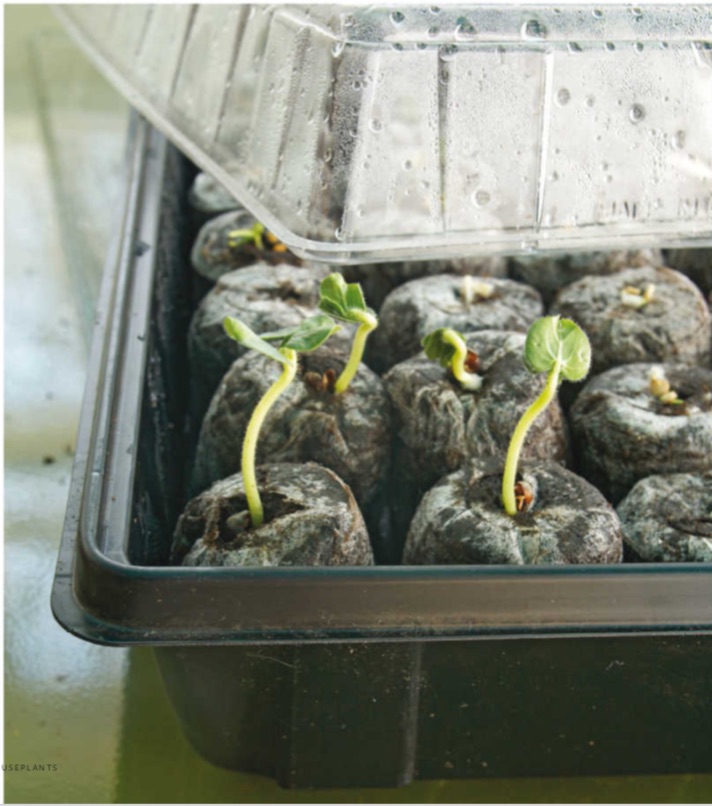
Germination is a seed’s process of sprouting from a dormant plant embryo and growing into a wee plant. A seed stores the plant’s initial food supply within its protective coating. What a seed needs from the gardener is conducive conditions (moisture, temperature, air, and light) for growth.

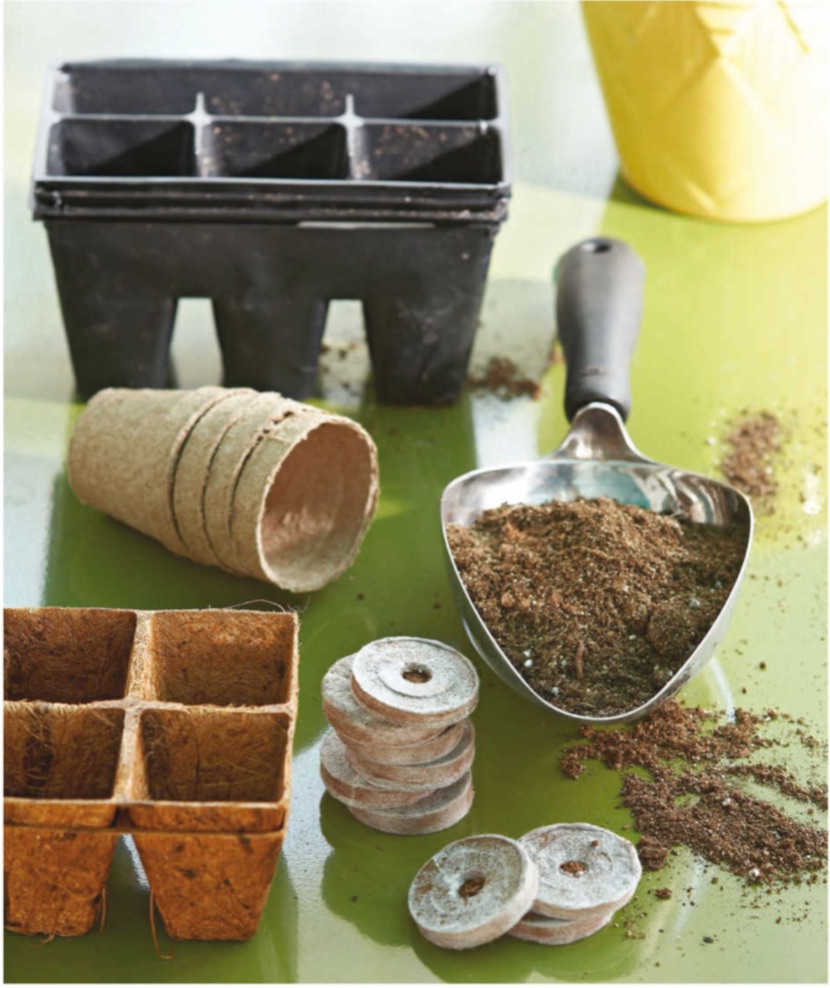
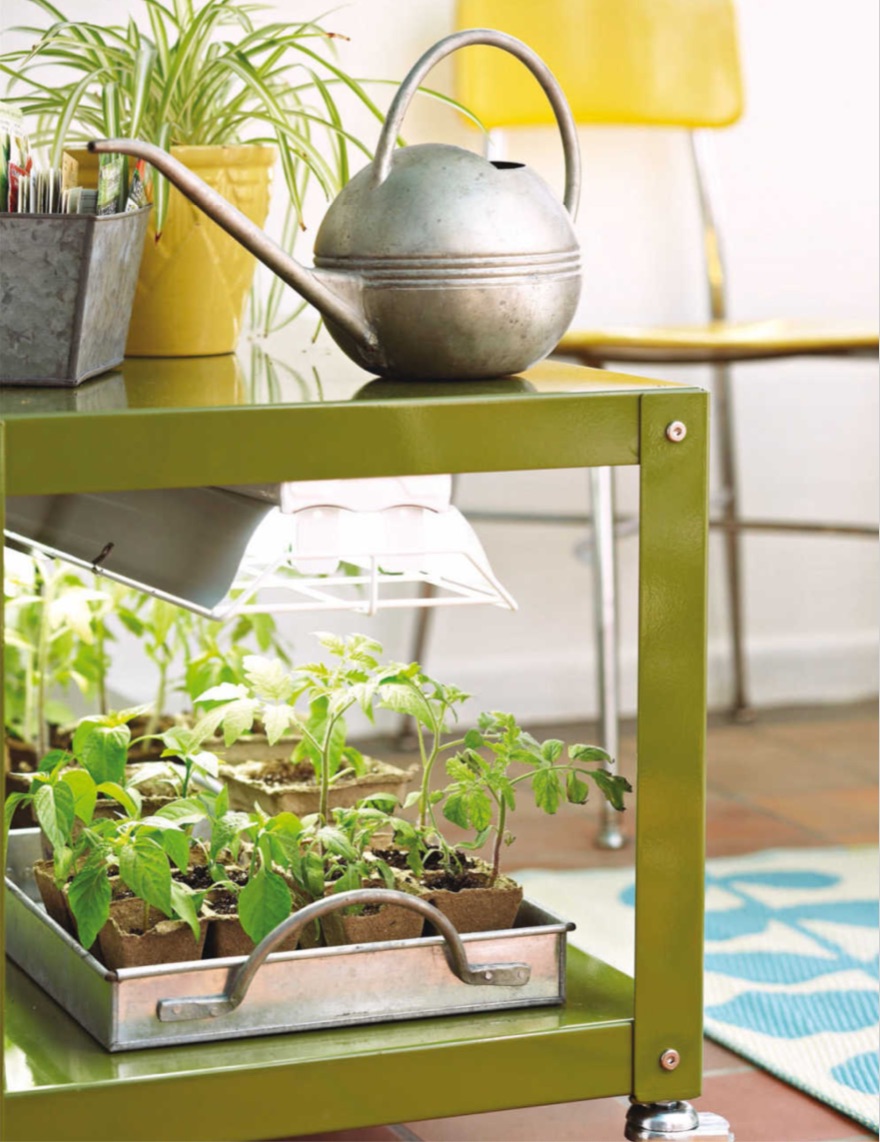
To sprout seeds, you need only a few supplies. It is possible to start a few seeds on a very warm and sunny windowsill. Better yet, set up a nursery on a shelf or a tabletop where you can be messy with soil and water, and there is access to electricity. Basic materials for a nursery include containers, soilless seed-starting mix, fluorescent light, heat mat, and timer for the light. A basic, inexpensive setup of equipment lasts for many years.

Start with clean containers that allow excess moisture to drain away. Plastic trays are sold in kits with planting packs and covers; the packs vary in size and number of cells for transplant-size seedlings. Some gardeners reuse plastic nursery containers, including flats, packs, and pots of various sizes. Others repurpose containers, such as yogurt cups and other recyclable plastic packaging. Wash containers in hot soapy water and disinfect with a weak bleach solution before filling with soilless mix.
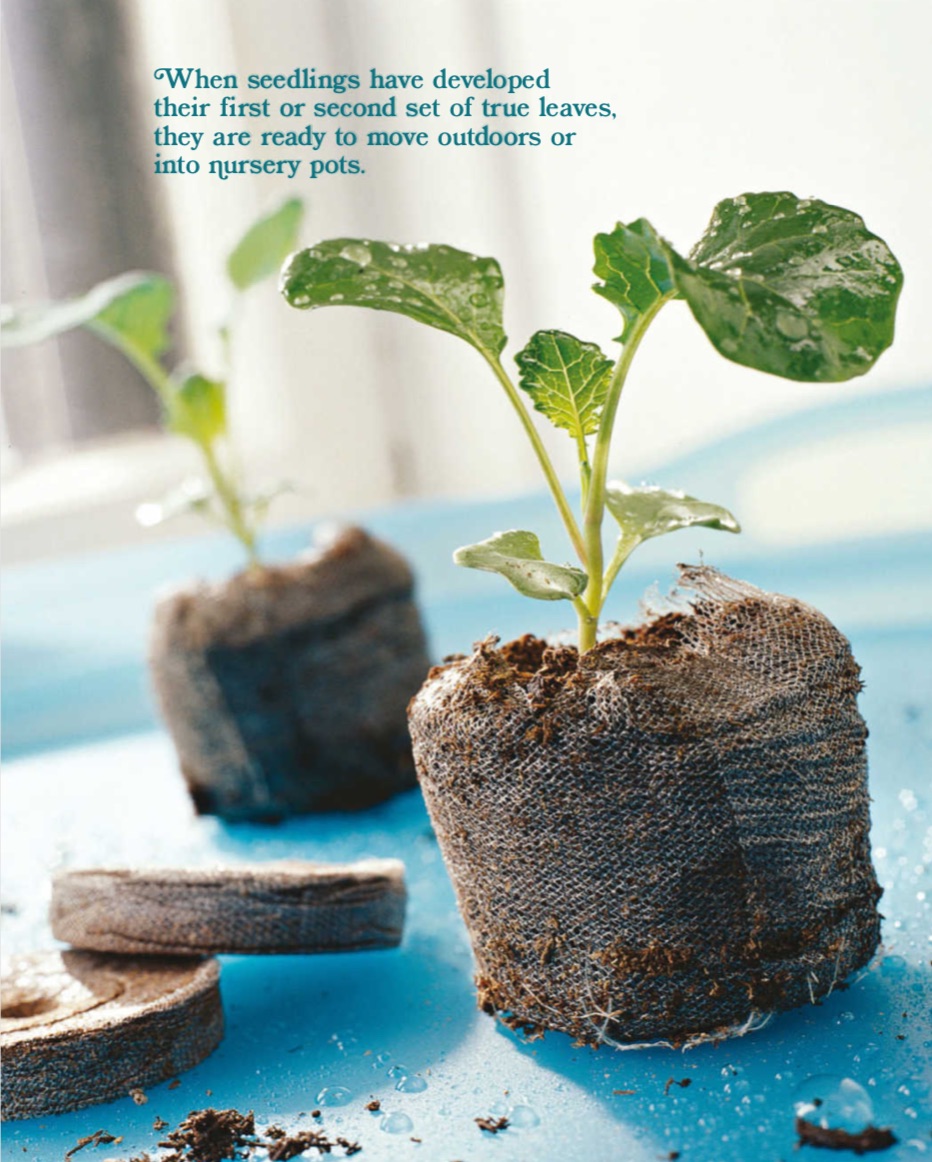
Uncover seedlings once they germinate (sprout). Water seedlings from the bottom, adding water to a watertight tray and allowing the young plants to draw up moisture via their roots. Watering from above and soaking the seed-starting medium may cause seedlings to rot.
Light is essential for all seedlings. Supplement available sunlight with artificial light. A shop light fitted with two fluorescent bulbs—one warm light and one cool light—is an efficient, economical option that works well. Seedlings need 12 to 16 hours of light each day. Position supplemental lights just above the tops of the seedlings and raise the lights as the seedlings grow to promote dense, lush plants.
 When seedlings have developed their first or second set of true leaves, they are ready to move outdoors or into nursery pots.
When seedlings have developed their first or second set of true leaves, they are ready to move outdoors or into nursery pots. – Biodegradable pots let you transplant seedlings directly into garden soil without removing them from the container, minimizing transplant shock.

Leaving the n?est

As seedlings develop their first set of true leaves (after the initial seed leaves), the containers will become crowded and you will need to thin out the weakest seedlings. It’s hard to get rid of healthy plants, but if you let the crowding continue, all the plants will suffer and fail to thrive. Keep the largest, healthiest seedlings and pull out weak plants or cut them at soil level. Transplant extraneous healthy seedlings into other containers.

Leave at least an inch of space between the remaining seedlings or grow one seedling per container. As the survivors grow and outdoor temperatures reach the 50s°F and above, the seedlings are ready to “harden off” (get tough) by being set in a protected area outdoors, such as a entryway or porch, sheltered from sun and wind. After a few days, they’re ready for their move to the garden.

Start seeds in a stylish container such as a large clear-glass bowl if desired. A container without drainage holes can be made more hospitable to seedlings by filling the bottom third of the container with clean pebbles or glass marbles. Top that layer with premoistened soilless seed-starting mix. Plant seeds of lettuce, moonflowers, morning glories, or heirloom tomatoes. Mist the planting medium and cover the container with a sheet of plastic until the seeds germinate. For healthy growth, remove the plastic and give the seedlings adequate light.

TIẾNG VIỆT

  • TÁC GIẢ: CARRIE BEBRIS VÀ KATE CARTER FREDERICK 
  • ẢNH: PETE KRUMHARDT

CẦN ÍT KỸ THUẬT VÀ VẬT LIỆU ĐỂ TRỒNG CÂY TỪ HẠT GIỐNG NHƯNG PHẦN THƯỞNG CHO NGƯỜI LÀM VƯỜN LẠI VÔ CÙNG TUYỆT VỜI.

Trồng hạt giống trong nhà có những lợi ích thiết thực: tiết kiệm tiền, bắt đầu thuận lợi vào mùa trồng trọt và lựa chọn từ các loại giống đa dạng hơn những giống có sẵn tại trung tâm vườn địa phương. Ngoài ra bạn sẽ rất ngạc nhiên và tự hào khi chứng kiến một hạt giống nảy mầm thành một cây sống.


Dù biết rằng cây trong vườn của bạn có thể được trồng từ hạt hoặc cây con (cấy ghép), bạn hãy suy nghĩ trước. Khi thời tiết ngoài trời vẫn còn lạnh giá, hãy bắt đầu trồng rau, thảo mộc và hoa từ hạt giống trong nhà, và chú ý khi điều kiện thời tiết thuận lợi vào mùa xuân để gieo trực tiếp trong vườn.


Khi mua hạt giống, hãy kiểm tra các gói để biết thời gian cây nảy mầm và chọn những giống tốt nhất cho khu vườn và khí hậu nơi bạn sinh sống. Thật dễ dàng để mang đi và mua nhiều gói hạt giống. Hơn thế nữa, một gói hạt giống bao gồm hàng chục, thậm chí hàng trăm các loại cây tiềm năng và rất có thể số hạn giống sẽ nhiều hơn những gì bạn cần để trồng trong khu vườn năm nay. Chỉ mua lượng hạt giống bạn cần và có chỗ để trồng, sau đó để dành số hạt giống còn lại cho năm sau hoặc chia sẻ chúng với bạn bè và hàng xóm.

 Opposite: Seed packets contain all the planting details needed: seed spacing, depth, number of days until maturity, and much more. Plant seeds in damp soilless seed-starting medium, following directions on the seed packet for the appropriate planting depth. Above: Seedlings root quickly and stay healthier when grown in a sterile, fine-textured seed-starting mix rather than soil. Commercial seed-starting mix, available from garden suppliers and nurseries, usually includes peat moss, perlite, and vermiculite. Pop-up containers made from peat moss pellets provide another option. Premoisten the medium—whether bulk seed-starting mix or pellets—by sprinkling it with warm water, then fill containers with damp mix.
Bao bì các gói hạt giống chứa tất cả các thông tin chi tiết cần thiết về việc gieo trồng: khoảng cách hạt, độ sâu, số ngày sinh trưởng và nhiều thông tin khác. Trồng hạt trong môi trường gieo hạt không ẩm ướt, theo hướng dẫn trên gói hạt giống để có độ sâu gieo trồng thích hợp. Ảnh trên: Cây con ra rễ nhanh chóng và khỏe mạnh hơn khi được trồng trong hỗn hợp hạt vô trùng, có kết cấu tốt hơn là đất thông thường. Hỗn hợp gieo hạt giống thương mại, có bán sẵn tại các nhà cung cấp cây và vườn ươm, thường bao gồm rêu than bùn, đá trân châu và đá vermiculite. Làm ấm đất bầu trước, dù là hỗn hợp ươm hạt lớn hay dạng viên – bằng cách rắc nước ấm lên hỗn hợp, sau đó đổ hỗn hợp ẩm vào các chậu ươm.

Hạt nảy mầm

Nảy mầm là quá trình hạt nảy mầm từ phôi thực vật ngủ đông và phát triển thành cây con. Hạt giống lưu trữ nguồn dinh dưỡng ban đầu của cây trong lớp phủ bảo vệ của nó. Người làm vườn cần cung cấp cho hạt giống các điều kiện thuận lợi về độ ẩm, nhiệt độ, không khí và ánh sáng để phát triển.


Để hạt nảy mầm, bạn chỉ cần thực hiện một vài bước. Có thể gieo một vài hạt giống trên bệ cửa sổ thật ấm áp và đầy nắng. Tốt hơn hết, bạn hãy bố trí vườn ươm trên giá hoặc mặt bàn, nơi bạn có thể thoải mái xáo đất và tưới nước mà không lo làm bẩn bề mặt, nơi có đường điện. Vật liệu cơ bản cho một vườn ươm bao gồm chậu, hỗn hợp gieo hạt không cần đất, đèn huỳnh quang, thảm nhiệt và bộ hẹn giờ đón ánh sáng. Đó là một số thiết bị cơ bản, không tốn kém và sẽ được dùng kéo dài trong nhiều năm.


Bắt đầu với các chậu cây sạch sẽ có khả năng thoát hơi ẩm dư thừa. Khay nhựa được bán trong bộ dụng cụ với gói hạt giống và nắp trồng; các gói khác nhau về kích thước và số lượng hạt giống. Một số người làm vườn tái sử dụng các thùng ươm bằng nhựa, bao gồm các thùng, bao bì và chậu với nhiều kích cỡ khác nhau. Những người khác sử dụng lại các hộp đựng, chẳng hạn như cốc đựng sữa chua và bao bì nhựa có thể tái chế khác. Rửa chậu ươm trong nước xà phòng nóng và khử trùng bằng dung dịch tẩy yếu trước khi đổ đầy hỗn hợp không chứa chất.

Uncover seedlings once they germinate (sprout). Water seedlings from the bottom, adding water to a watertight tray and allowing the young plants to draw up moisture via their roots. Watering from above and soaking the seed-starting medium may cause seedlings to rot.
Mở nắp cho cây con khi chúng nảy mầm. Tưới nước cho cây con từ phía dưới, thêm nước vào khay kín nước và để cây non hút ẩm qua rễ. Tưới nước từ trên cao xuống và ngâm bầu ươm khi gieo hạt giống có thể làm thối cây con.
Light is essential for all seedlings. Supplement available sunlight with artificial light. A shop light fitted with two fluorescent bulbs—one warm light and one cool light—is an efficient, economical option that works well. Seedlings need 12 to 16 hours of light each day. Position supplemental lights just above the tops of the seedlings and raise the lights as the seedlings grow to promote dense, lush plants.
Ánh sáng là điều cần thiết cho tất cả các cây con, bạn có thể bổ sung bằng ánh sáng nhân tạo. Khu vực gieo hạt được trang bị hai bóng đèn huỳnh quang, một bóng sáng ấm và một bóng đèn mát, là một lựa chọn hiệu quả, tiết kiệm và hoạt động tốt. Cây con cần 12 đến 16 giờ ánh sáng mỗi ngày. Đặt đèn bổ sung ngay phía trên ngọn cây con và nâng cao đèn khi cây con phát triển để thúc đẩy cây mọc rậm rạp, tươi tốt.
 When seedlings have developed their first or second set of true leaves, they are ready to move outdoors or into nursery pots.
Khi cây con đã phát triển bộ lá thật đầu tiên hoặc thứ hai, chúng đã sẵn sàng để chuyển ra ngoài trời hoặc vào bầu ươm. – Chậu phân hủy sinh học cho phép bạn cấy cây con trực tiếp vào đất vườn mà không cần lấy ra khỏi giá thể, giảm thiểu sự tác động đến cây con.

Chuyển cây con ra ngoài trời hoặc vào bầu ươm

Khi cây con phát triển bộ lá thật đầu tiên (sau khi mất hạt ban đầu), các thùng chứa sẽ trở nên chật chội và bạn sẽ cần tỉa bớt những cây con yếu nhất. Thật khó để loại bỏ những cây khỏe mạnh, nhưng nếu bạn cứ để một số lượng lớn cây con cùng phát triển, tất cả các cây sẽ bị ảnh hưởng và không phát triển được. Giữ những cây con lớn nhất, khỏe mạnh nhất và nhổ những cây yếu hoặc cắt ngang mặt đất. Cấy các cây con khỏe mạnh vào các chậu cây khác.


Để lại khoảng trống ít nhất một inch giữa các cây con còn lại hoặc trồng một cây con trên mỗi thùng. Khi những cây này phát triển và nhiệt độ ngoài trời đạt từ 10 độ C (50 °F) trở lên, cây con đã cứng cáp và sẵn sàng để được đặt trong khu vực được bảo vệ ngoài trời, chẳng hạn như lối vào hoặc hiên nhà, được che chắn khỏi nắng và gió. Sau một vài ngày, chúng đã sẵn sàng để chuyển đến khu vườn.

Start seeds in a stylish container such as a large clear-glass bowl if desired. A container without drainage holes can be made more hospitable to seedlings by filling the bottom third of the container with clean pebbles or glass marbles. Top that layer with premoistened soilless seed-starting mix. Plant seeds of lettuce, moonflowers, morning glories, or heirloom tomatoes. Mist the planting medium and cover the container with a sheet of plastic until the seeds germinate. For healthy growth, remove the plastic and give the seedlings adequate light.
Bạn có thể gieo hạt giống vào hộp đựng sành điệu, chẳng hạn như bát thủy tinh lớn nếu muốn. Bạn có thể khiến một thùng chứa không có lỗ thoát nước có thể trở nên thân thiện hơn với cây con bằng cách lấp đầy một phần ba đáy thùng bằng đá cuội sạch hoặc viên bi thủy tinh. Phủ lên lớp đá đó hỗn hợp gieo hạt không chứa đất đã được ủ sẵn. Trồng hạt giống rau Diếp (lettuce), hoa Mặt Trăng (moonflower), hoa Mai (morning glories), hoặc Cà Chua (tomato). Phun sương cho chất trồng và phủ một tấm nhựa lên giá thể cho đến khi hạt nảy mầm. Để cây phát triển khỏe mạnh, bạn cần loại bỏ nhựa và cung cấp cho cây con đủ ánh sáng.

Xem thêm các mục khác của sách!

Trả lời

0988110300
chat-active-icon