Ebook Việt Hoá] Plant parenting: Easy ways to make more houseplants vegetables and flowers - LESLIE F. HALLECK
[Ebook Việt Hoá] Plant parenting – LESLIE F. HALLECK (Nhân giống cây) – HOW TO COLLECT AND STORE SEEDS (Cách thu thập và bảo quản hạt giống)
- Nguồn: [Ebook Việt Hoá] Plant parenting: Easy ways to make more houseplants, vegetables, and flowers – LESLIE F. HALLECK (Nhân giống cây: Những cách dễ nhất để nhân giống cây cảnh trong nhà, rau và hoa)
- Biên tập: Dũng Cá Xinh (Tháng 08/20201)
- Dịch: Huyền Nguyễn
English
If you grow plants in your outdoor garden or in containers and allow them to flower and go to seed, you should be sure to collect and save some seed. Collecting and saving seeds from the plants you’re already growing is a sustainable approach to your gardening endeavors and a smart way to save money.
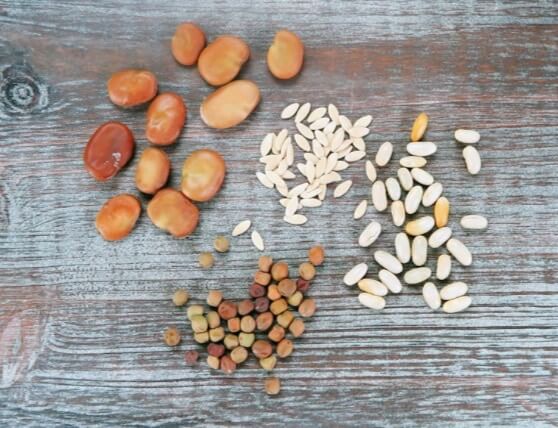
There are two main types of seeds: wet and dry. Dry seeds develop inside a husk or a fruit pod that dries completely so seeds are visible. Beans, okra, peppers, onions, and herbs such as dill produce dry seeds.
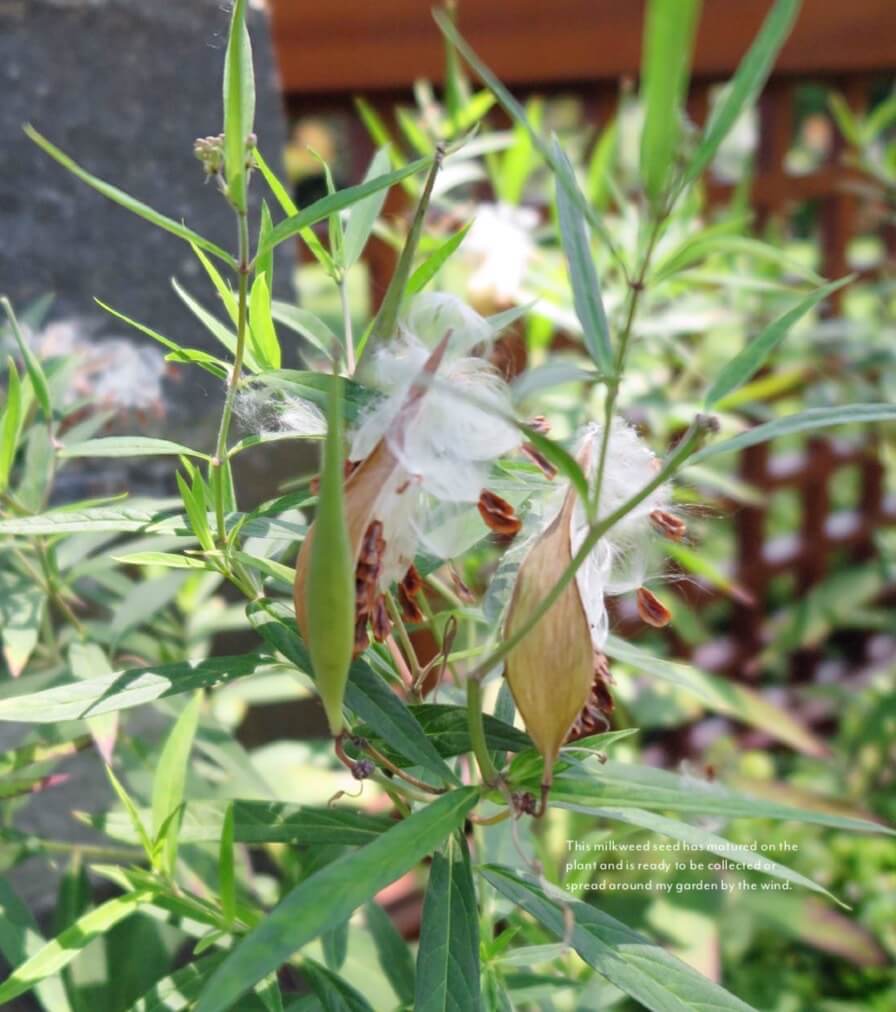
Harvest dry seeds while still on the plant, once they have completely matured and dried. The dry pods will be easy to open or will burst open on their own, and the seeds inside will be hard and completely dry. Once you have harvested the seeds, leave them on a towel in a cool, dry place for a few days to ensure they are completely dry before you store them.
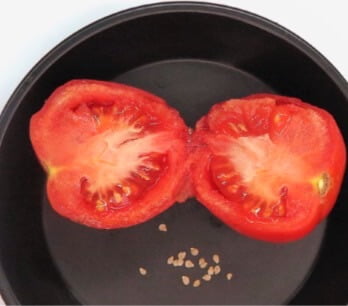
Wet seeds are produced from fleshy fruits such as tomatoes, eggplant, and squash. They typically remain inside a large amount of flesh and are not visible unless you break open the fruit. To harvest wet seeds, break open a mature fruit that has begun to shrivel, then separate the seeds from the fleshy part of the fruit. After the seeds are completely clean, spread them out on a dry surface for several days before storing.
Some wet seeds perform best if you ferment them before storing. Fermenting mimics the process the seeds go through on the vine as they mature and enables you to eliminate fungal activity that could damage the seeds or prevent germination in the future. Fermentation also breaks down germination inhibitors that may remain in the seed coat.
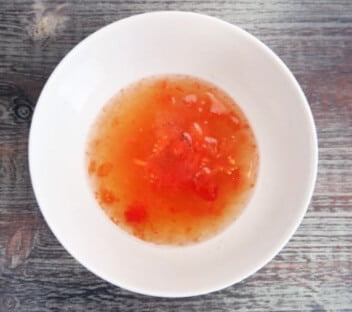
To ferment seeds, place them in a bowl of water with some of the fruit flesh remaining around them. Use about twice the volume of water as the amount of seed. Place the container in a warm area, where temperatures are between 75°F and 80°F (24–27°C), for 2 to 5 days. (Alternatively, look for bubbling or mold to appear on the surface of the water, which could occur sooner.) Once the fermentation is complete, the viable seeds will sink to the bottom of the container and the bad seeds and any remaining debris will float to the top. Do not let the seeds ferment too long or they can start to germinate. Spread out the good seeds on a dry surface for several days, then store them as you would dry seeds.
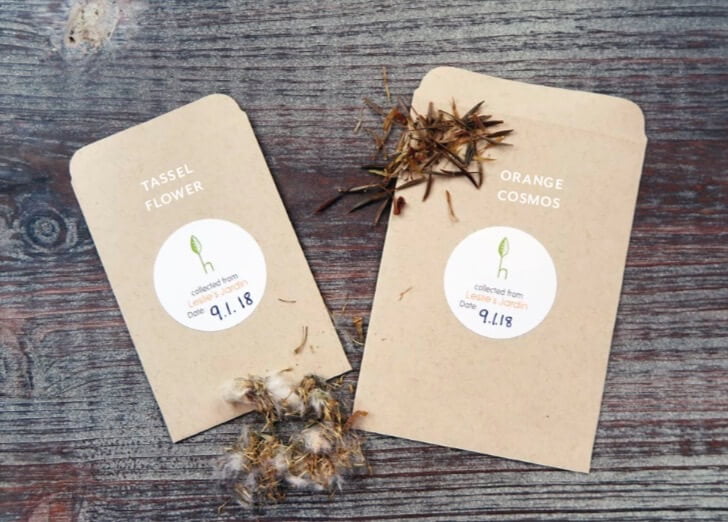
Place your dried seed in sealed containers—such as envelopes, paper seed packets, or jars—and store in a cool, dry, dark place. If you store seeds in an area where they will be exposed to very hot or very cold temperatures they can degrade.
Keeping seeds in a cool, dry place will help extend their life. Be aware, however, that the longer you store seeds, the more their germination rate decreases. For example, you may achieve 100 percent germination from seeds you’ve harvested and stored within the same year, but 3 years later you may get only 60 percent germination. These rates will differ depending on plant variety and the conditions in which seeds are stored.
As you get the hang of seed-starting basics, you’ll develop confidence to branch out with propagating more difficult species. Experiment and have fun!
Spores
In non-flowering plants such as ferns, propagation from seeds is not possible because ferns don’t flower or develop seeds. Instead, ferns make spores. These spores spread to moist areas, are fertilized, and generate new ferns. So, while you can’t collect seeds from ferns, you can easily multiply ferns with spores, simple division, root cuttings, rhizome cuttings, and tissue culture.
How to Grow Ferns from Spores
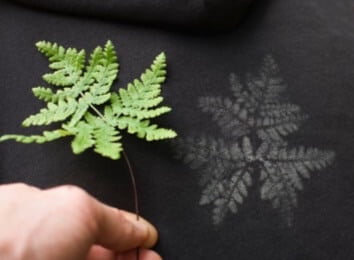
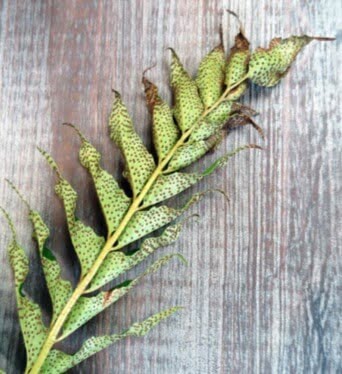
- 1 Lay a fertile frond (with sori facing down) onto a sheet of paper. Spores will drop onto the paper within 24 hours if they are ripe.
- 2 Fill a shallow container with organic compost and add some earthworm castings. Dust the spores on top of the soil and cover with a clear plastic container or enclose in a clear plastic bag.
- 3 Place under a single cool fluorescent grow lamp for 12 to 14 hours a day. No direct hot sunlight.
- 4 In several weeks, a tiny green carpet will begin
to develop, which are the prothalli of the ferns (they contain sperm and egg.) When they reach about 1/4 inch, mist them with dechlorinated water. You should then see tiny sporelings (plantlets) developing. - 5 Gently divide clumps of sporelings into plug trays filled with a lightweight indoor potting mix and cover with a clear plastic cover. Once fern plants have filled out the space, you can transplant them into 4-inch or larger containers.

Tiếng Việt
Nếu bạn trồng cây trong khu vườn ngoài trời hoặc trong các thùng chứa và để chúng ra hoa, sau đó gieo hạt, bạn nên thu thập và lưu trữ một số hạt giống. Thu thập và bảo quản hạt giống từ những cây bạn đang trồng là một cách làm vườn bền vững và là một cách tiết kiệm thông minh.
Có hai loại hạt chính: hạt ướt và hạt khô. Hạt khô phát triển bên trong vỏ hoặc vỏ quả khô hoàn toàn. Đậu (bean), Đậu Bắp (okra), Tiêu (pepper), Hành Tây (onion) và các loại rau thơm như Thì Là (dill) tạo ra hạt khô.
Thu hoạch hạt khô khi còn ở trên cây, khi chúng đã già hoàn toàn và phơi khô. Vỏ khô sẽ dễ mở hoặc tự bung ra, hạt bên trong cứng và khô hoàn toàn. Khi bạn đã thu hoạch hạt, hãy để chúng trên khăn ở nơi khô ráo và thoáng mát trong vài ngày để đảm bảo hạt khô hoàn toàn trước khi cất đi.
Hạt ướt được tạo ra từ các loại quả nhiều thịt như cà chua, cà tím và bí. Chúng thường vẫn còn bên trong một lượng lớn thịt và không thể nhìn thấy trừ khi bạn bẻ mở quả. Để thu hoạch hạt ướt, hãy bẻ mở một quả trưởng thành đã bắt đầu teo lại, sau đó tách hạt ra khỏi phần thịt của quả. Sau khi hạt sạch hoàn toàn, hãy trải chúng trên bề mặt khô ráo trong vài ngày trước khi cất giữ.
Một số hạt ướt hoạt động tốt nhất nếu bạn lên men trước khi cất giữ. Lên men bắt chước quá trình hạt giống trải qua trên cây nho khi chúng trưởng thành và giúp hạt giống không bị hỏng do nấm hoặc ngăn chặn sự nảy mầm trong tương lai. Quá trình lên men cũng phá vỡ các chất ức chế nảy mầm có thể vẫn còn trong vỏ hạt.
Để lên men hạt giống, đặt hạt vào một bát nước với một ít thịt quả còn lại xung quanh hạt. Sử dụng lượng nước gấp đôi lượng hạt giống. Đặt bát nước ở khu vực ấm áp, nơi có nhiệt độ từ 75 °F đến 80 °F (24-27 °C), trong 2 đến 5 ngày. Ngoài ra, bạn hãy xem xem có sủi bọt hoặc nấm mốc xuất hiện trên bề mặt nước hay không, hiện tượng này có thể xảy ra sớm hơn. Khi quá trình lên men hoàn tất, những hạt còn sống sẽ chìm xuống đáy thùng và những hạt xấu và các mảnh vụn còn sót lại sẽ nổi lên mặt nước. Đừng để hạt lên men quá lâu nếu không hạt có thể nảy mầm ngay. Trải hạt giống có chất lượng tốt trên bề mặt khô ráo trong vài ngày, sau đó bảo quản như cách bạn phơi hạt giống.
Đặt hạt giống khô vào các hộp kín, chẳng hạn như phong bì, gói hạt giống bằng giấy hoặc lọ và bảo quản ở nơi tối, khô ráo, thoáng mát. Nếu bạn cất giữ hạt giống ở nơi có nhiệt độ quá nóng hoặc quá lạnh, chúng có thể bị biến chất.
Bảo quản hạt ở nơi khô ráo, thoáng mát sẽ giúp kéo dài hạn sử dụng của hạt. Tuy nhiên, hãy lưu ý rằng bạn bảo quản hạt càng lâu thì tỷ lệ nảy mầm càng giảm. Ví dụ, 100% số hạt giống của bạn có khả năng nảy mầm nếu chúng cất giữ trong cùng một năm, nhưng 3 năm sau, chỉ khoảng 60% số hạt giống đó có thể này mầm. Tỷ lệ này sẽ khác nhau tùy thuộc vào giống cây trồng và điều kiện bảo quản hạt giống.
Khi bạn nắm được các kiến thức cơ bản về bảo quản hạt giống, bạn sẽ tự tin để nhân giống các loài khó hơn. Hãy thử nghiệm và tận hưởng niềm vui từ việc gieo trồng!
Bào tử
Ở những cây không có hoa như Dương Xỉ (fern), không thể nhân giống từ hạt vì loại cây này không ra hoa hoặc phát triển hạt. Thay vào đó, Dương Xỉ (fern) tạo bào tử. Những bào tử này phát tán đến những khu vực ẩm ướt, được bón phân và tạo ra những cây Dương Xỉ (fern) mới. Vì vậy, dù bạn không thể thu thập hạt từ cây Dương Xỉ (fern), bạn có thể dễ dàng nhân giống cây Dương Xỉ (fern) bằng bào tử, bằng cách phân chia đơn giản, giâm rễ, giâm cành thân rễ và nuôi cấy mô.
Làm thế nào để trồng cây Dương Xỉ (fern) từ bào tử
- 1. Đặt một cành Dương Xỉ có bào tử úp lên một tờ giấy. Bào tử sẽ rơi ra giấy trong vòng 24 giờ nếu chúng đã chín.
- 2. Đổ phân hữu cơ vào thùng nông và thêm một ít phân trùn quế. Gạt các bào tử lên trên mặt đất và đậy bằng hộp nhựa trong hoặc bọc túi nhựa trong.
- 3. Đặt thùng dưới một bóng đèn huỳnh quang mát từ 12 đến 14 giờ một ngày, không có ánh nắng nóng trực tiếp.
- 4. Trong vài tuần nữa, một thảm xanh nhỏ sẽ bắt đầu phát triển, đó là các thể giao tử non của Dương Xỉ ( prothalli). Khi chúng đạt khoảng 1/4 inch, hãy phun sương bằng nước khử clo. Sau đó, bạn sẽ thấy các bào tử nhỏ (cây con) phát triển.
- 5. Nhẹ nhàng tách các cụm bào tử và trồng vào các khay trồng có chứa hỗn hợp bầu nhẹ và đậy bằng nắp nhựa trong. Khi cây đã lấp đầy không gian, bạn có thể cấy chúng vào các thùng chứa 4 inch hoặc lớn hơn.


![[Ebook Việt Hoá] Plant parenting – LESLIE F. HALLECK (Nhân giống cây) – HOW TO COLLECT AND STORE SEEDS (Cách thu thập và bảo quản hạt giống) [Ebook Việt Hoá] Plant parenting – LESLIE F. HALLECK (Nhân giống cây) – HOW TO COLLECT AND STORE SEEDS (Cách thu thập và bảo quản hạt giống)](https://vn1.vdrive.vn/codai.net/2021/02/ebook-huong-dan-nhan-giong-cay-canh-rau-va-hoa-04.jpg)


