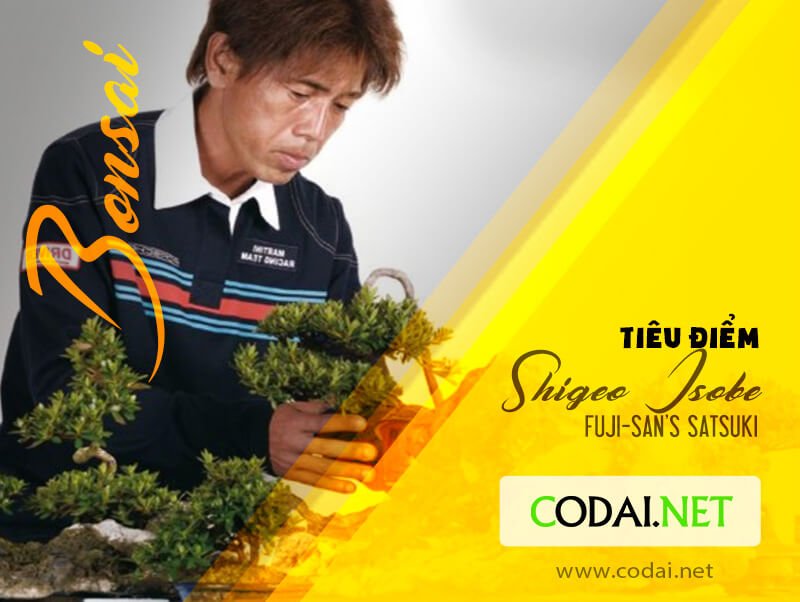
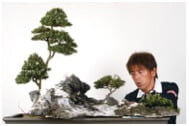
Bậc thầy Shigeo Isobe và tác phẩm Satsuki mô phỏng Fuji-san (núi Phú Sĩ)

Nguồn: Tạp chí Bonsai Focus English Edition T01/T02 2016

Dịch và biên tập: Dũng Cá Xinh (16/08/2021) 


English

  • Text and photography: Kinbon magazine, Japan

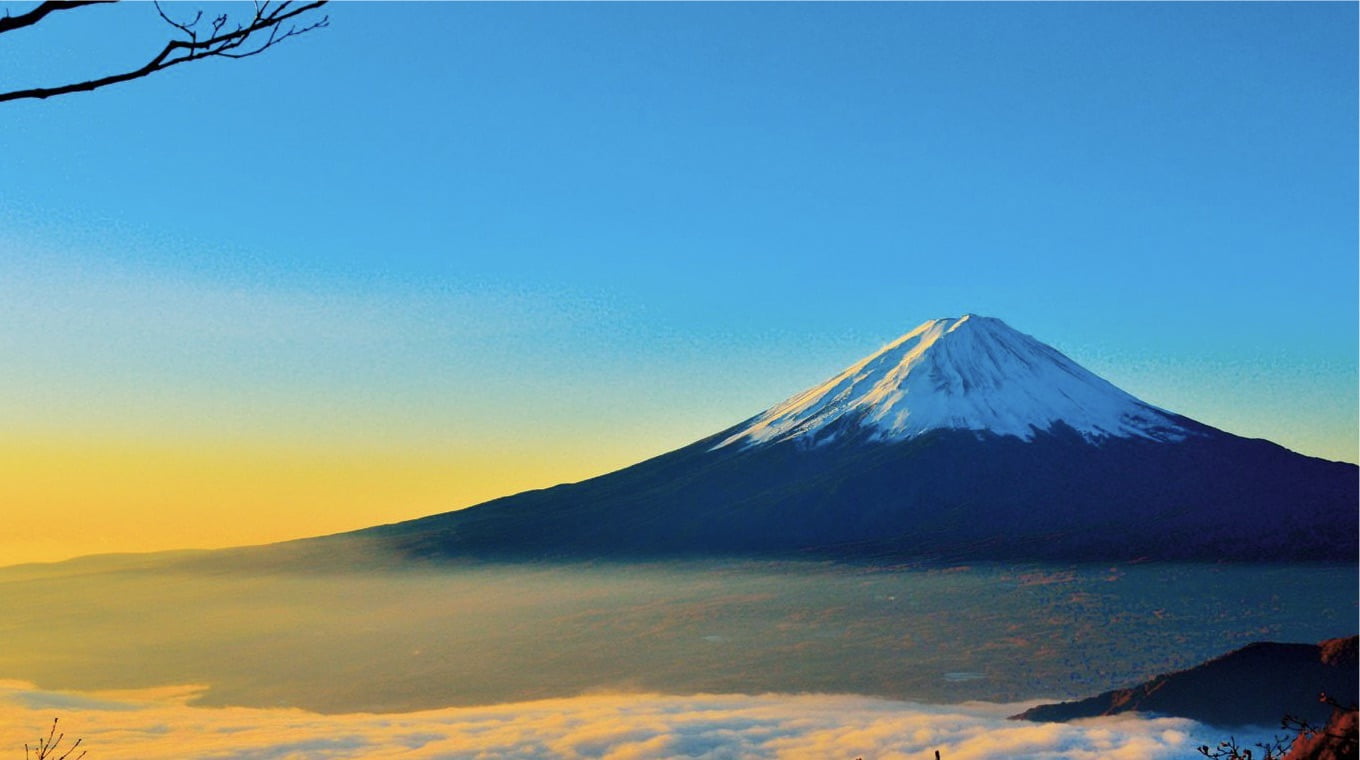
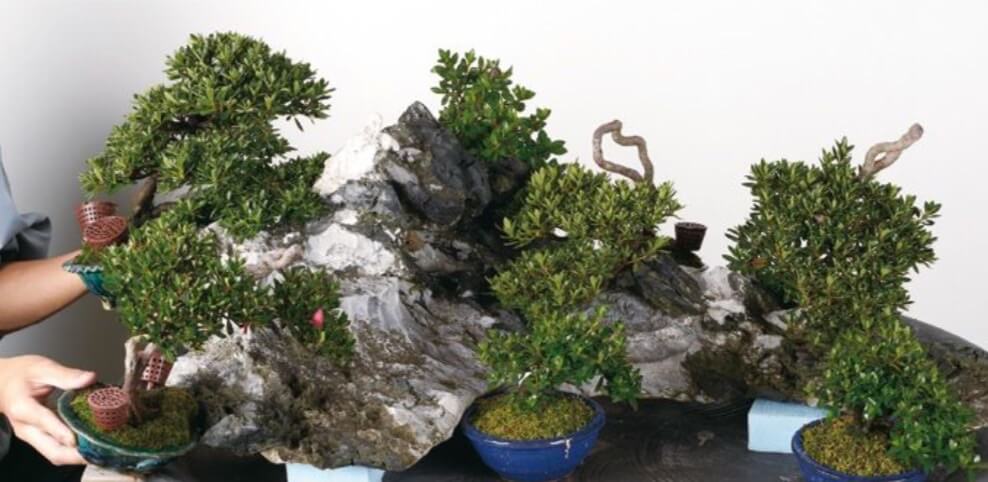
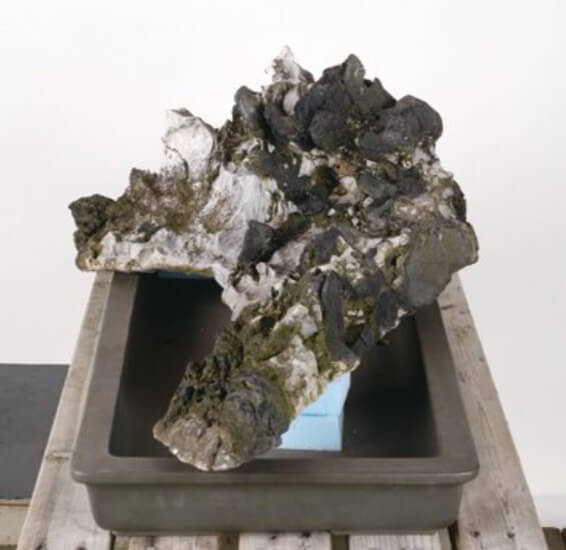
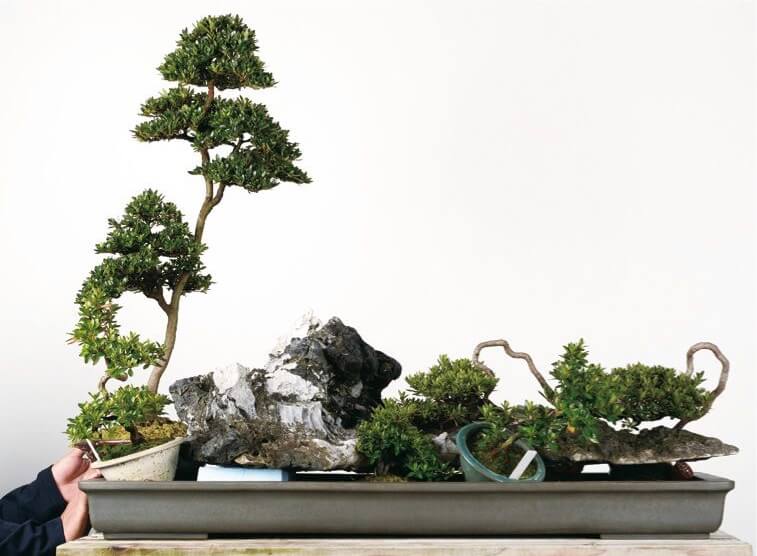
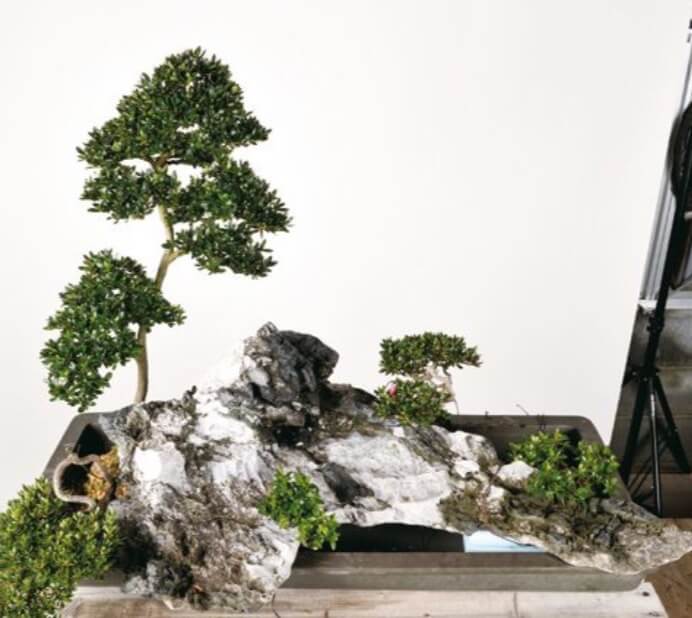
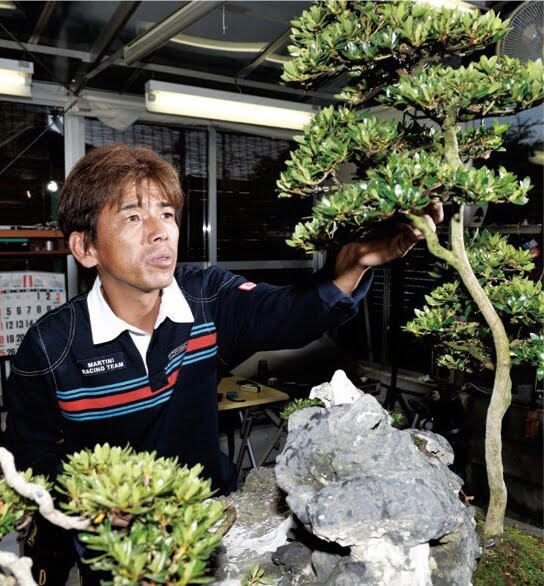
A rock that evokes images of the famous volcano Fuji, near Tokyo, is the centre stage for an unusual rock planting. The obsession of the artist can be seen forming on the rock. What scene will satsuki specialist, Shigeo Isobe create on this old Ibigawa rock?

Bậc thầy Satsuki: Shigeo Isobe

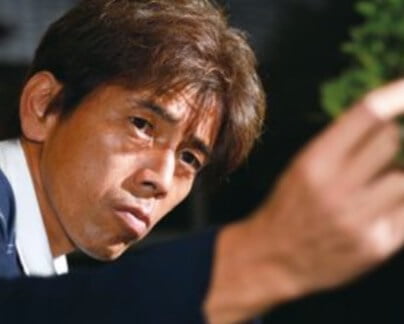
In order to use this stone without destroying the character, much artistic sensitivity is required, rather than technique. Will the iron man of satsuki bonsai, Mr Shigeo Isobe live up to the challenge and create a worthy scene?

Using the Masahiko Kimura technique of planting the rock in a pot 

Mr Isobe has been studying underneath Masahiko Kimura for a number of years, seeking his guidance and taking advice on the more creative side of bonsai. He tells us, ‘It is important, however, that I do things that he doesn’t, or wouldn’t do, so I searched long and hard for this stone. It offers a wonderful scene that I cannot improve on by carving, but I intend to use the stone to its fullest potential by planting some azaleas on it. This is a very difficult task.’

A number of trees have been prepared for this make or break transformation, but the two possible pots for use will not hold the entire stone.

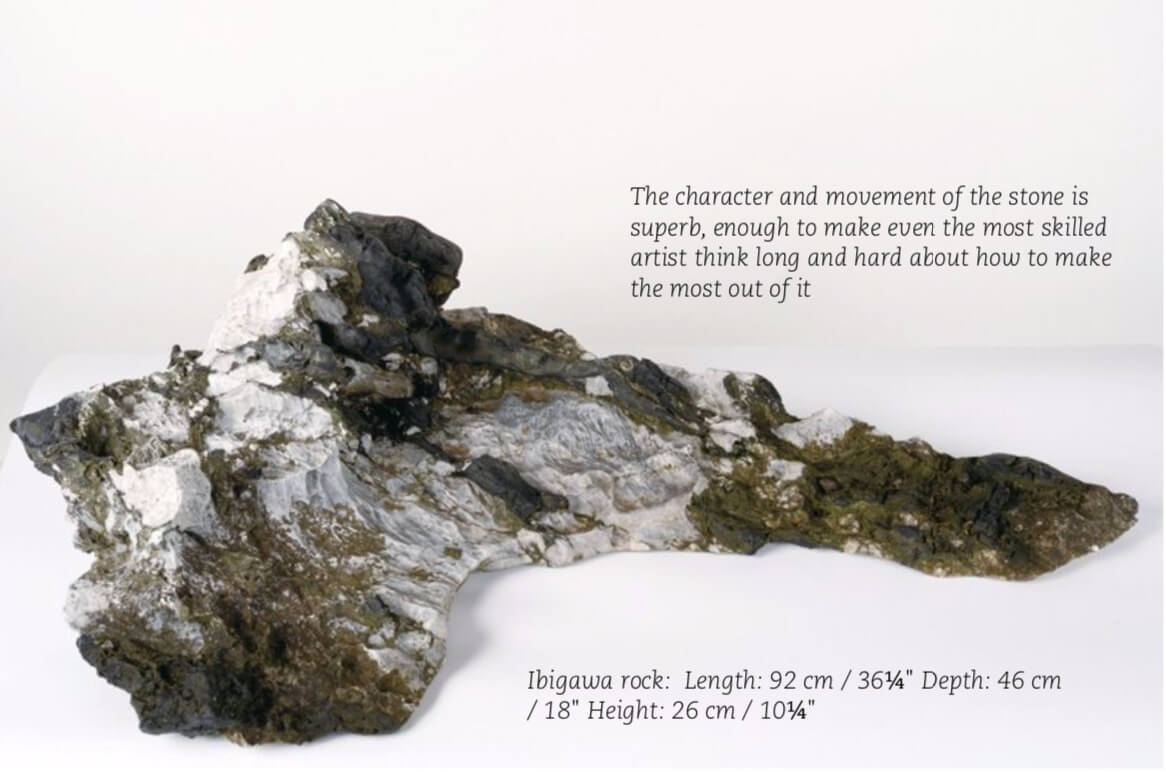
  • The character and movement of the stone is superb, enough to make even the most skilled artist think long and hard about how to make the most out of it
  • Ibigawa rock: Length: 92 cm / 361⁄4″ Depth: 46 cm / 18″ Height: 26 cm / 101⁄4″
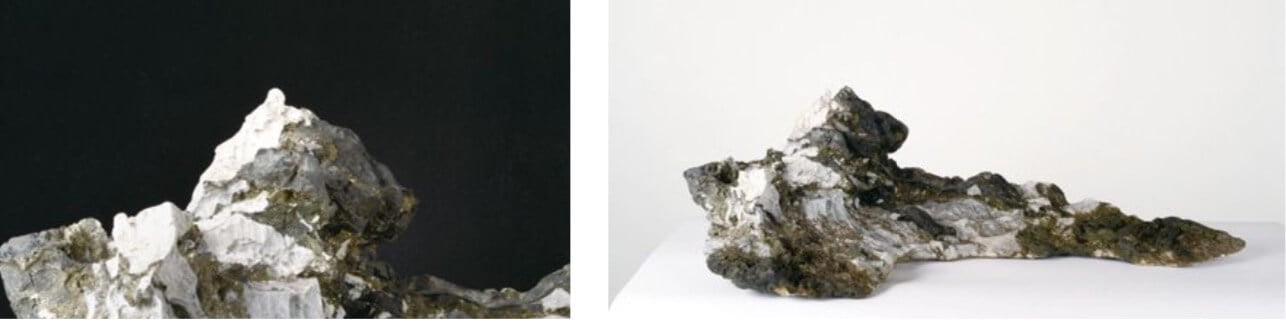
This Ibigawa ryugan rock was owned by an enthusiast from that area for a great number of years. There is a great sense of age and the image of a snow capped mountain is exceptionally superb and rare

Taller than Fuji

As seen from the right. The right edge of the stone overhangs the edge of the pot slightly. The front and back are easily contained inside the pot

The rock planting by creative satsuki specialist, Shigeo Isobe, is not one that is straightforward. One of the reasons for this is that the character and style of the rock being used looks as though it is something you would see at the base of Mount Fuji.

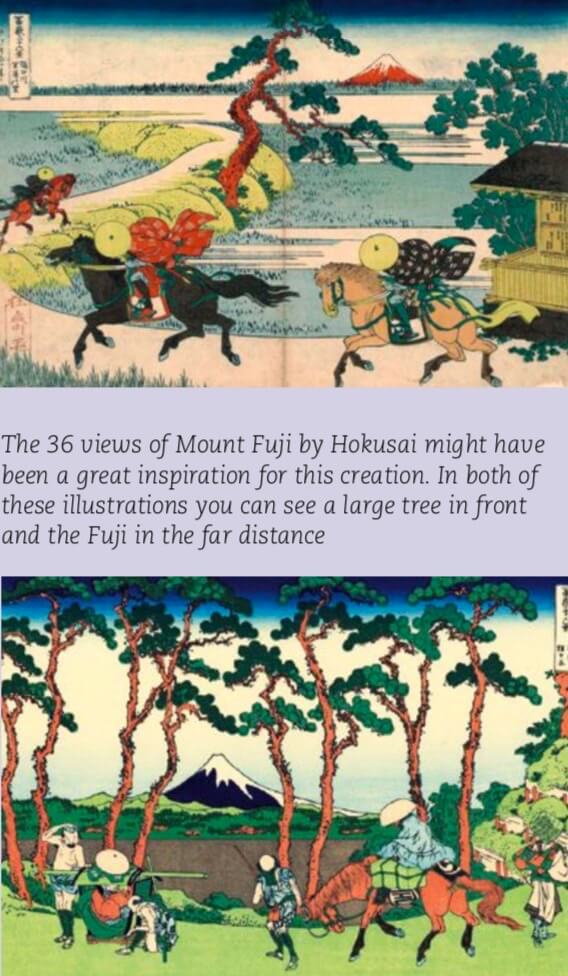
When trying to match a tree to place with such a rock, the immediate logical thought is that there are no trees taller than a mountain top. So trees that are shorter than the ‘peak’ are chosen. Following on from that logic, you can say that, if Mount Fuji is in the distance and there is a tree just in front of you, it will look taller than Fuji. This brings to mind any number of famous pictures where Mount Fuji appears in the background framed by cascading branches.

If we use some very short, compact trees the main peak certainly does stand out; however, there is a difference between making the peak stand out and utilising its character to its maximum.

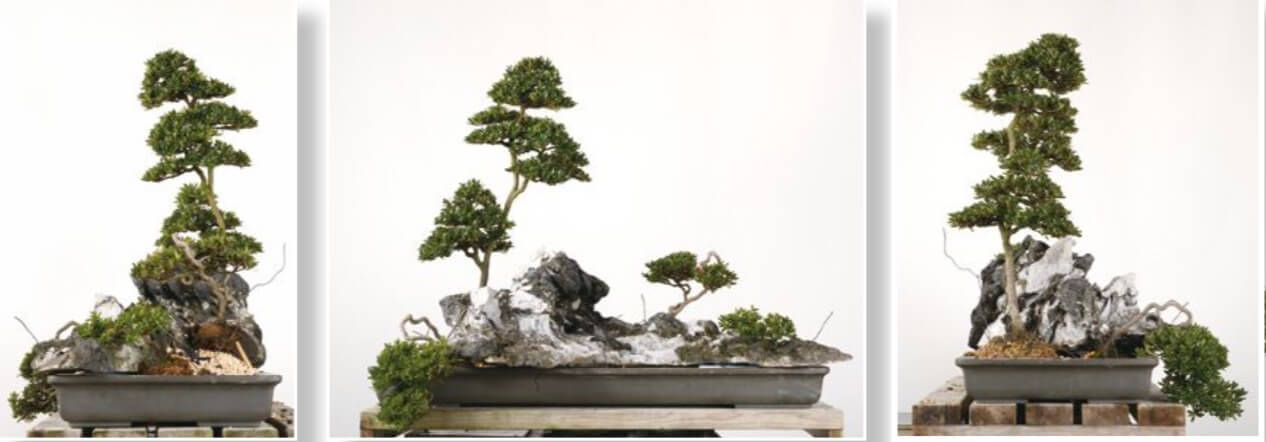
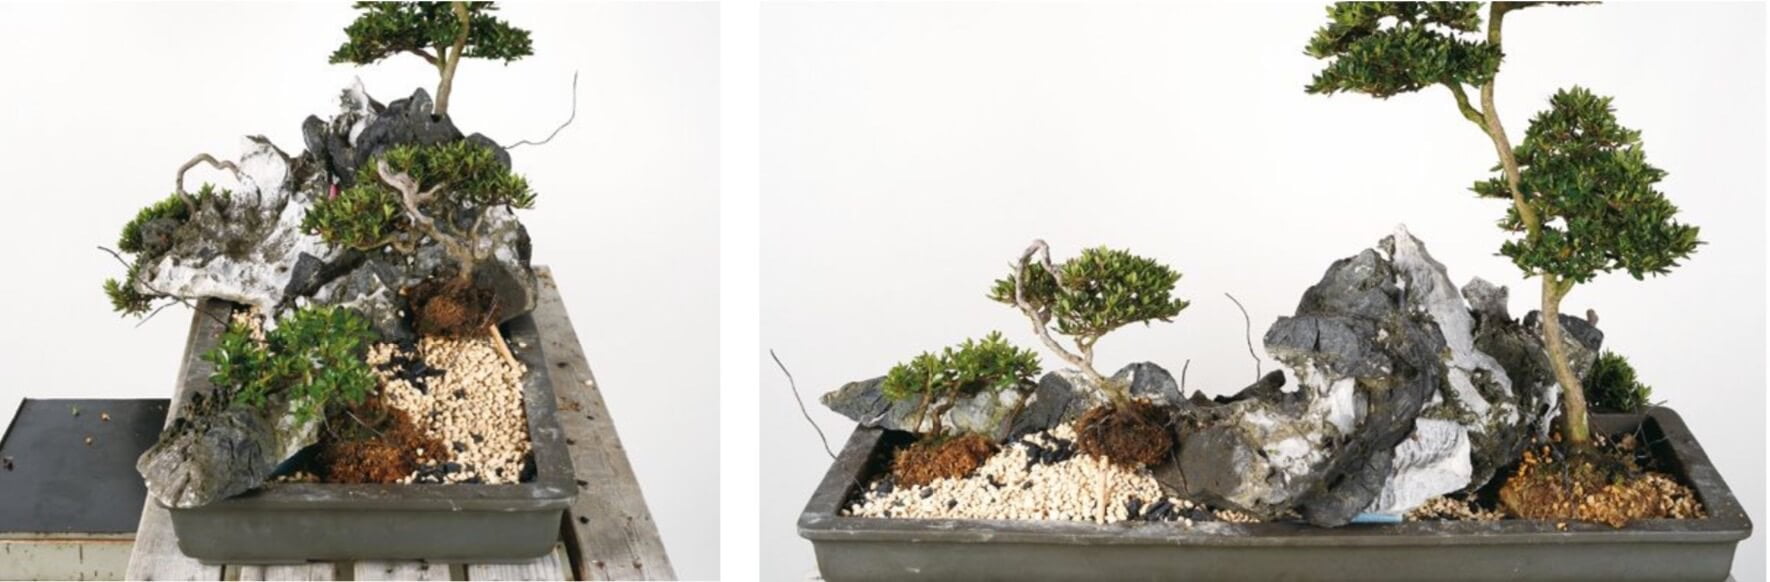
Round or oval? The choice of pot is crucial for the whole creation. The first attempt is with an oval pot

The stone is placed in a shallow oval pot to see how it looks. The pot has lots of room, front to back, so the rock fits in, though it does protrude a little on the left. Japanese oval. Length: 93 cm / 363⁄4" Depth: 72 cm / 281⁄2" Height: 7.5 cm / 3"
The stone is placed in a shallow oval pot to see how it looks. The pot has lots of room, front to back, so the rock fits in, though it does protrude a little on the left. Japanese oval. Length: 93 cm / 363⁄4″ Depth: 72 cm / 281⁄2″ Height: 7.5 cm / 3″

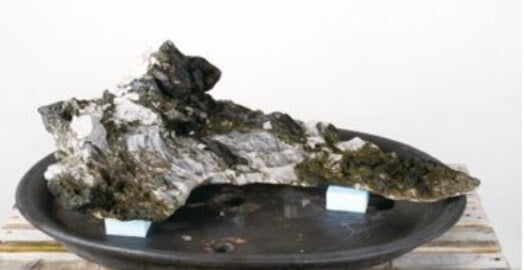
First, Shigeo Isobe tries to match the material with the rock in the oval pot. The rock protrudes slightly on the righthand side and fits comfortably at front to back. There will be no issues growing trees in this pot. That said, one of the important points is to utilise the space back to front to create a certain feel. It is not simply a case of creating space and throwing a tree in it without thought. Let’s start off by considering the trees we have available.

As seen from the left. There is plenty of space to plant trees at the front and back

A matter of perspective: small trees to make the rock stand out

In order make the peak the of the rock stand out, a number of small trees are planted around it. Each of them are styled and refined trees, showing the artistic determination of Mr Isobe
A further two trees are added, filling up the space and making it look rather like a miniature garden
 Even by pulling down the branches with wire and changing the planting angles so they are below the peak of the rock, Mr Isobe is far from happy with this image
Even by pulling down the branches with wire and changing the planting angles so they are below the peak of the rock, Mr Isobe is far from happy with this image
In order to accentuate the main peak of the stone, Mr Isobe tries planting a tree with a crooked trunk at the back. But the result it not satisfying

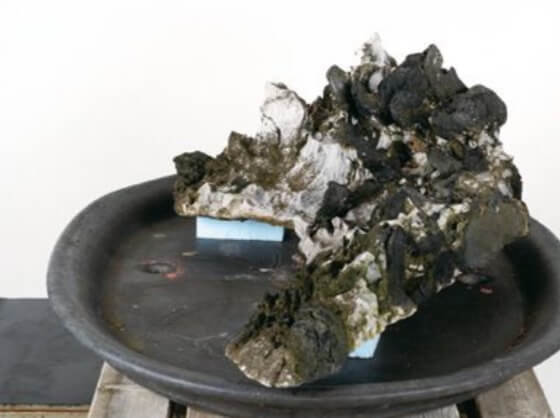
Trying a rectangular pot

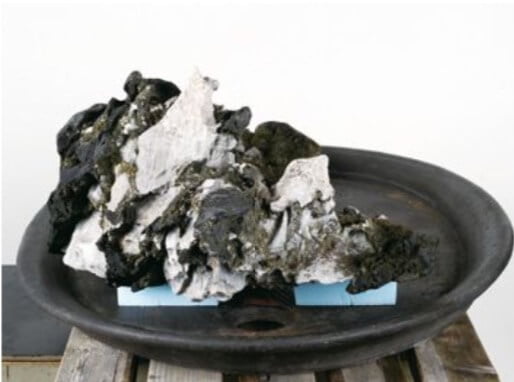
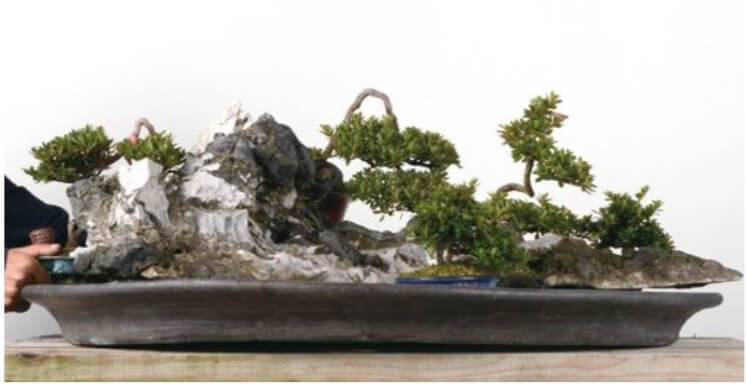
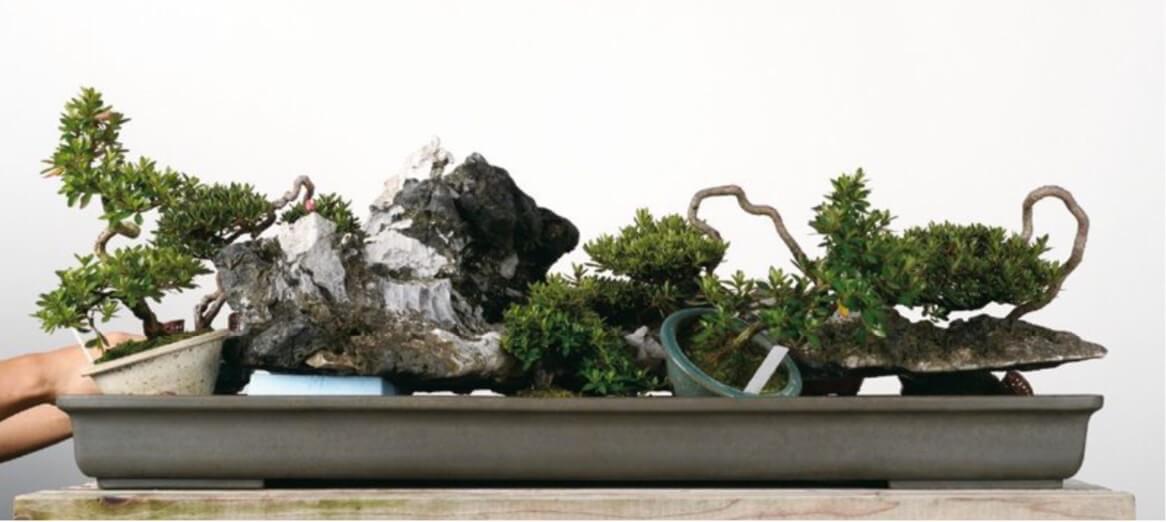
Shigeo Isobe is not satisfied with the oval pot combination and so attempts something with a narrow rectangle, deliberately pushing the stone over the front, back and righthand edges. In order to do this, it is placed on blocks so that it isn’t touching the edges of the pot.

In comparison with the oval pot, the rock hangs over the edge of the pot a good deal more and there is much less space for the roots to grow, thereby giving it a much more confined image. Let’s see what image can be created.

It has the sense of floating at the moment and you can see just how much it extends out of the pot.
Seen from the right and above. It is raised ever so slightly towards the front in order to give the roots a little more space for growth

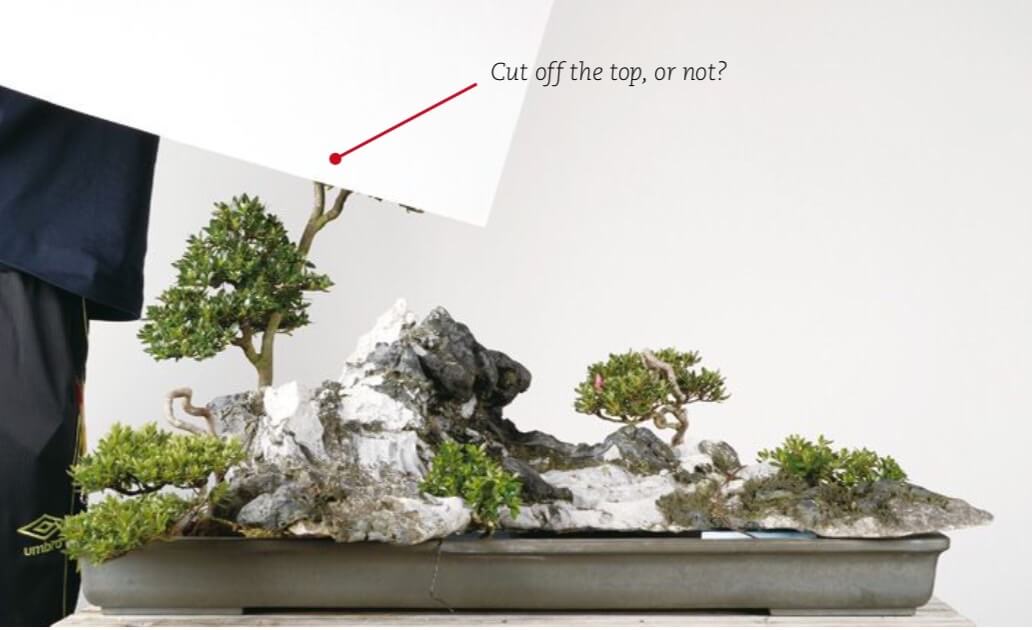
Change of perspective: Lower or higher?

 The principle of perspective is illustrated here with the Eiffel Tower in Paris
The principle of perspective is illustrated here with the Eiffel Tower in Paris

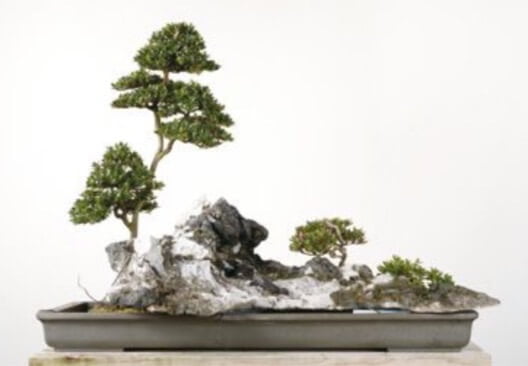
Shigeo Isobe has decided against trying to make a planting in the oval pot where all of the trees are lower than the central peak. Instead he is trying to use the long, narrow rectangular pot. Even though the pot is smaller, more confined and has a number of small trees, it still looks like a miniature box garden.

The plan to keep the central peak as the highest point has been abandoned as impractical.

The next tree to be tried is a relatively large tree placed to the left back. With the flow of the rock towards the right, the balance works fairly well; however, the heavy nature of the tree takes the eye away from the quality and character of the rock.

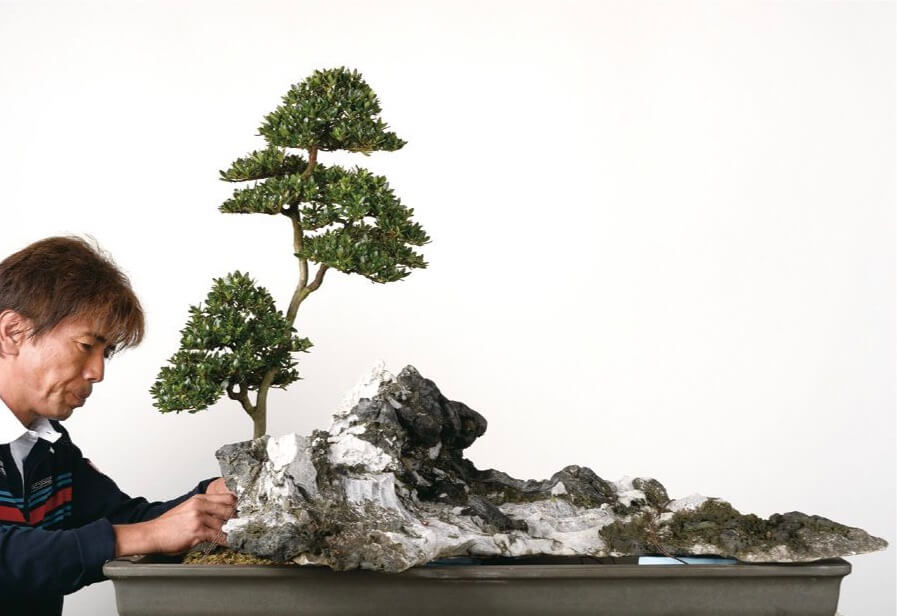
The next is a tall, thin, literati style tree, placed by itself to the left back. It is a high quality tree in itself and due to the lack of lower branches and visual weight in the trunk, the character of the rock is not overpowered. Although not the traditional way of using a rock, a move away from theory is starting to look good.

First, the same arrangement as used in the oval pot is tried out here. It still looks like a miniature box garden
As seen from slightly above. A jumble of trees - A relatively large tree is placed on the lefthand side. It is starting to look like a more traditional group planting with a scalene triangular outline. However, the character of the rock is being overpowered
As seen from slightly above. A jumble of trees – A relatively large tree is placed on the lefthand side. It is starting to look like a more traditional group planting with a scalene triangular outline. However, the character of the rock is being overpowered

Inspired by Hokusai

The 36 views of Mount Fuji by Hokusai might have been a great inspiration for this creation. In both of these illustrations you can see a large tree in front and the Fuji in the far distance
 A radically different approach with a literati style tree used on the lefthand side, flowing across to the right. The character of the rock is accentuated rather than overpowered
A radically different approach with a literati style tree used on the lefthand side, flowing across to the right. The character of the rock is accentuated rather than overpowered

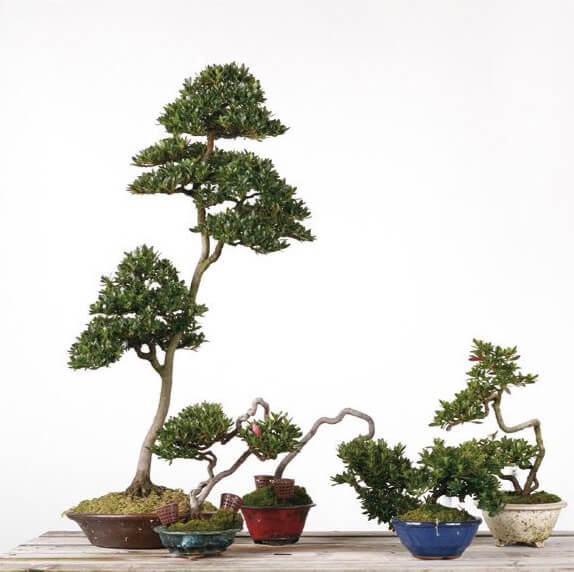
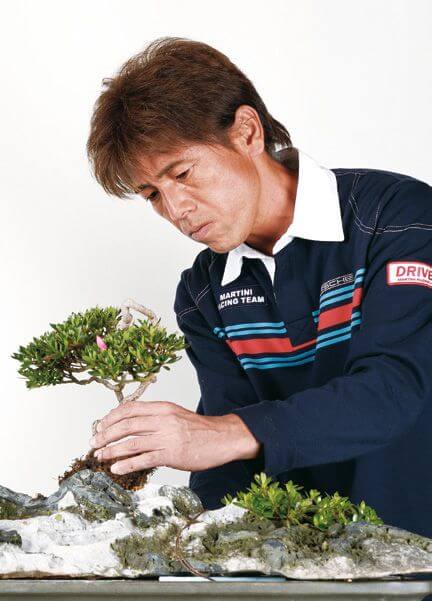
Preparing the satsuki material

The trees which will be used for the planting. All of them are the osakazuki variety and each of the trees has its own character and could be appreciated by itself individually
'Tanzaku' shaped narrow rectangular pot. Japanese rectangle Length: 97 cm / Depth: 39 cm / Height: 9 cm / - The wires are not just to keep the trees in place but also to hold the rock and so stronger copper wires are used for that.
‘Tanzaku’ shaped narrow rectangular pot. Japanese rectangle Length: 97 cm / Depth: 39 cm / Height: 9 cm / – The wires are not just to keep the trees in place but also to hold the rock and so stronger copper wires are used for that.
The tree to be used on the righthand side could be used as it is, but in order to make it even more compact, Mr Isobe reduces the height by cutting off the main trunk - This is another tree that could just as easily be used as it is in an exhibition. It's an old tree with great character, a sign that Mr Isobe will spare no expense to create the best image
The tree to be used on the righthand side could be used as it is, but in order to make it even more compact, Mr Isobe reduces the height by cutting off the main trunk – This is another tree that could just as easily be used as it is in an exhibition. It’s an old tree with great character, a sign that Mr Isobe will spare no expense to create the best image
Next to be positioned is the twin trunk tree which had its main trunk removed. As it has character in itself, it is planted so that it can be seen clearly, but placed so it is separate from the rock
The main tree is the last to be put in position. It is the wonderful, literati style satsuki which is put at the rear of the stone on the left side
The third tree is placed and Mr Isobe stands back to see if that is sufficient or whether more trees need to be added
The finishing touches are applied to the two remaining trees and the idea is floated to reduce the height of the literati style tree down to the first branch. But it's not a very good idea
The finishing touches are applied to the two remaining trees and the idea is floated to reduce the height of the literati style tree down to the first branch. But it’s not a very good idea
The concept is starting to become reality. Seen slightly from above. With this number of trees and planting positions, the sense of a miniature box garden has been eliminated

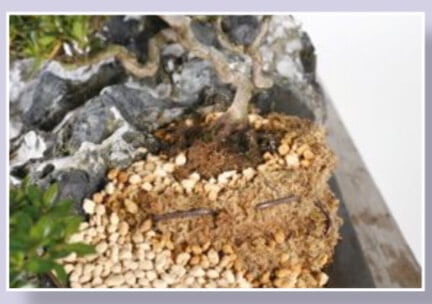
Each tree is fixed lightly and reconsidered

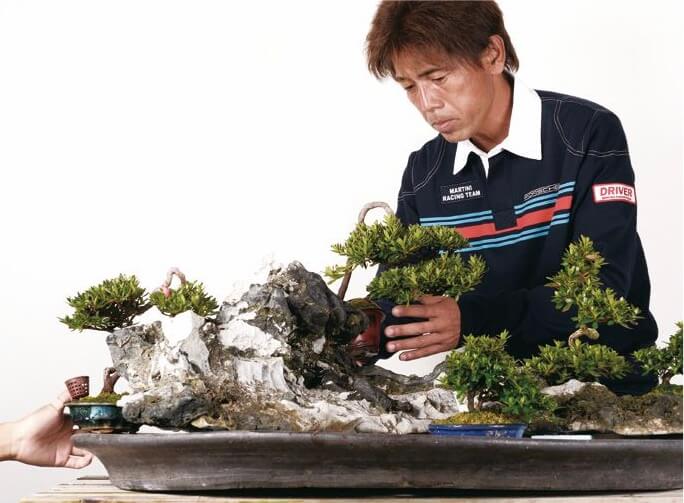
The position of each is considered from the front and the sides before it is tightened into the pot firmly. Even at this stage, the last tree to be considered is giving Shigeo Isobe great concern, the one on the lower left.

From the right - Front - Left
From the right – Front – Left
Shigeo. Isobe fixes the tree in the middle section, considering the angle and front

Obsession with the stone

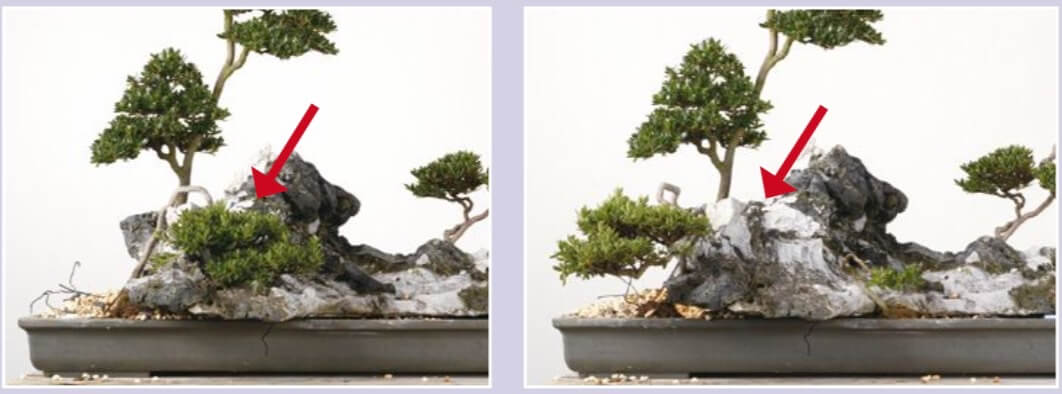
Shigeo Isobe’s obsession with the character of the stone is strong. The tree prepared for the lower lefthand side is giving Shigeo Isobe great concern. It looks good without it, but it can also be used flowing to the front right or away from the rock towards the left.

With the tree flowing towards the front right, some of the character of the rock is lost. This isn’t what Shigeo Isobe wants since he is looking to make the most of the rock. He decides to use it flowing towards the left.

Shigeo. Isobe fixes the tree in the middle section, considering the angle and front

It is brought closer to the rock and flows from left to right. If the base and roots of the tree on the lower right are covered with moss, this offers a very possible orientation. It gives the impression of trees growing in a ravine Bringing the tree around to the lower left shows off the full frontage of the stone and it is still balanced. The decision is made and the trees are securely fixed in place
Seen from the right. There is plenty of space into which soil can be placed - From behind you can see just how much space has been left for the trees to grow into
Seen from the right. There is plenty of space into which soil can be placed – From behind you can see just how much space has been left for the trees to grow into

Considerations for creating rock plantings with azaleas

 In this case, just Kanuma and sphagnum moss will be sufficient
In this case, just Kanuma and sphagnum moss will be sufficient

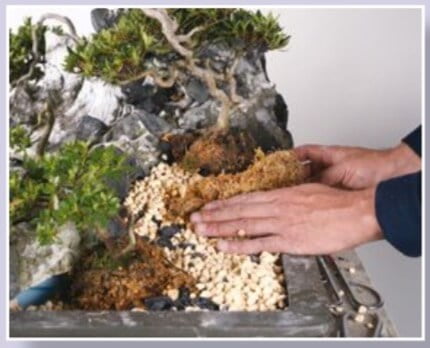
Now we have reached the final part of the rock planting, there are some important points to understand and consider: When creating rock planting with conifers, using Keto is a very valuable product to use. However, the very fine root structure of azaleas does not penetrate into the Keto in the same way that other species can.

In this rock planting we do not have many exposed roots or those which are going to be trained down the rock into soil and so the use of Keto is not required, simply Kanuma and sphagnum moss for top dressing.
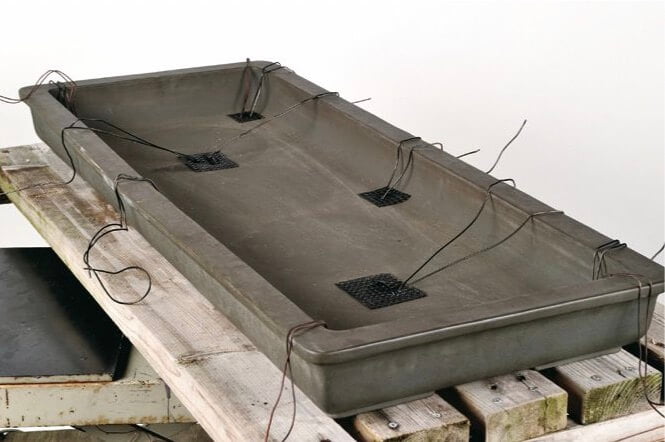
In the case of creating a rock planting where the roots need to be trained down into the pot, or the pot is created from mesh and wire, Keto is an important ingredient.

Creating rock plantings with azaleas is difficult due to their horticultural requirements and growth habit, so special consideration is required.

A wire is used to hold the sphagnum and soil in place, over the top of which, decorative moss will surely be placed

Final pruning and styling

The trees were pretty much finished material when planted and so need little manipulation or pruning in order to finish the image.

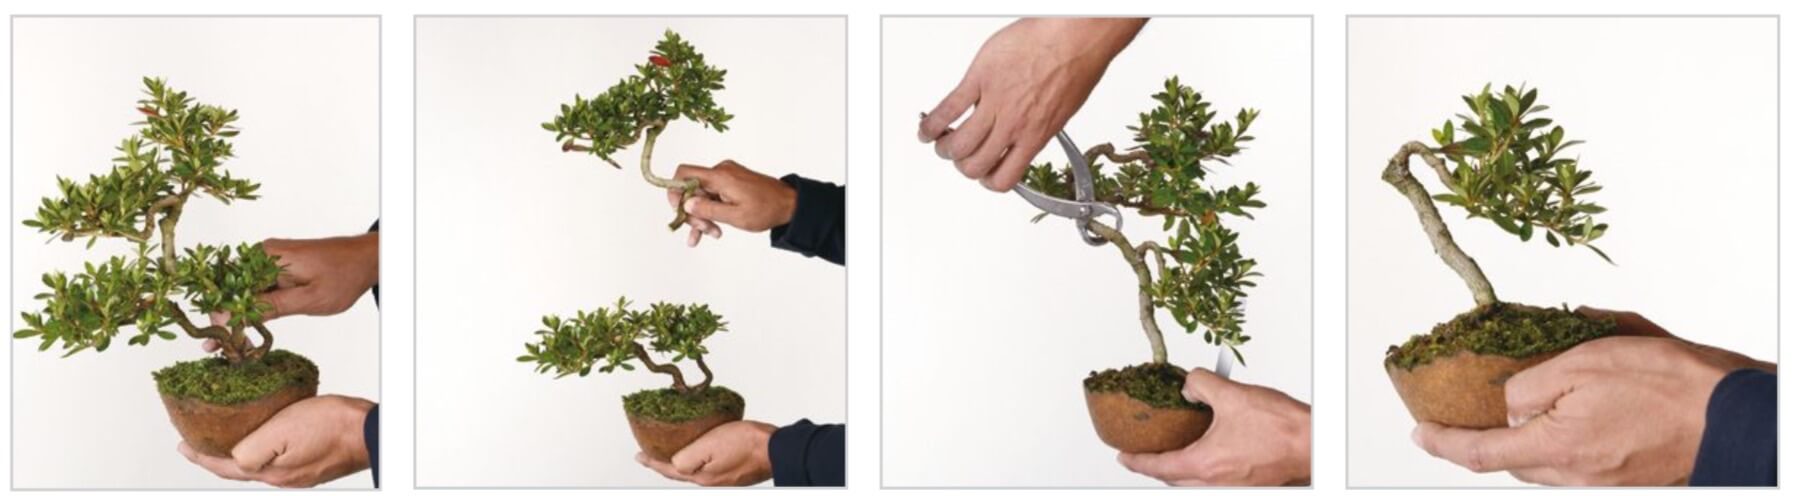
The point to consider when pruning is to accentuate the character of each individual tree after it has been planted at what may be a new angle or front. Each tree has a certain part to play in the overall design and so may need to be altered to suit that design. They can all be viewed individually and were initially created as such; however, slight but important alterations may be necessary.

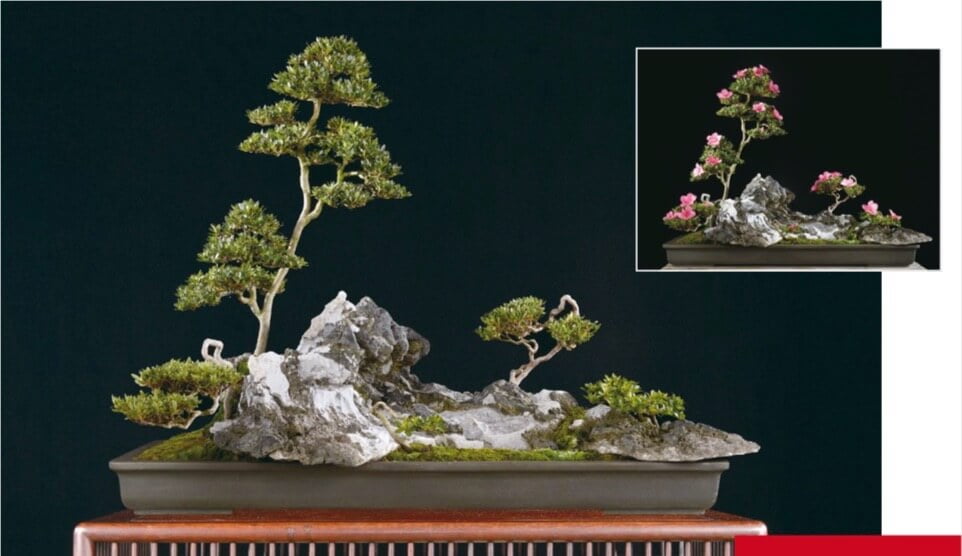
Look at the literati tree, for example, and compare the before and after pruning images. The tree had a lofty, aloof air which was accentuated by lightening the foliage pads and creating more of a jaunty rhythm to the movement of trunk and branches, giving somewhat the feel of a Chinese landscape painting — an ideal match for the stone.

Although it might have been possible to create a miniature box garden with this idea, the artistry of the creator has ultimately shone through and he has created a beautiful scene.

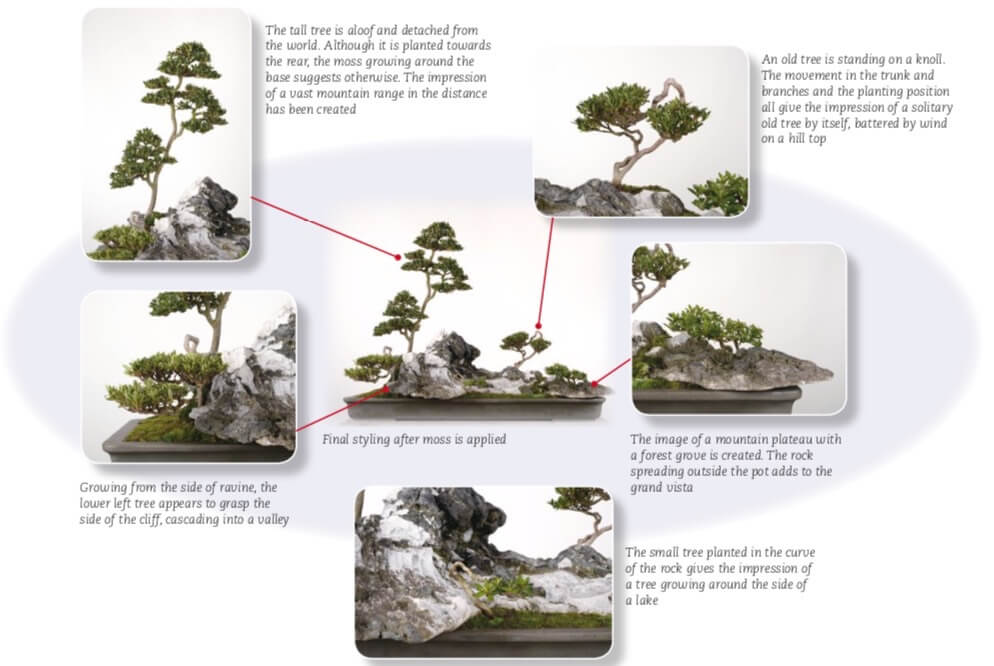
  • The tall tree is aloof and detached from the world. Although it is planted towards the rear, the moss growing around the base suggests otherwise. The impression of a vast mountain range in the distance has been created
      
  • An old tree is standing on a knoll. The movement in the trunk and branches and the planting position all give the impression of a solitary old tree by itself, battered by wind on a hill top
  • Growing from the side of ravine, the lower left tree appears to grasp the side of the cliff, cascading into a valley
  • Final styling after moss is applied
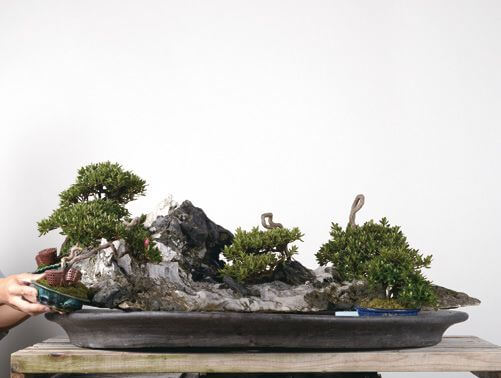
  • The image of a mountain plateau with a forest grove is created. The rock spreading outside the pot adds to the grand vista
  • The small tree planted in the curve of the rock gives the impression of a tree growing around the side of a lake
Final result. Height: 68 cm / 263⁄4" Width: 98 cm / 38"
Final result. Height: 68 cm / 263⁄4″ Width: 98 cm / 38″

Tiếng Việt

  • Bài và ảnh: Kinbon magazine, Japan

Một tảng đá gợi lên hình ảnh của ngọn núi lửa nổi tiếng Fuji (Phú Sĩ), gần Tokyo, là trung tâm của một tác phẩm Satsuki (Bonsai Hoa Đỗ Quyên) khác thường. Có thể thấy nỗi ám ảnh của người nghệ sĩ đang hình thành trên tảng đá. Chuyên gia satsuki, Shigeo Isobe sẽ tạo ra phong cảnh gì trên tảng đá Ibigawa cũ kỹ này? 

Bậc thầy Satsuki: Shigeo Isobe

Để sử dụng viên đá này mà không phá hủy đặc tính, cần phải có sự nhạy cảm về nghệ thuật hơn là kỹ thuật. Liệu ‘Iron Man’ trong vũ trụ Bonsai Satsuki, Mr Shigeo Isobe có thành công với thử thách và tạo ra một khung cảnh đắt giá? 

Sử dụng kỹ thuật Masahiko Kimura để trồng đá trong chậu 

Mr Isobe đã theo học thầy Masahiko Kimura trong một số năm, tìm kiếm sự hướng dẫn của ông và nhận lời khuyên về khía cạnh sáng tạo hơn trong nghệ thuật Bonsai. Anh ấy chia sẻ với chúng tôi, ‘Tuy nhiên, điều quan trọng là tôi làm những việc mà ông ấy không làm hoặc sẽ không làm, vì vậy tôi đã tìm kiếm rất lâu và chăm chỉ để có được viên đá này. Nó mang đến một khung cảnh tuyệt vời mà tôi không thể cải thiện bằng cách chạm khắc, nhưng tôi dự định sẽ sử dụng hết khả năng của nó bằng cách trồng một số cây Đỗ Quyên xen kẽ lên trên. Đây là một nhiệm vụ rất khó khăn. ‘

Một số cây đã được chuẩn bị cho quá trình chuyển đổi đột phá này, nhưng hai cái chậu có sẵn có lẽ không chứa được toàn bộ tảng đá. 

  • Đặc tính và chuyển động của viên đá là tuyệt vời, đủ để khiến ngay cả những nghệ nhân lành nghề nhất cũng phải suy nghĩ rất lâu về cách tận dụng tối đa nó
  • Đá Ibigawa: Chiều dài: 92 cm / 361/4 “Chiều sâu: 46 cm / 18″ Chiều cao: 26 cm / 101/4 ” 
This Ibigawa ryugan rock was owned by an enthusiast from that area for a great number of years. There is a great sense of age and the image of a snow capped mountain is exceptionally superb and rare
Tảng đá ryugan Ibigawa này thuộc sở hữu của một người đam mê sống tại khu vực đó trong nhiều năm. Có một vẻ ngoài già cỗi với hình ảnh một ngọn núi phủ tuyết là điểm tuyệt vời hiếm có 

Cao hơn núi Phú Sĩ

As seen from the right. The right edge of the stone overhangs the edge of the pot slightly. The front and back are easily contained inside the pot
Nhìn từ bên phải. Mép đá bên phải hơi nhô ra khỏi mép chậu. Mặt trước và mặt sau dễ dàng để đặt được trong chậu.

Việc sắp đặt đá của chuyên gia sáng tạo Satsuki, Shigeo Isobe, không phải là một công việc đơn giản. Một trong những lý do cho điều này là đặc điểm và phong cách của tảng đá đang được sử dụng trông như thể nó là thứ mà bạn sẽ thấy ở chân núi Phú Sĩ.

Khi cố gắng ghép một cái cây để đặt với một tảng đá như vậy, suy nghĩ logic ngay lập tức là không có cây nào cao hơn đỉnh núi. Vì vậy những cây thấp hơn ‘đỉnh’ được chọn. Theo logic đó, bạn có thể nói rằng, nếu núi Phú Sĩ ở phía xa và có một cái cây ngay trước mặt bạn, nó sẽ trông cao hơn Phú Sĩ. Điều này gợi nhớ đến bất kỳ bức ảnh nổi tiếng nào có núi Phú Sĩ xuất hiện trong nền được đóng khung bởi những cành cây xếp tầng.

Nếu chúng ta sử dụng một số cây rất ngắn, nhỏ gọn thì đỉnh chính chắc chắn nổi bật; tuy nhiên, có sự khác biệt giữa việc làm cho đỉnh nổi bật và sử dụng đặc tính của nó một cách tối đa. 

Hình tròn hay hình bầu dục? Việc lựa chậu là rất quan trọng cho toàn bộ quá trình sáng tạo. Lần thử đầu tiên là với một cái chậu hình bầu dục 

The stone is placed in a shallow oval pot to see how it looks. The pot has lots of room, front to back, so the rock fits in, though it does protrude a little on the left. Japanese oval. Length: 93 cm / 363⁄4" Depth: 72 cm / 281⁄2" Height: 7.5 cm / 3"
Đá được đặt trong một cái chậu hình bầu dục nông để xem như thế nào. Chậu có rất nhiều khoảng trống, từ trước ra sau, vì vậy tảng đá khá vừa vặn, mặc dù nó hơi nhô ra bên trái. Chậu hình bầu dục nguồn gốc Nhật Bản. Chiều dài: 93 cm / 363⁄4 “Chiều sâu: 72 cm / 281⁄2″ Chiều cao: 7,5 cm / 3 ” 

Đầu tiên, Shigeo Isobe cố gắng kết hợp vật liệu với tảng đá trong chậu hình bầu dục. Tảng đá nhô ra một chút ở phía bên tay phải và vừa vặn thoải mái từ trước ra sau. Sẽ không có vấn đề gì khi trồng cây trong chậu này. Điều đó nói lên rằng, một trong những điểm quan trọng là tận dụng không gian phía sau để tạo ra một cảm giác nhất định. Nó không chỉ đơn giản là một trường hợp tạo ra không gian và nhét một cái cây vào đó mà không cần suy nghĩ. Hãy bắt đầu bằng cách xem xét những cây chúng ta có sẵn. 

As seen from the left. There is plenty of space to plant trees at the front and back
Như nhìn từ bên trái. Có nhiều không gian để trồng cây ở phía trước và sau 

Một vấn đề về góc độ: Những cây nhỏ sẽ làm cho tảng đá nổi bật 

In order make the peak the of the rock stand out, a number of small trees are planted around it. Each of them are styled and refined trees, showing the artistic determination of Mr Isobe
Để làm nổi bật phần đỉnh của tảng đá, xung quanh nó được trồng một số cây nhỏ. Mỗi cây trong số chúng là những cây được tạo kiểu và tinh tế, thể hiện quyết tâm nghệ thuật của Mr Isobe 
A further two trees are added, filling up the space and making it look rather like a miniature garden
Thêm hai cây nữa, lấp đầy không gian và khiến nó trông giống như một khu vườn thu nhỏ 
 Even by pulling down the branches with wire and changing the planting angles so they are below the peak of the rock, Mr Isobe is far from happy with this image
Ngay cả khi dùng dây kéo các cành cây xuống và thay đổi góc trồng để chúng ở dưới đỉnh của tảng đá, anh Isobe vẫn chưa hài lòng với hình ảnh này 
In order to accentuate the main peak of the stone, Mr Isobe tries planting a tree with a crooked trunk at the back. But the result it not satisfying
Để làm nổi bật đỉnh chính của phiến đá, anh Isobe đã thử trồng một cái cây có thân cây cong queo ở phía sau. Nhưng kết quả có vẻ không thỏa mãn anh

Thử nghiệm bằng một cái chậu hình chữ nhật 

Shigeo Isobe không hài lòng với sự kết hợp chậu hình bầu dục và do đó, anh đã cố gắng làm một cái gì đó với một chậu hình chữ nhật hẹp, cố tình đẩy viên đá qua các cạnh trước, sau và bên phải. Để làm điều này, nó được đặt trên các viên gạch kê bên đưới để tảng đá không chạm vào các cạnh của chậu.

So với chậu hình bầu dục, tảng đá treo trên mép chậu nhiều hơn và có ít không gian hơn cho rễ phát triển, do đó tạo cho nó một hình ảnh hạn chế hơn nhiều. Hãy xem những gì hình ảnh có thể được tạo ra. 

It has the sense of floating at the moment and you can see just how much it extends out of the pot.
Nó có cảm giác bông bềnh vào lúc này và bạn có thể thấy nó vươn ra khỏi chậu như thế nào
Seen from the right and above. It is raised ever so slightly towards the front in order to give the roots a little more space for growth
Nhìn từ bên phải lên trên. Nó được nâng lên một chút về phía trước để cung cấp cho rễ thêm không gian để phát triển 

Thay đổi phối cảnh: Thấp hơn hay cao hơn? 

 The principle of perspective is illustrated here with the Eiffel Tower in Paris
Nguyên tắc phối cảnh được minh họa ở đây với Tháp Eiffel ở Paris 

Shigeo Isobe đã quyết định không cố gắng trồng trong chậu hình bầu dục, nơi tất cả các cây đều thấp hơn đỉnh trung tâm. Thay vào đó, anh cố gắng sử dụng cái chậu hình chữ nhật dài và hẹp. Mặc dù chậu nhỏ hơn, chật chội hơn và có một số cây nhỏ nhưng nó vẫn giống như một khu vườn thu nhỏ.

Kế hoạch giữ đỉnh trung tâm là điểm cao nhất đã bị từ bỏ vì không thực tế.

Cây tiếp theo sẽ được thử là một cây tương đối lớn được đặt ở phía sau bên trái. Với dòng chảy của đá về phía bên phải, sự cân bằng hoạt động khá tốt; tuy nhiên, bản chất nặng nề của cây làm mất đi chất lượng và đặc tính của tảng đá.

Tiếp theo là một cái cây cao, mảnh, dáng văn nhân, được đặt ở phía sau bên trái. Bản thân nó là một cây có chất lượng cao và do không có cành thấp hơn và trọng lượng thị giác ở thân cây, đặc tính của tảng đá không bị chế ngự. Mặc dù không phải là cách sử dụng đá truyền thống, nhưng việc rời xa lý thuyết đang bắt đầu có vẻ hiệu quả.

First, the same arrangement as used in the oval pot is tried out here. It still looks like a miniature box garden
Đầu tiên, cách sắp xếp tương tự như được sử dụng trong chậu hình bầu dục được thử ở đây. Nó trông vẫn giống như một khu vườn thu nhỏ 
As seen from slightly above. A jumble of trees - A relatively large tree is placed on the lefthand side. It is starting to look like a more traditional group planting with a scalene triangular outline. However, the character of the rock is being overpowered
Như đã thấy từ phía trên một chút. Một mớ cây – Một cái cây tương đối lớn được đặt ở phía bên tay trái. Nó đang bắt đầu giống kiểu trồng theo nhóm truyền thống hơn với đường viền hình tam giác. Tuy nhiên, tính cách của tảng đá đang bị chế ngự 

Lấy cảm hứng từ Hokusai 

The 36 views of Mount Fuji by Hokusai might have been a great inspiration for this creation. In both of these illustrations you can see a large tree in front and the Fuji in the far distance
36 góc nhìn về núi Phú Sĩ của Hokusai có thể là nguồn cảm hứng tuyệt vời cho sự sáng tạo này. Trong cả hai hình minh họa này, bạn có thể thấy một cái cây lớn ở phía trước và Phú Sĩ ở phía xa 
 A radically different approach with a literati style tree used on the lefthand side, flowing across to the right. The character of the rock is accentuated rather than overpowered
Một cách tiếp cận hoàn toàn khác với một cây dáng văn nhân được sử dụng ở phía bên trái, chuyển động qua bên phải. Đặc điểm của tảng đá được nhấn mạnh thay vì chế ngự 

Chuẩn bị các cây Đỗ Quyên (Satsukai) nguyên liệu 

The trees which will be used for the planting. All of them are the osakazuki variety and each of the trees has its own character and could be appreciated by itself individually
Những cây sẽ được sử dụng để trồng. Tất cả chúng đều là giống Osakazuki và mỗi cây đều có điểm độc đáo riêng và có thể được trưng bày độc lập
'Tanzaku' shaped narrow rectangular pot. Japanese rectangle Length: 97 cm / Depth: 39 cm / Height: 9 cm / - The wires are not just to keep the trees in place but also to hold the rock and so stronger copper wires are used for that.
‘Tanzaku’ shaped narrow rectangular pot. Japanese rectangle Length: 97 cm / Depth: 39 cm / Height: 9 cm / – The wires are not just to keep the trees in place but also to hold the rock and so stronger copper wires are used for that.
The tree to be used on the righthand side could be used as it is, but in order to make it even more compact, Mr Isobe reduces the height by cutting off the main trunk - This is another tree that could just as easily be used as it is in an exhibition. It's an old tree with great character, a sign that Mr Isobe will spare no expense to create the best image
The tree to be used on the righthand side could be used as it is, but in order to make it even more compact, Mr Isobe reduces the height by cutting off the main trunk – This is another tree that could just as easily be used as it is in an exhibition. It’s an old tree with great character, a sign that Mr Isobe will spare no expense to create the best image
Next to be positioned is the twin trunk tree which had its main trunk removed. As it has character in itself, it is planted so that it can be seen clearly, but placed so it is separate from the rock
The main tree is the last to be put in position. It is the wonderful, literati style satsuki which is put at the rear of the stone on the left side
The third tree is placed and Mr Isobe stands back to see if that is sufficient or whether more trees need to be added
The finishing touches are applied to the two remaining trees and the idea is floated to reduce the height of the literati style tree down to the first branch. But it's not a very good idea
Các bước hoàn thiện được áp dụng cho hai cây còn lại và ý tưởng nảy ra là giảm chiều cao của cây có dáng văn nhân xuống đến nhánh đầu tiên. Nhưng nó không phải là một ý kiến hay 
The concept is starting to become reality. Seen slightly from above. With this number of trees and planting positions, the sense of a miniature box garden has been eliminated
Khái niệm này đang bắt đầu trở thành hiện thực. Nhìn từ trên cao một chút. Với số lượng cây và vị trí trồng này, cảm giác về một khu vườn thu nhỏ đã được loại bỏ 

Mỗi cây được cố định tạm thời và xem xét lại 

Vị trí của mỗi câyi được xem xét từ phía trước và hai bên trước khi nó được cố định chặt vào chậu một cách chắc chắn. Ngay cả ở giai đoạn này, cây cuối cùng được xem xét đang khiến Shigeo Isobe quan tâm rất nhiều, cây ở phía dưới bên trái. 

From the right - Front - Left
Nhìn từ bên phải – mặt tiền và bên trái
Shigeo. Isobe fixes the tree in the middle section, considering the angle and front
Shigeo. Isobe cố định cây ở khu vực trung tâm, xem xét góc độ và mặt trước 

Nỗi ám ảnh với đá 

Nỗi ám ảnh của Shigeo Isobe về đặc tính của viên đá rất mạnh mẽ. Cái cây chuẩn bị cho phía dưới bên tay trái khiến Shigeo Isobe rất lo lắng. Không có nó thì vẫn đẹp, nhưng nó cũng có thể được sử dụng để tạo dòng chảy ra phía trước bên phải hoặc từ tảng đá về phía bên trái.

Với cây có dòng chảy về phía trước bên phải, một số đặc điểm của tảng đá sẽ bị che mất. Đây không phải là điều mà Shigeo Isobe muốn vì anh ấy đang tìm cách tận dụng tối đa tảng đá. Anh ta quyết định sử dụng để nó nghiêng về phía bên trái.

It is brought closer to the rock and flows from left to right. If the base and roots of the tree on the lower right are covered with moss, this offers a very possible orientation. It gives the impression of trees growing in a ravine Bringing the tree around to the lower left shows off the full frontage of the stone and it is still balanced. The decision is made and the trees are securely fixed in place
Nó được đưa đến gần tảng đá hơn và nghiêng về phía bê trái. Nếu phần gốc và rễ của cây ở phía dưới bên phải bị rêu bao phủ, thì điều này rất khả thi. Nó tạo ấn tượng như cây cối mọc trong khe núi – Đưa cây đến gần khu phía dưới bên trái sẽ khoe toàn bộ mặt trước của đá và nó vẫn cân đối. Quyết định được đưa ra và cây được cố định tại chỗ 
Seen from the right. There is plenty of space into which soil can be placed - From behind you can see just how much space has been left for the trees to grow into
Nhìn từ bên phải. Có nhiều không gian để có thể lấp đất vào – Từ phía sau, bạn có thể thấy khoảng trống còn lại để cây phát triển 

Những lưu ý khi làm tác phẩm trồng cây lên đá với cây Đỗ Quyên 

 In this case, just Kanuma and sphagnum moss will be sufficient
Trong trường hợp này, chỉ cần đất Kanuma và rêu sphagnum là đủ 

Bây giờ chúng ta đã đến phần cuối cùng của tác phẩm, có một số điểm quan trọng cần hiểu và cân nhắc: Khi trồng cây lá kim lên đá, Keto là một sản phẩm rất có giá trị sử dụng. Tuy nhiên, cấu trúc rễ rất tốt của Đỗ Quyên không xâm nhập vào Keto theo cách mà các loài khác có thể làm được.

Trong cách trồng trên đá này, chúng tôi không có nhiều rễ lộ ra ngoài hoặc rễ sẽ đâm xuống đá thành đất và vì vậy việc sử dụng Keto là không cần thiết, chỉ cần Kanuma và rêu sphagnum để bón thúc.
Trong trường hợp tạo một hòn non bộ mà rễ cây cần được chôn xuống chậu, hoặc chậu được tạo ra từ lưới và dây, Keto là một thành phần quan trọng.

Việc trồng cây trên đá với Đỗ Quyên rất khó do yêu cầu chăm sóc và thói quen sinh trưởng của chúng, vì vậy cần phải nghiên cứu rất kỹ.

A wire is used to hold the sphagnum and soil in place, over the top of which, decorative moss will surely be placed
Dây được sử dụng để giữ cây và đất cố định, phía trên lớp rêu trang trí chắc chắn sẽ được phủ

Cắt tỉa và tạo kiểu cuối cùng 

Cây lúc được trồng đã gần như đã qua giai đoạn cây nguyên liệu và vì vậy cần rất ít thao tác hoặc cắt tỉa để hoàn thiện hình ảnh.

Điểm cần lưu ý khi cắt tỉa là làm nổi bật đặc tính của từng cây riêng lẻ sau khi đã được trồng ở góc độ hoặc mặt tiền mới. Mỗi cây có một phần nhất định để tận dụng trong thiết kế tổng thể và vì vậy có thể cần được thay đổi để phù hợp với thiết kế đó. Tất cả chúng đều có thể được ngắm một cách riêng lẻ và mục đích ban đầu là như vậy; tuy nhiên, những thay đổi nhỏ nhưng quan trọng có thể sẽ cần thiết.

Ví dụ, hãy nhìn vào cây dáng Văn Nhân và so sánh hình ảnh trước & sau khi được cắt tỉa. Cây có một bầu không khí cao cả, xa cách, được tạo điểm nhấn bằng cách làm nhẹ bớt các tán lá và tạo thêm nhịp điệu vui tươi cho chuyển động của thân và cành, phần nào mang lại cảm giác như một bức tranh phong cảnh Trung Quốc – một sự kết hợp lý tưởng cho đá.

Mặc dù có thể tạo ra một khu vườn thu nhỏ với ý tưởng này, nhưng cuối cùng nghệ thuật của người sáng tạo đã tỏa sáng và anh ấy đã tạo ra một khung cảnh tuyệt đẹp. 

  • Cây cao thì xa cách và tách biệt với thế giới. Mặc dù nó được trồng về phía sau, nhưng rêu mọc xung quanh gốc lại cho thấy điều ngược lại. Ấn tượng về một dãy núi rộng lớn ở phía xa đã được tạo ra
  • Một cây cổ thụ đang đứng trên gò. Sự chuyển động của thân, cành và vị trí trồng đều tạo cảm giác như một thân cây cổ thụ trơ trọi, bị gió quật ngã trên đỉnh đồi
  • Mọc từ một bên khe núi, cây thấp bên trái dường như bám bên vách đá, xếp tầng tạo thành một thung lũng
  • Tạo kiểu cuối cùng sau khi phủ rêu
  • Hình ảnh của một cao nguyên núi với một rừng cây được tạo ra. Tảng đá trải rộng bên ngoài chậu làm tăng thêm không gian rộng lớn
  • Cây nhỏ được trồng theo đường cong của đá tạo cảm giác như cây mọc quanh thành hồ. 
Final result. Height: 68 cm / 263⁄4" Width: 98 cm / 38"
Kết quả cuối cùng. Cao: 68 cm / 263⁄4″ Rộng: 98 cm / 38″

Trả lời

0988110300
chat-active-icon